Getting Started
This guide takes you from a new account to a business that runs on Whautomate: customers reach you on every channel, your team answers from one inbox, and bookings, payments and follow-ups happen on their own. Work through it in order. The first part takes about 30 minutes; the rest depends on what you switch on.
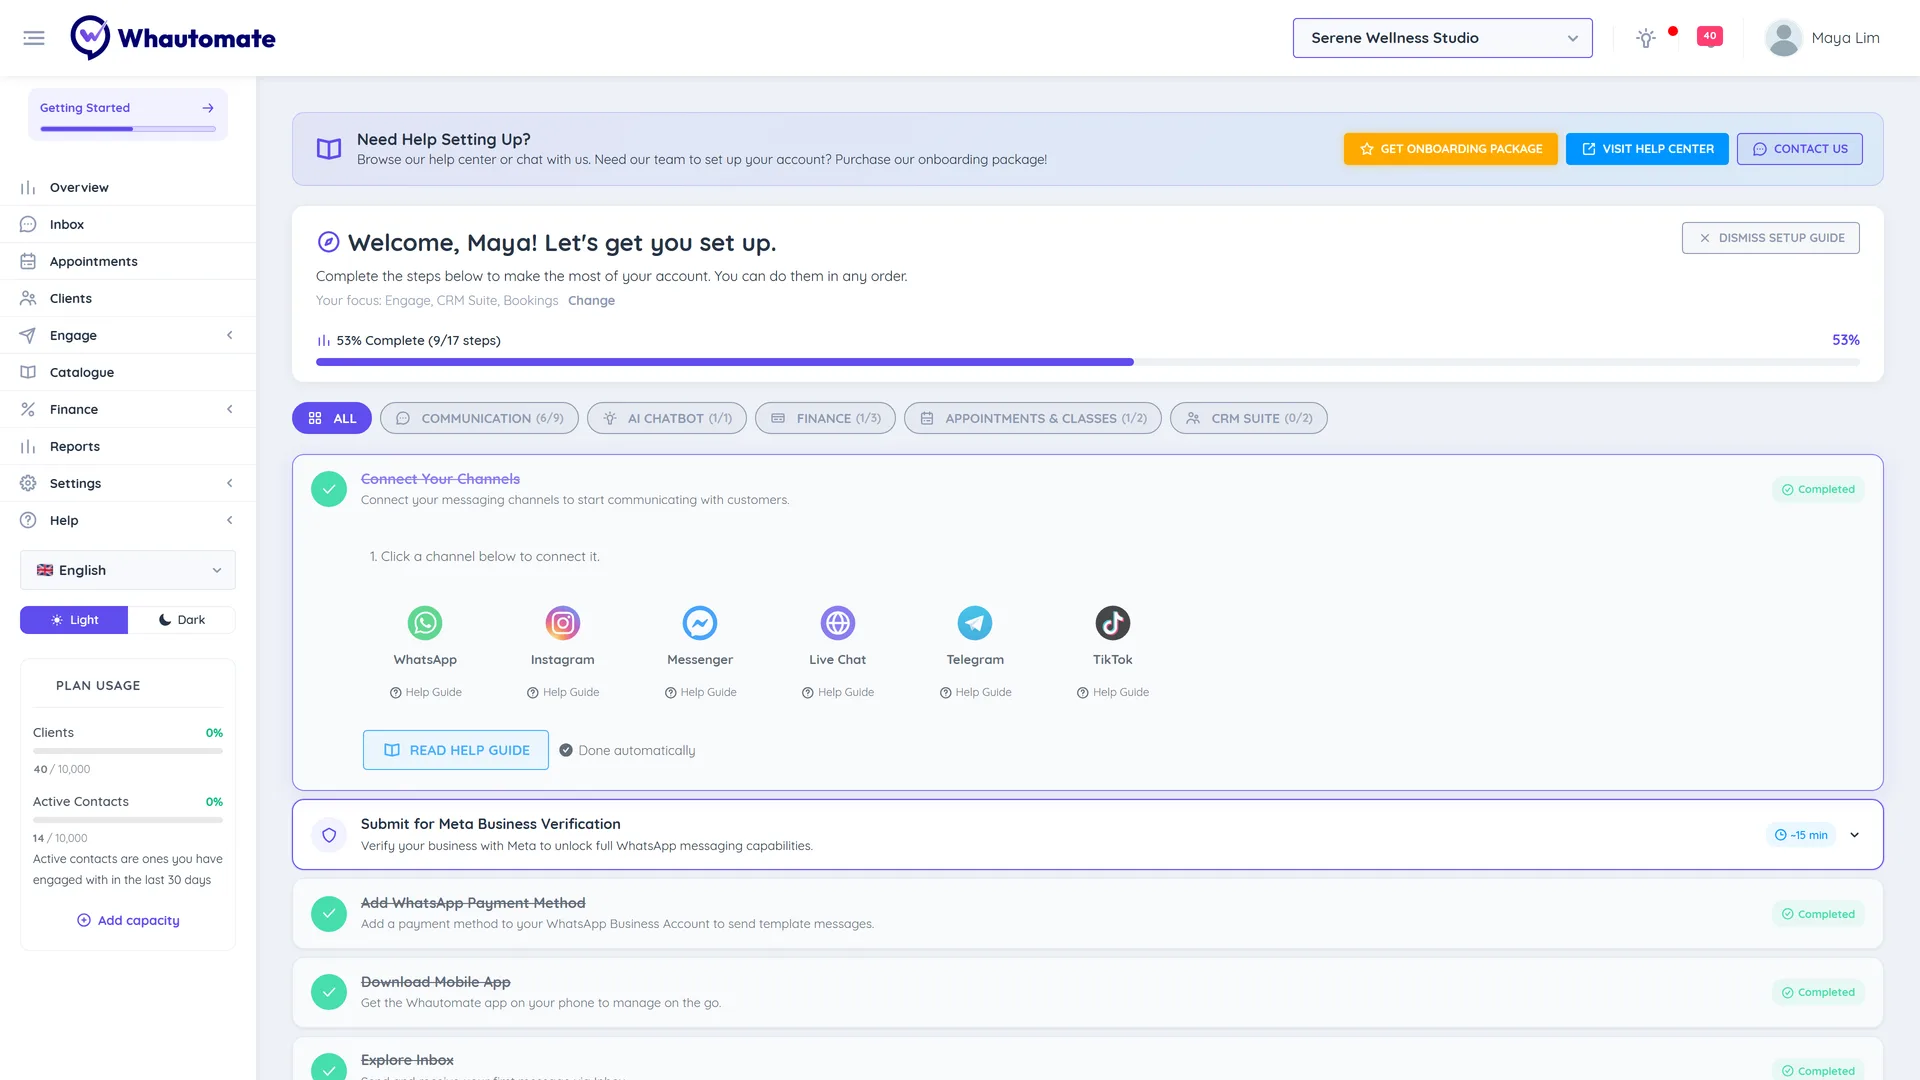
The in-app setup guide (Help > Getting Started) follows the same steps, ticks them off as you go and starts with the modules you picked. See In-app setup guide.
What you can switch on
Every plan includes Engage: the team inbox, broadcasts, chatbots and automations. Add the modules your business needs; the steps below are marked with the module they belong to.
| Module | What it adds | Start with |
|---|---|---|
| Engage (always included) | Team inbox for WhatsApp, Instagram, Messenger, Telegram, TikTok, SMS and live chat; broadcasts; chatbots, AI chatbot and automations; contacts and segments; mobile app | Steps 1 to 7 |
| CRM Suite | Client records with full history, client segments, email campaigns, web forms and WhatsApp Flow forms, your website | Step 8 and the Marketing track |
| Bookings | Appointments, classes, online booking page, booking chatbots, reminders | Step 9 and the Appointments or Classes track |
| Sales | Invoices and payment links, memberships and credits, online store, coupons, loyalty | Step 10 and the Sales or E-Commerce track |
Bookings and Sales come with CRM Suite, because every booking and sale belongs to a client. Prices depend on your country: see pricing and Plan Modules.
Step 1: Create your account
- On the sign-up page (Sign up to create your account), enter Business Name, First Name, Last Name, Business Email and Password. Check the Location and Timezone under the form and click change if they are wrong.
- Click Create account. Whautomate emails a verification link to your business email. Open it to verify your account (check spam if it has not arrived; you can resend it).
- Let us get to know you: add your Phone Number, Business Category and How did you find us?, then Continue.
- What will you use it for? Tick what you came for: Chat, broadcasts and automations (always included), Know your clients and market to them, Take bookings and Sell and get paid. Your trial and menu start with just that, and your setup guide puts those steps first. You can change it any time.
- Click Set up my account. You land on Getting Started.
Step 2: Connect your channels
Connect the channels your customers already use. Every conversation lands in the same team inbox.
-
Go to Settings > Integrations.
-
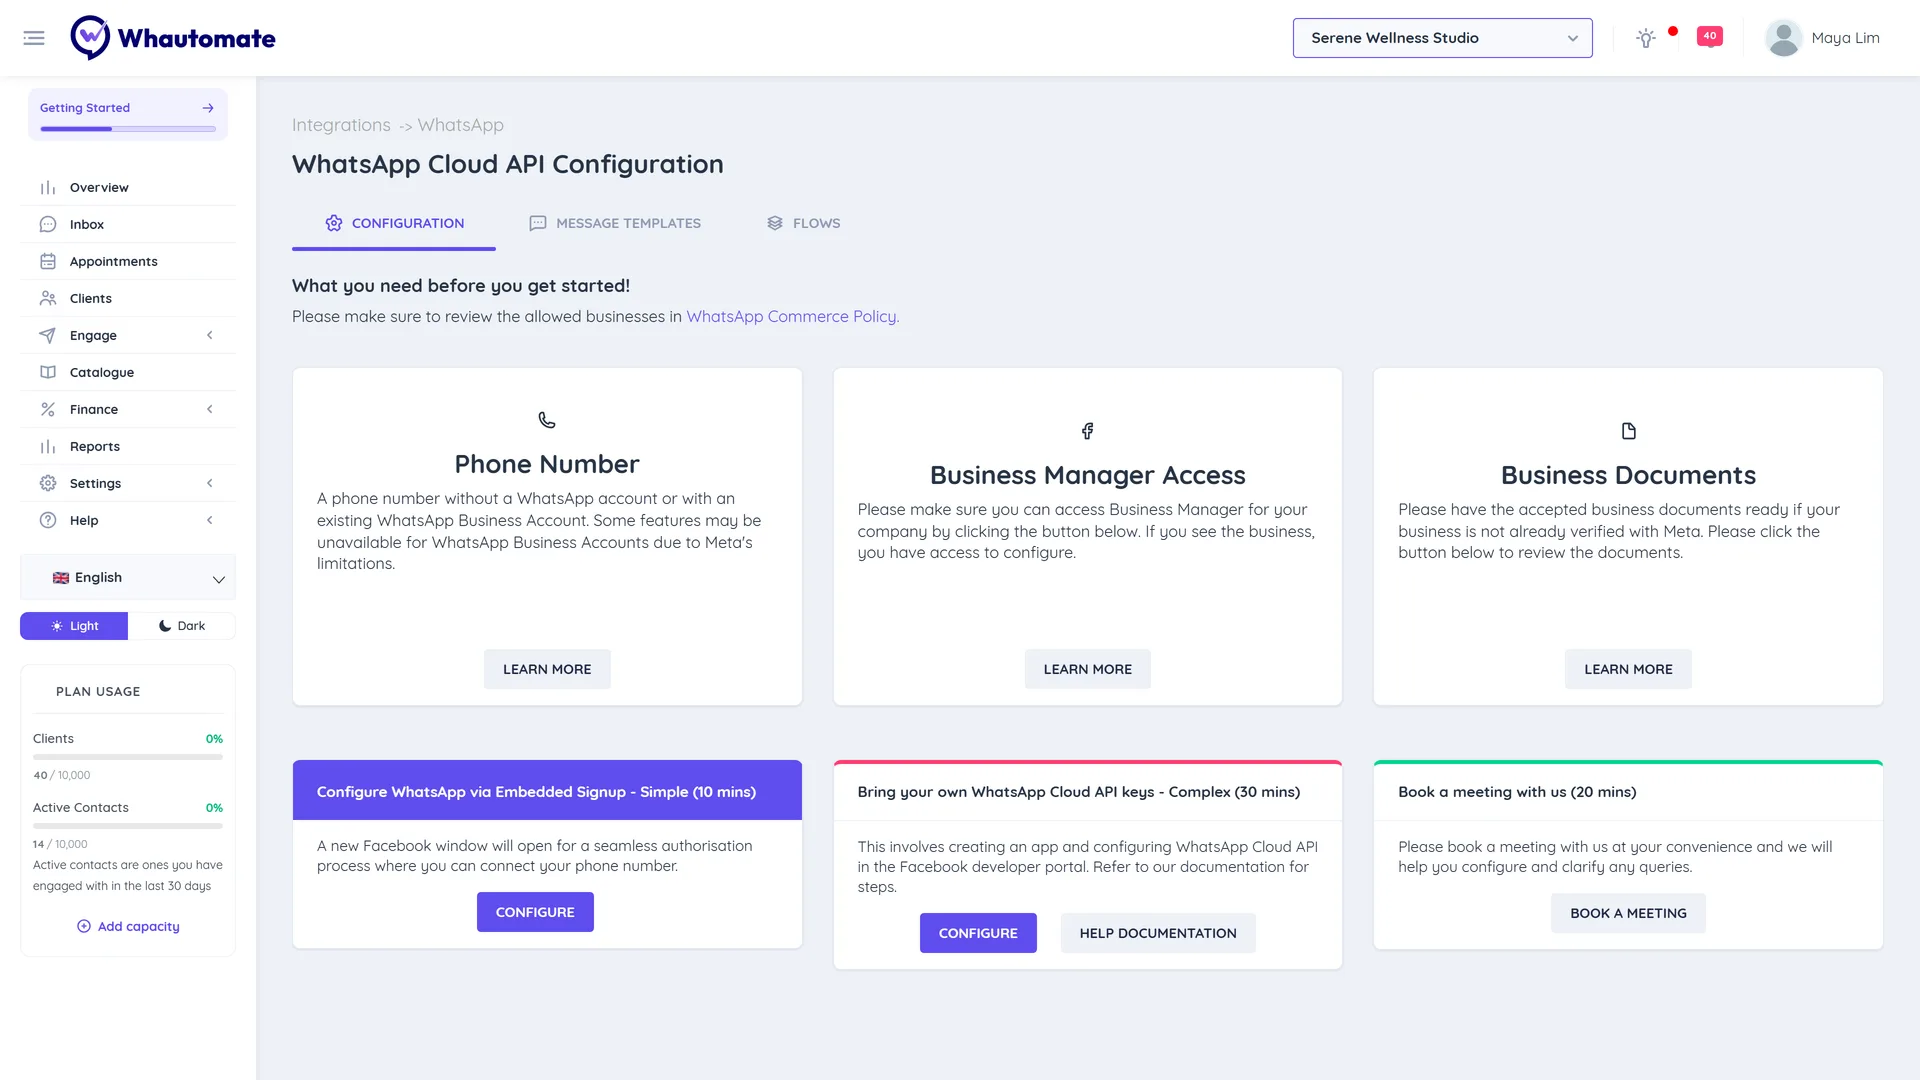
Connect WhatsApp first: click Connect on the WhatsApp card (or WhatsApp in the Connect Your Channels step of Getting Started), then Connect with Facebook and follow the Meta window (about 10 minutes). Use a new number, or keep the number you use in the WhatsApp Business app and use it in Whautomate at the same time. See WhatsApp Cloud API.
-
Add a WhatsApp payment method in Meta, or WhatsApp template messages (confirmations, reminders, broadcasts) cannot be sent. See WhatsApp Payment Method.
-
Submit for Meta Business Verification to raise your messaging limits and show your business name. See Meta Business Verification.
-
Add your other channels: Instagram, Facebook Messenger, Telegram, TikTok, live chat on your website, and SMS with your own Twilio, Vonage or Telnyx account.
See Connect a Communication Channel.
Step 3: Get the mobile app
Answer customers and manage bookings from your phone with the Whautomate Business app. Sign in with the same email and password.
Download on the App Storeapps.apple.com Get it on Google Playplay.google.comStep 4: Invite your team
Add the people who answer chats, take bookings or run the business, each with the right role. See Invite team members.
Step 5: Answer from the team inbox
- From your personal WhatsApp, send a message to the number you connected.
- Open Inbox. Assign the conversation, reply, add an internal note and close it.
- Save answers you type often as canned responses.
See Team Inbox.
Step 6: Add a chatbot
Let a chatbot answer straight away, day and night, and hand over to your team when needed.
- Chatbot from a template: menus, FAQs and lead capture. See Setup WhatsApp Chatbot and the chatbot demos.
- AI chatbot: answers questions from your own business information. See WhatsApp AI Chatbot - Customer Service.
Chatbots reply only while a conversation is Closed. When a team member replies, the conversation moves to Open and the bots stay quiet until someone closes it.
Step 7: Send your first broadcast
Send an approved WhatsApp template to a segment of your contacts, for example everyone tagged "New". See Segmentation & Broadcasts and WhatsApp Broadcasts.
Step 8: Know your clients
- Import your clients from a spreadsheet. See Bulk Import Clients.
- Create a form to capture leads or intake details, on the web or inside WhatsApp. See Web Forms and WhatsApp Flow Forms.
- Configure email sending: verify your domain and add a sender, so you can send email campaigns and emails from automations. See Email Domains.
Then follow the Marketing track.
Step 9: Take bookings
- Set your opening hours and holidays, and each team member's hours. See Setup Team Member Profile.
- Create your services, with variants, prices and deposits if you need them. See Setup Services.
- Book Appointment: book a test appointment from Appointments. See Book Appointments - Admin.
- Set Up Online Booking Page so clients book themselves. See Setup the Booking Portal.
- Turn on confirmations and reminders. See Setup Appointment Notifications.
Then follow the Appointments or Classes & Memberships track.
Step 10: Sell and get paid
- Update Business Settings: your business name, address and logo for invoices. See Update Business Settings.
- Connect Payment Gateway: Stripe, Razorpay, MyFatoorah, Thawani Pay, PayTabs or DOKU. See Setup Payment Gateway.
- Create Invoice and send it with a payment link. See Invoice & Payments.
Then follow the Sales or E-Commerce track.
Get the most out of Whautomate
Once the basics run, these make the biggest difference:
- Automate the follow-up: reminders, thank-you messages, review requests, birthday wishes and win-back campaigns run on their own. Start from a Quick Automation or build a rule. See Automation Rules.
- Let clients serve themselves: the booking page, online store and client portal let clients book, pay, reschedule and buy memberships without messaging you. See Customer Booking Portal.
- Sell packages and memberships: prepaid sessions and credits bring clients back and smooth your cash flow. See Plans & Memberships.
- Segment and retarget: send each group the message that fits, then retarget people who did not open or reply. See Segmentation & Broadcasts.
- Measure: reports show bookings, revenue, conversations, team response and customer satisfaction. See Reports.
- Connect your other tools: Google Calendar, Zoom, Shopify, WooCommerce, Zapier, webhooks and the REST API. See Integrations.
Pick your track
Each track is a go-live checklist for one goal, in the order that works best.
The setup guide has a Get Onboarding Package button if you would like our team to set up your account. You can also click Contact Us to talk to support.