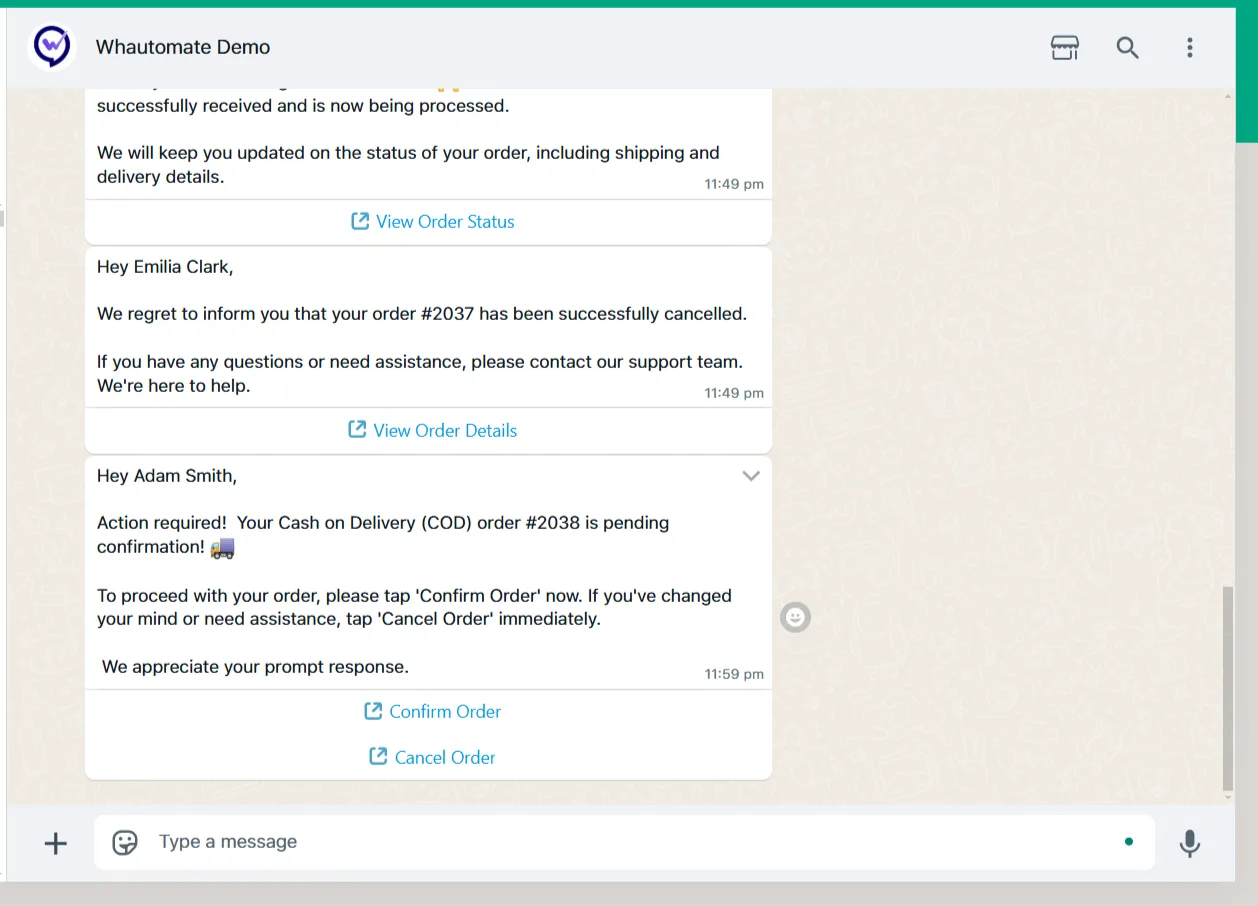
Shopify
This guide provides step-by-step instructions to connect your Shopify store with the Whautomate platform and automate experiences like abandoned carts, COD confirmations, Order confirmations, etc.
Step 1: Open the Shopify setup
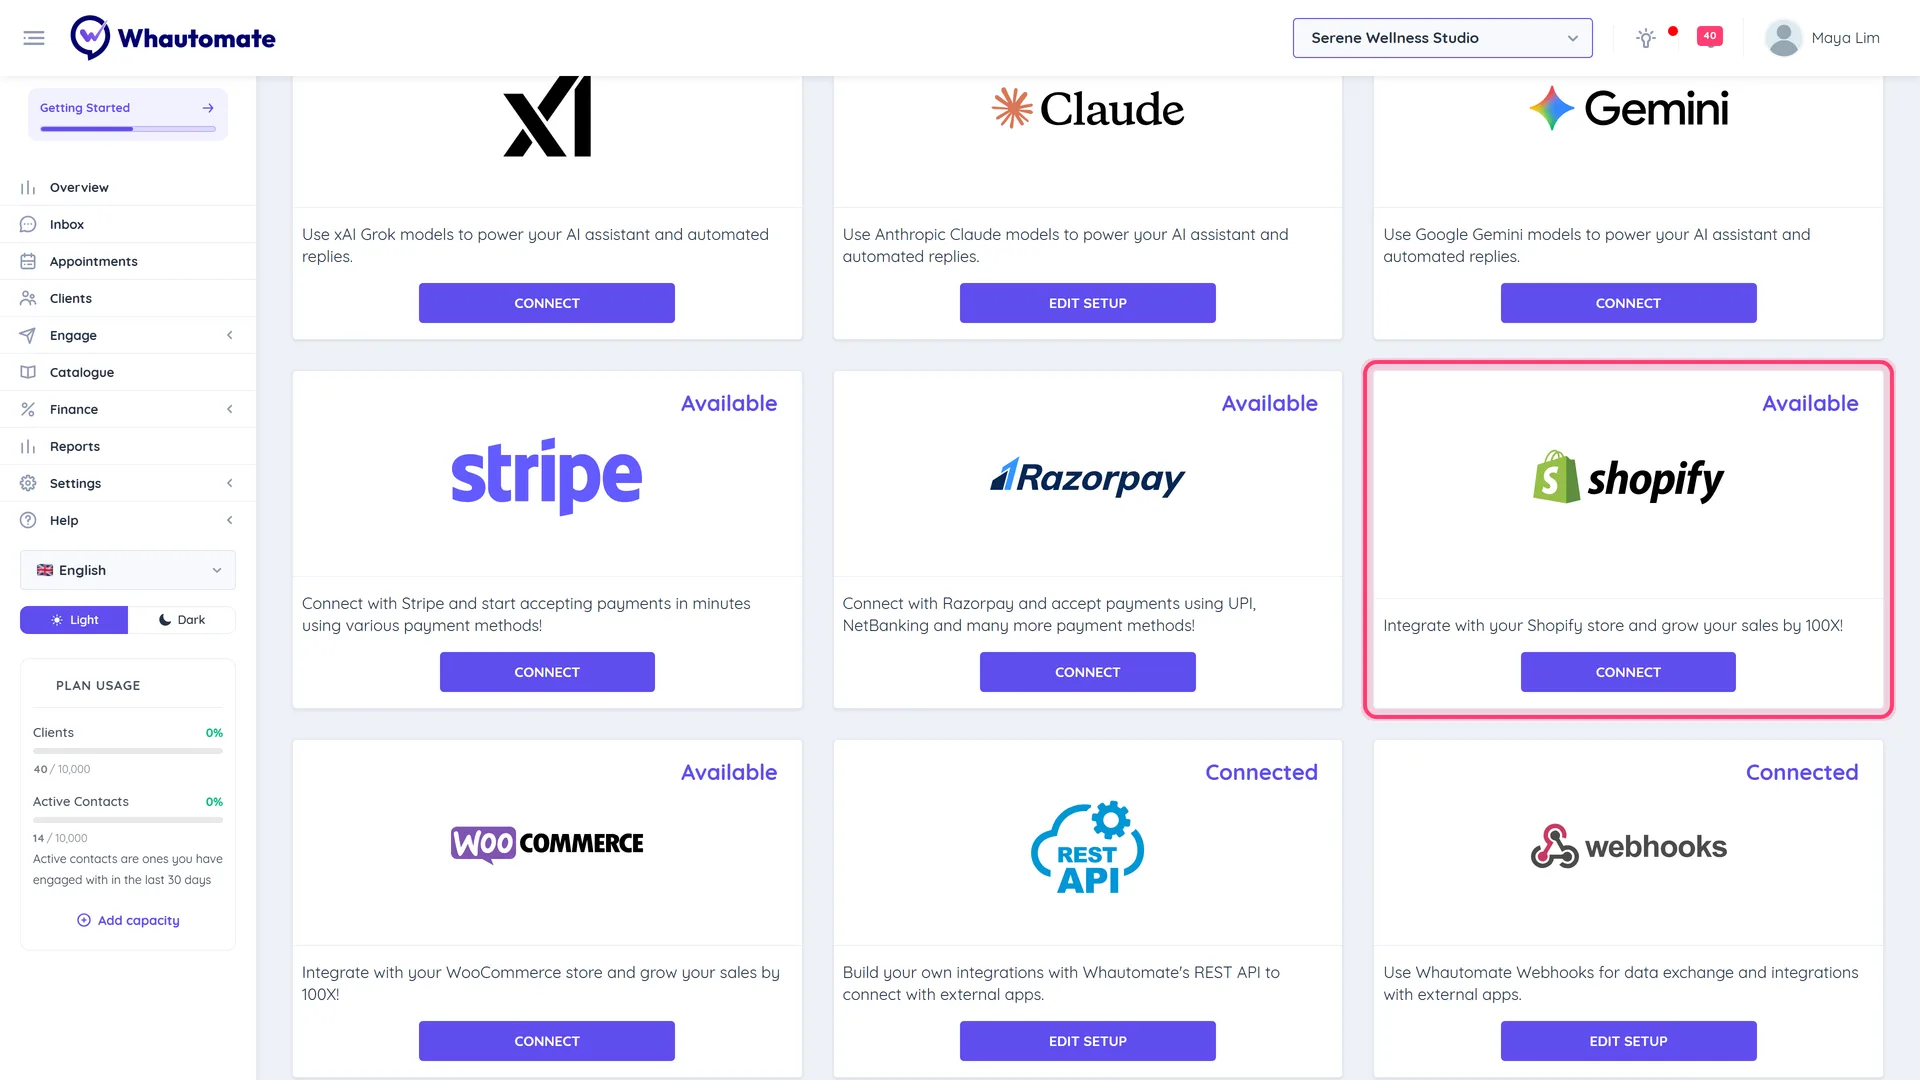
Go to Integrations and click Connect on the Shopify card.
The Shopify Configuration page shows the Redirect URL and the Required access scopes you need for your Shopify app, each with a Copy button, and the same setup steps under How to set up your Shopify app.
Step 2: Create an app in Shopify
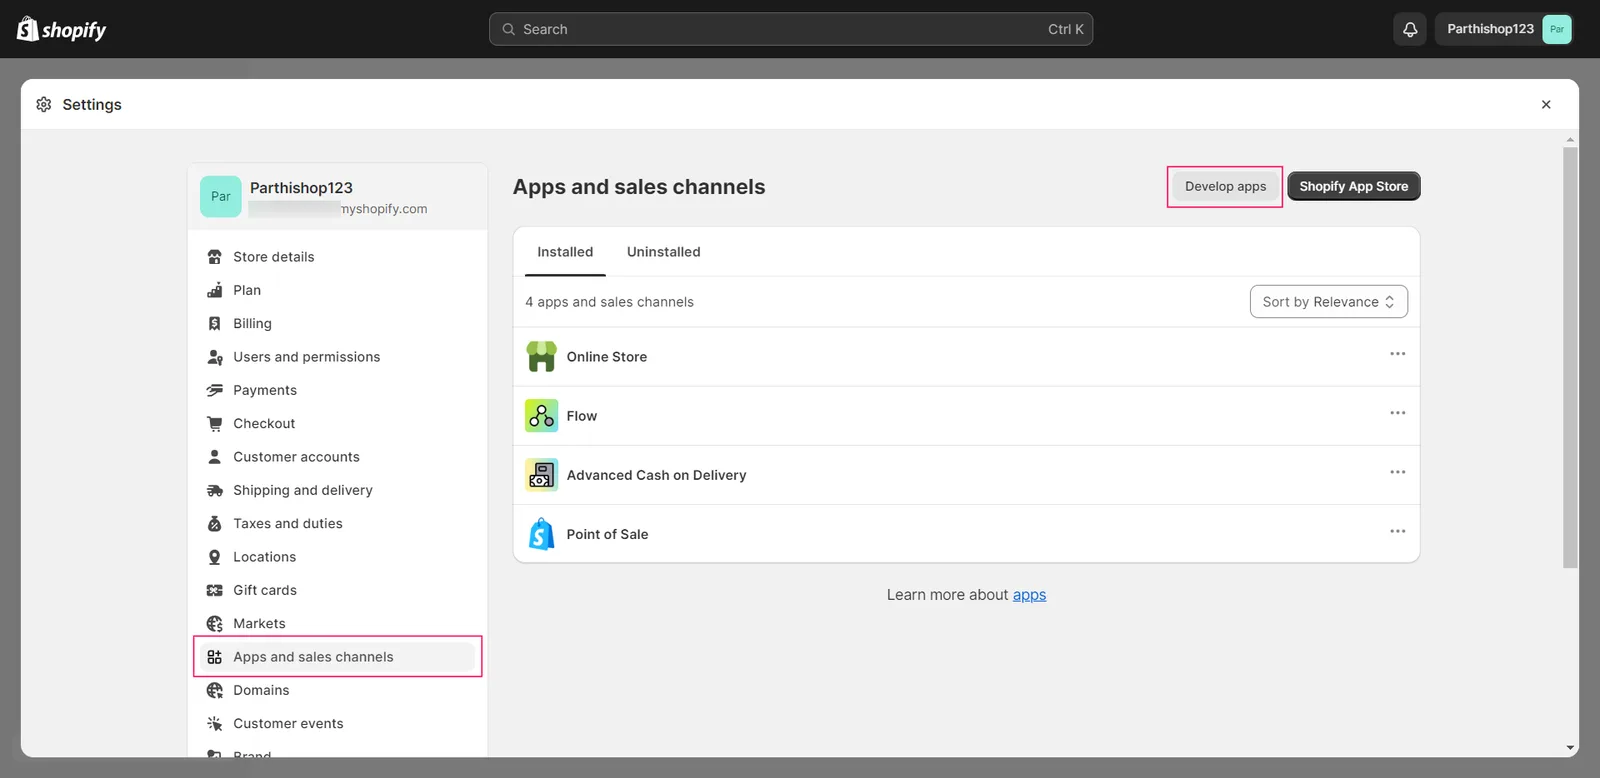
- In your Shopify store admin, go to Settings > Apps and click Develop apps.
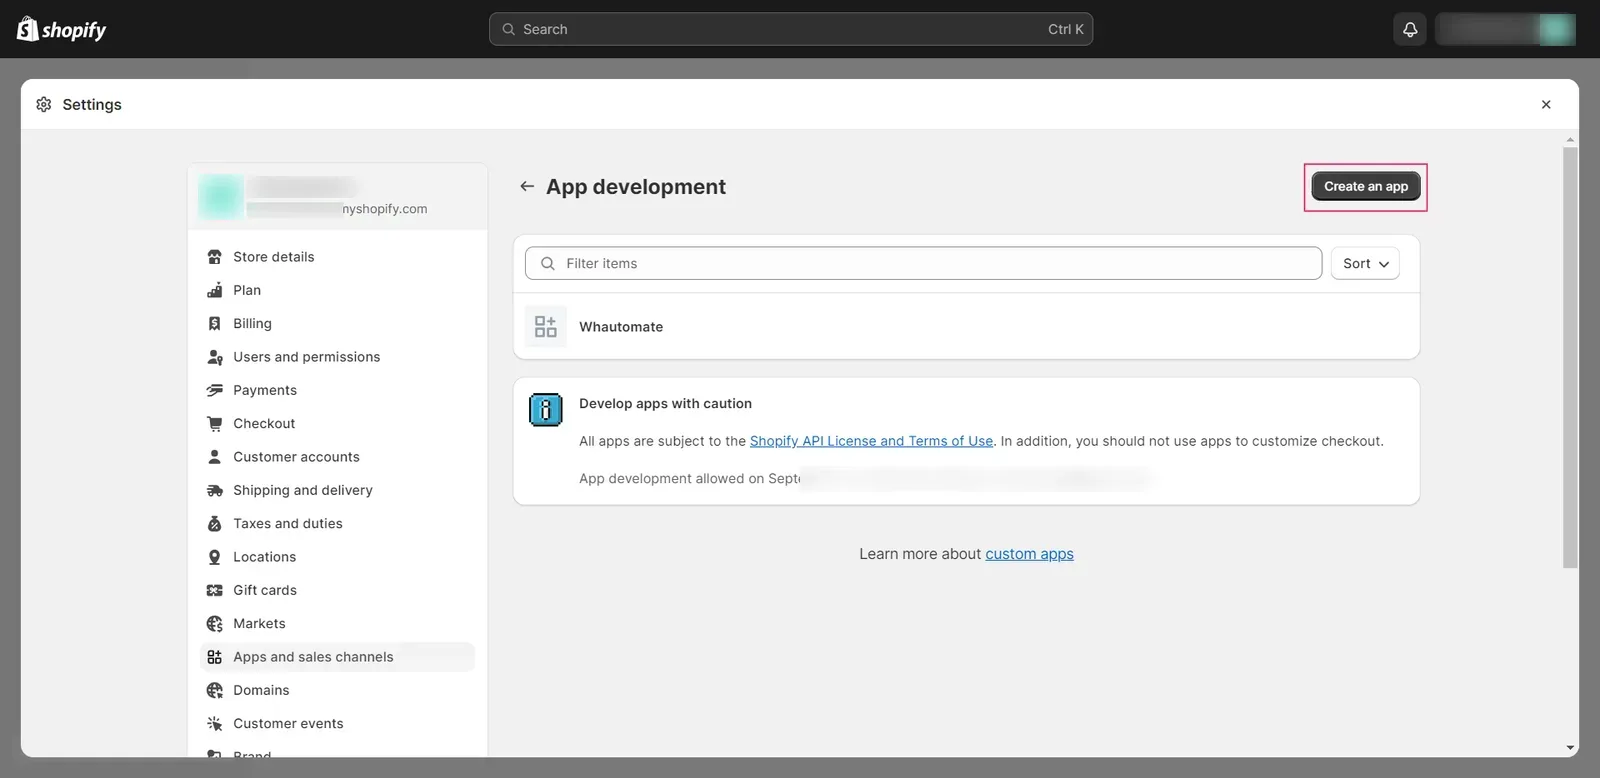
- Create a new app and enter an app name, for example "Whautomate".
- On the Create version screen, fill in these settings in the order they appear:
- App URL: paste the Redirect URL from the Shopify Configuration page.
- Untick Embed app in Shopify admin.
- Set the Webhooks API version to the version shown on the Shopify Configuration page.
- Scopes: paste the access scopes from the Shopify Configuration page.
- Turn on Use legacy install flow.
- Redirect URLs: paste the Redirect URL again.
- Click Release, enter a version name (for example, 1.0) and click Release again.
- In the developer dashboard, open Settings > Credentials and copy the Client ID and Secret.
note
Create the app in the same Shopify organization that owns your store. A custom distribution app can only be installed on stores in its own organization.
Step 3: Connect your store
- Back on the Shopify Configuration page, enter your Shopify Store URL (for example, mystore.myshopify.com), the Client ID and the Client Secret.
- Click Save Credentials, then Install on Shopify and approve the app in Shopify.
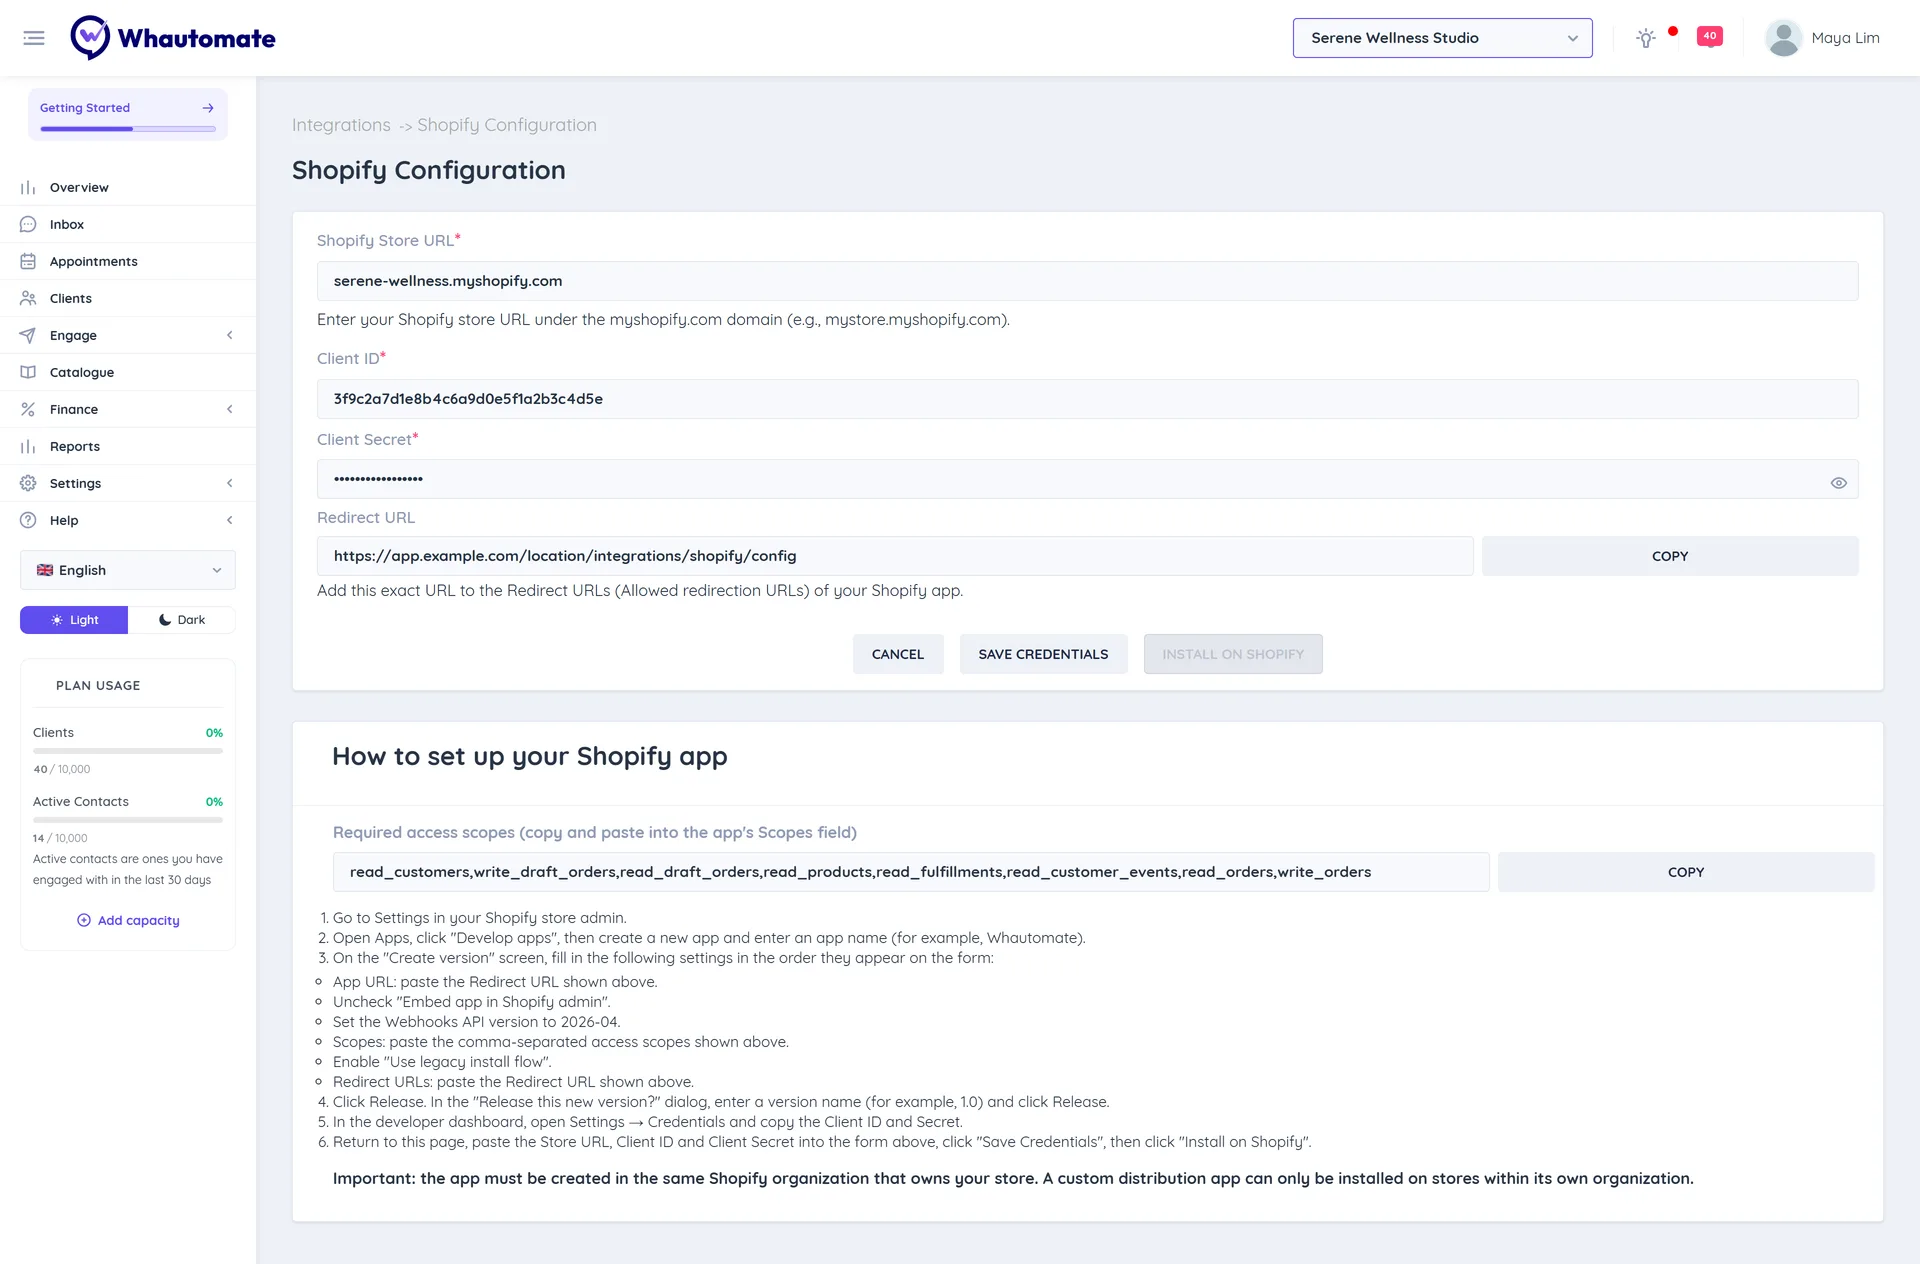
When the store is connected, the Shopify page lists your Shopify automation rules.
Step 4: Configure Shipping Address Phone Number and SMS / WhatsApp Notifications in Shopify
- After successfully connecting your Shopify store to Whautomate, navigate back to your Shopify admin panel.
- Go to Settings > Checkout.
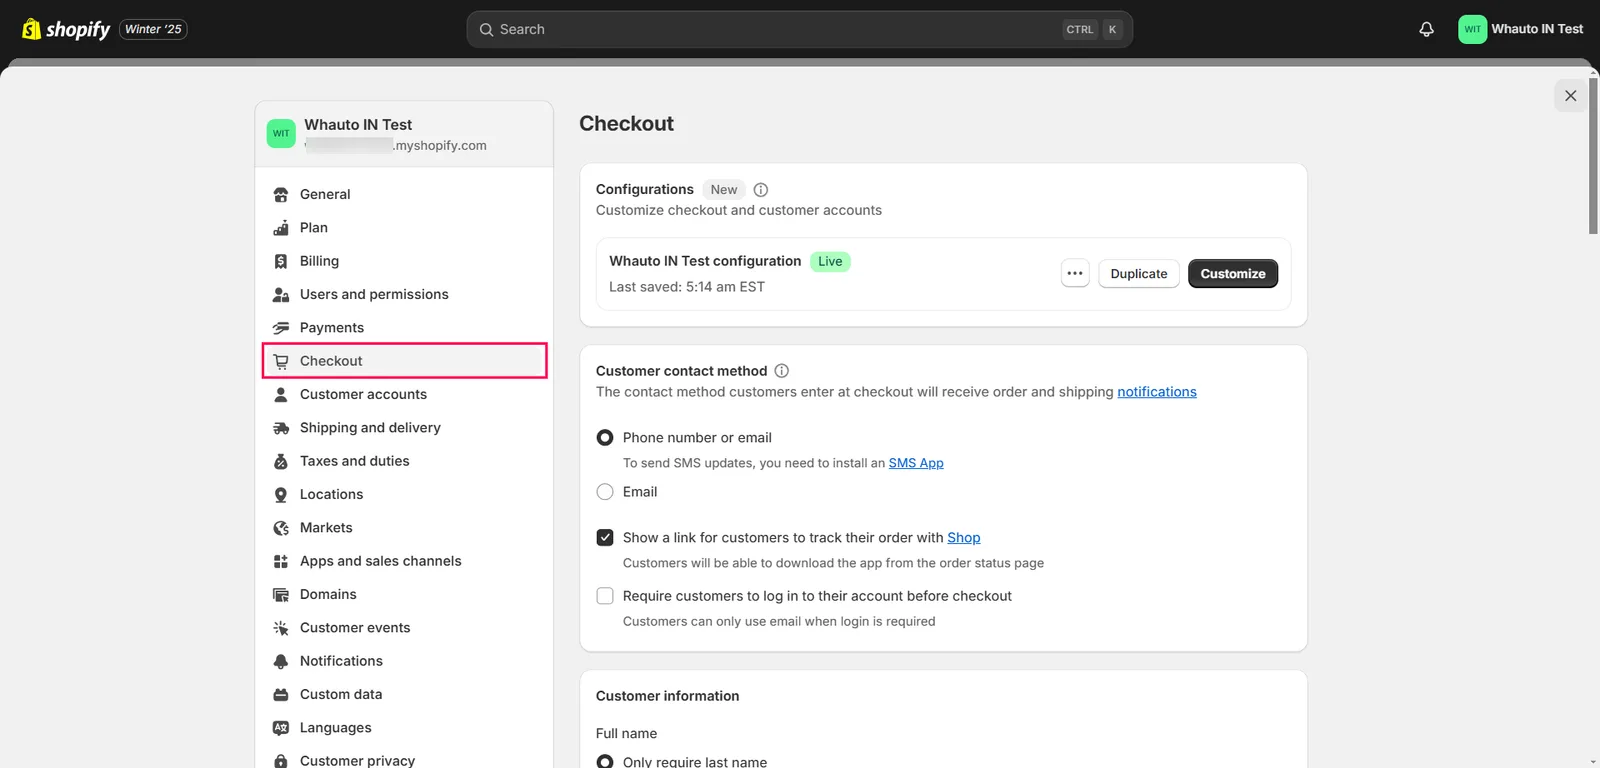
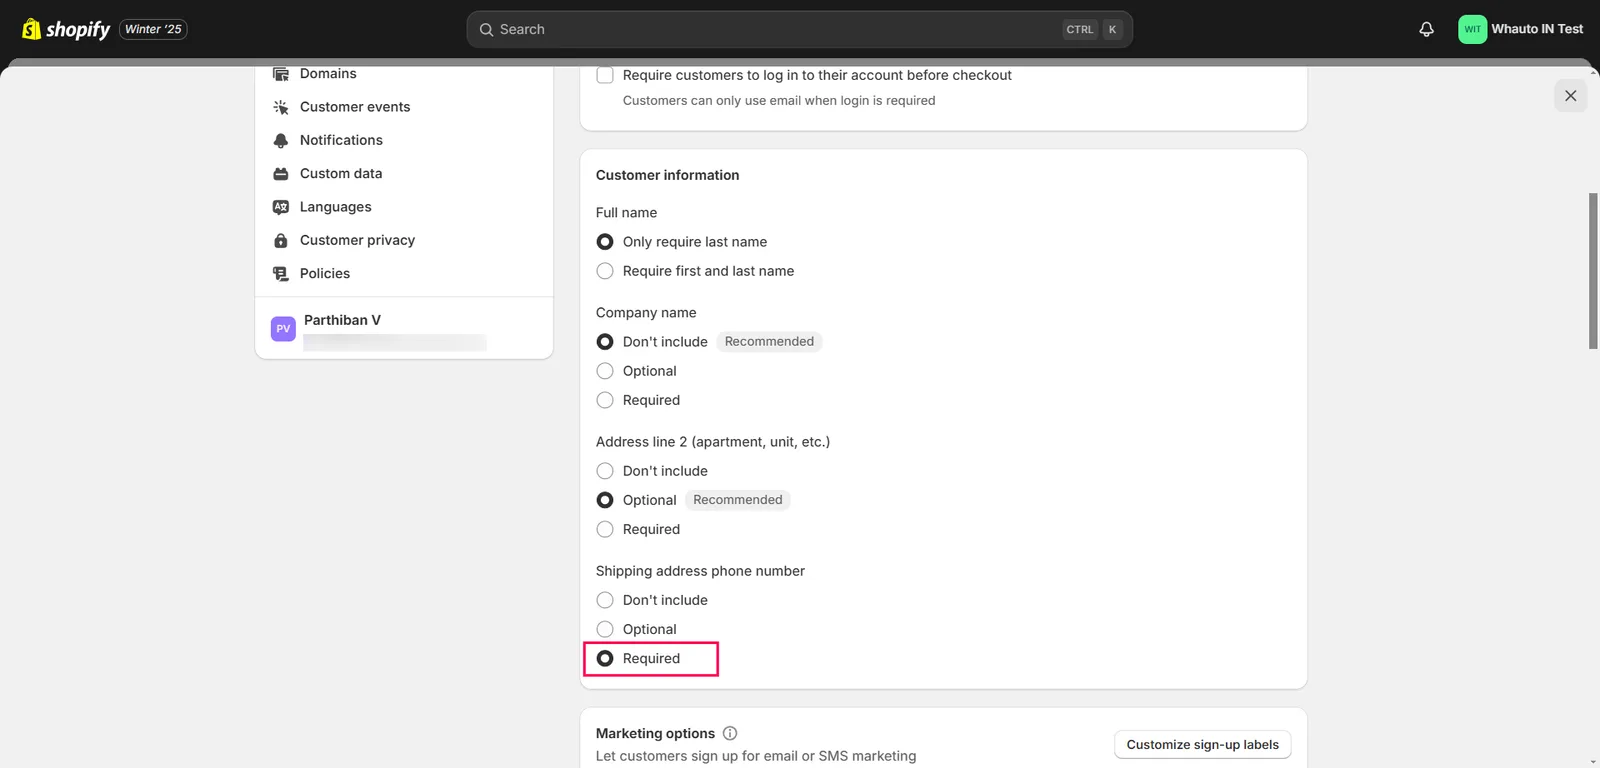
- Scroll down to the Customer information section.
- Ensure the "Shipping address phone number" field is set to Required.
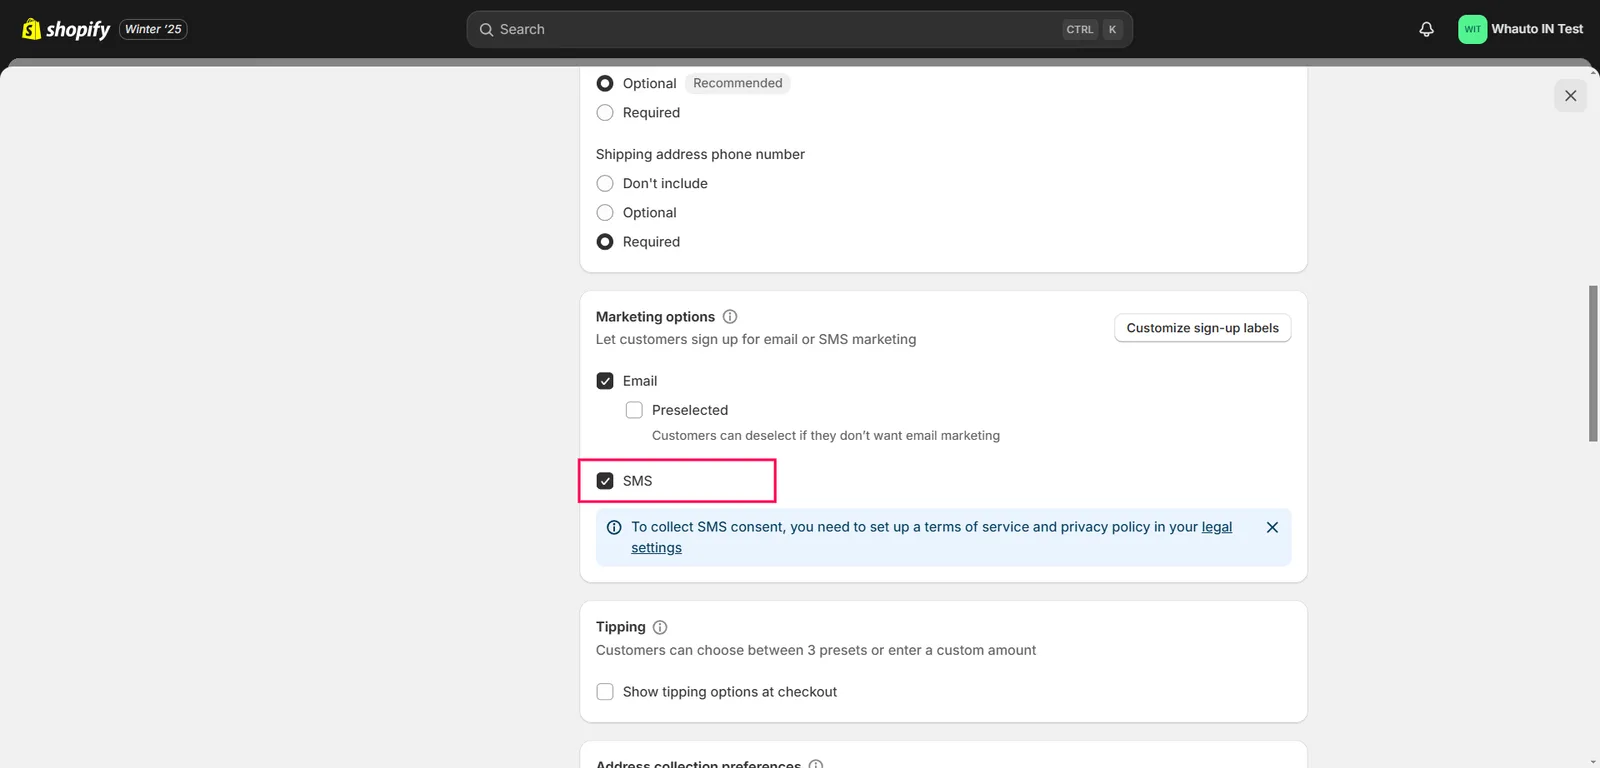
- Scroll down further to the Marketing options section.
- Check the SMS checkbox. This enables the system to send order updates to customers via SMS or WhatsApp.
- Save your changes. 👇
Step 12: Place a Test Order
- Place a test order on your Shopify store to verify that the shipping address and phone number are now mandatory during checkout.