Client Forms
The Forms tab of a client profile lists every web form assigned to or filled in by that client. Use it to request a form from one client, such as a Massage Consent Form before their first session, and to open the completed answers, uploaded files and PDF later. To create the form itself, see Web forms.
Before you start
- Create the form in Forms & Flows first. Private forms can only be filled in by a client you send them to.
- To send by WhatsApp, connect the WhatsApp Cloud API. SMS needs SMS set up for your account; contact support if you have not used SMS yet.
Assign and send a form
- Open the client from Clients and click the Forms tab.
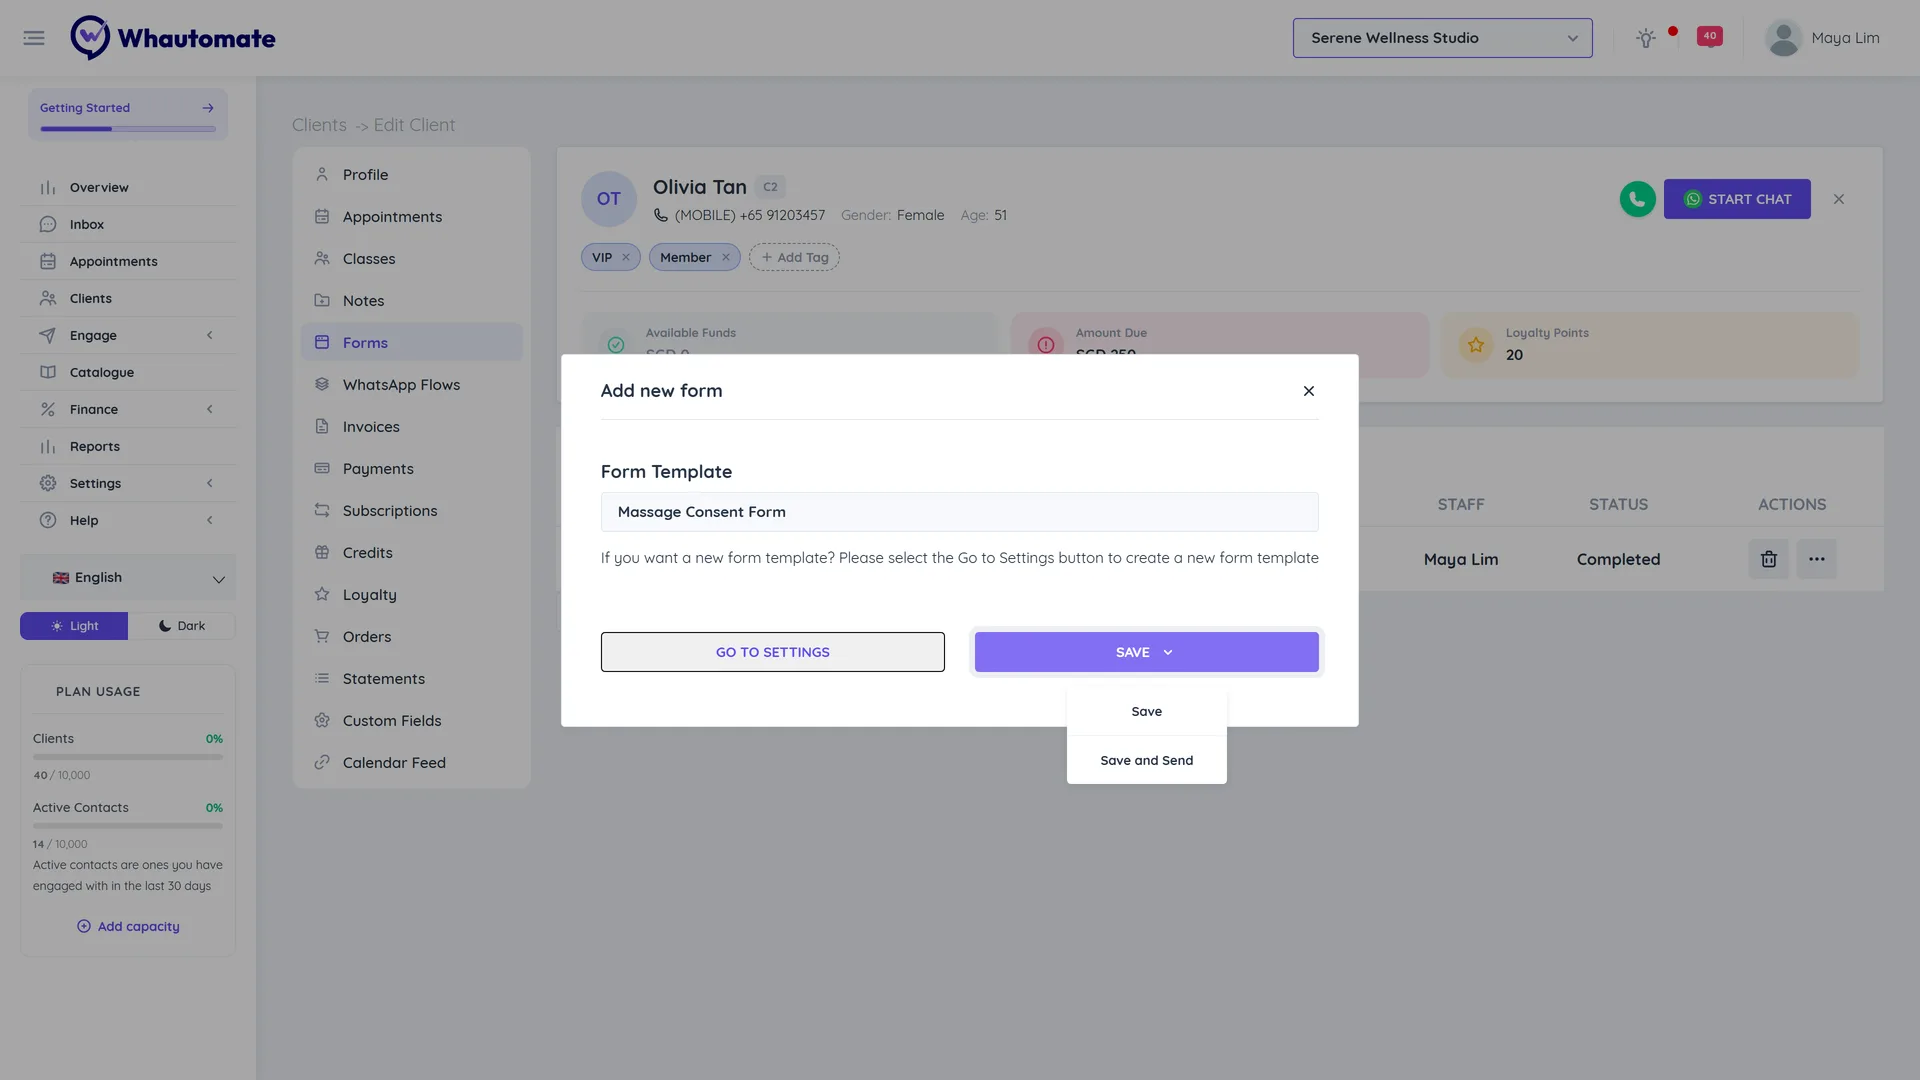
- Click Add New Form.
- In Form Template, search for and pick the form.
- Open the Save menu and choose:
- Save to assign the form without sending it, or
- Save and Send to send it now.
- In Share Form Link, choose WhatsApp, Email or SMS, then click Send. To fill it in yourself with the client, click Visit Client Form link.
The message uses your default request form templates. To change the wording, see Request form templates.
View a completed form
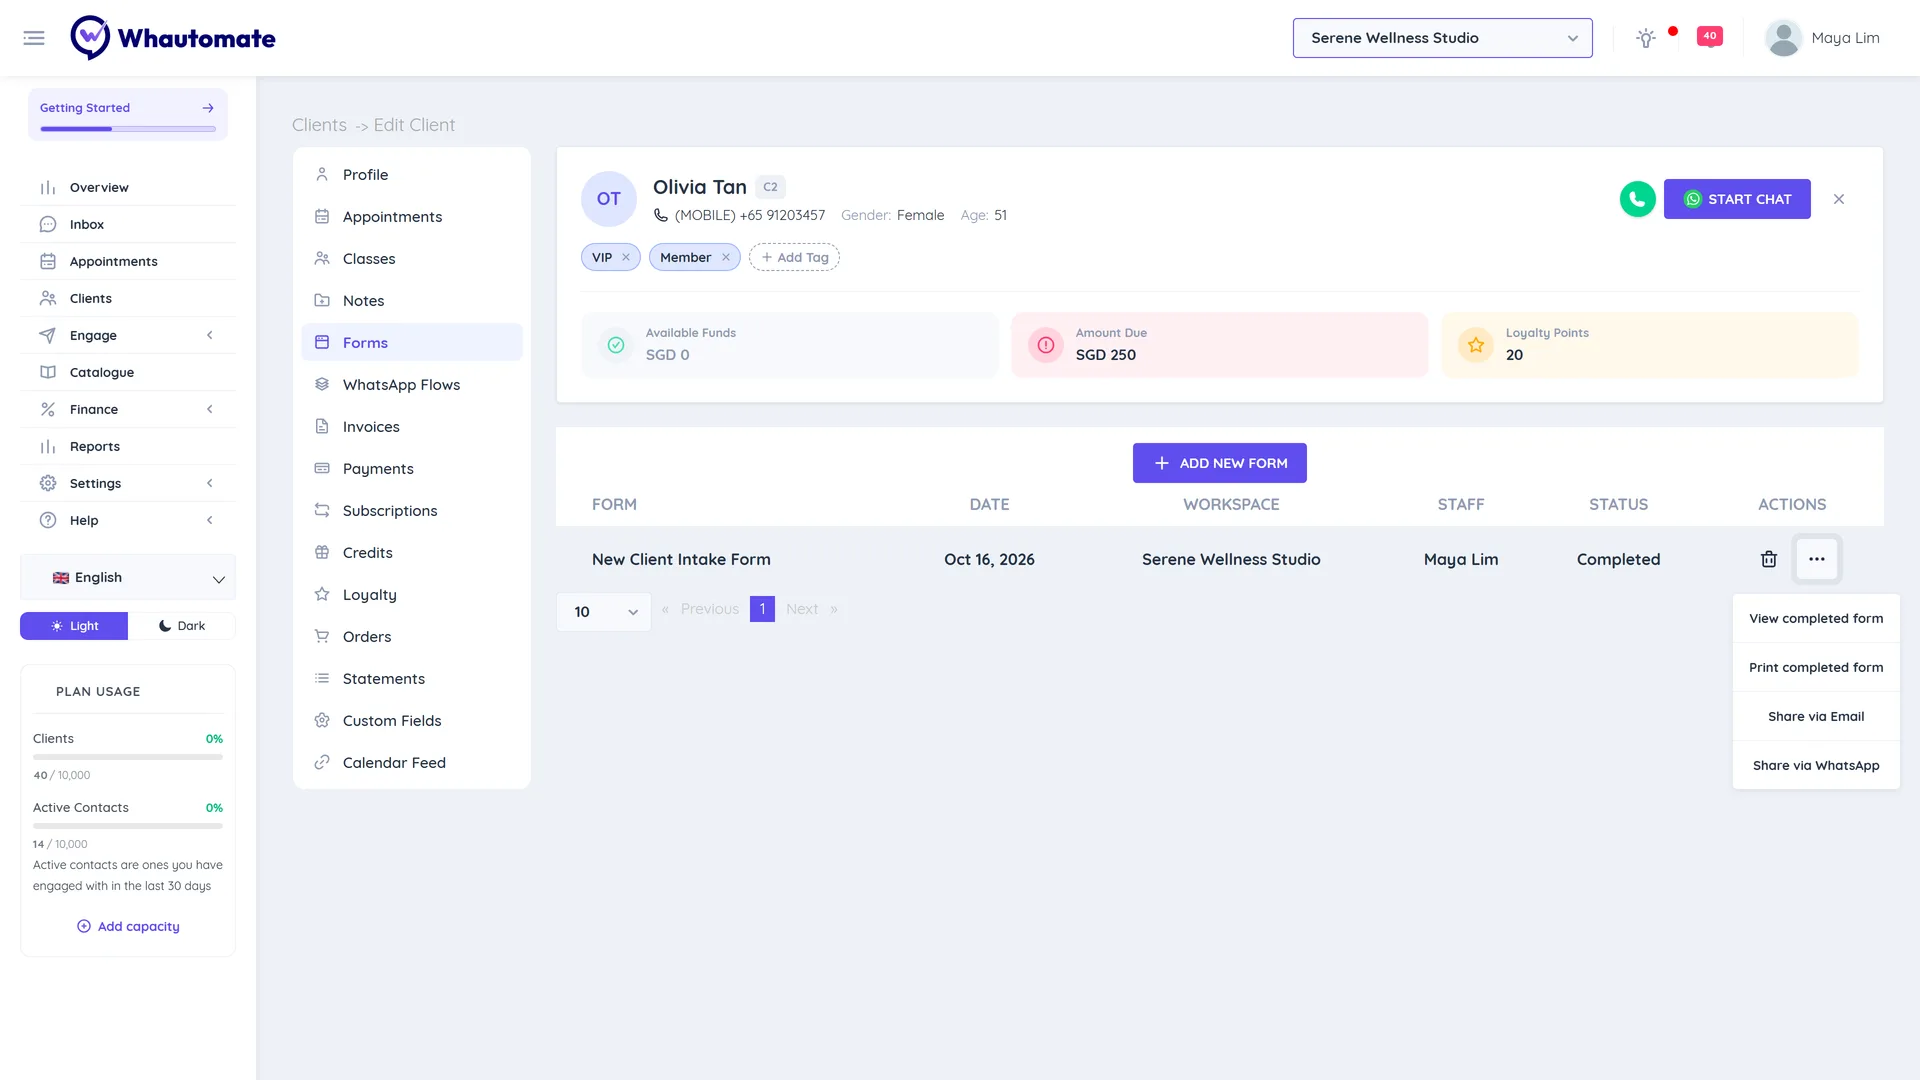
Each row shows the FORM, Date, WORKSPACE, STAFF and Status (and the payment status for payment forms). Open More Actions on a row. The options depend on the form status:
- View/Share form link to copy or resend the link
- View completed form to read the answers
- Print completed form to print or save the PDF
- View uploaded files for files from file upload questions
- Share via Email or Share via WhatsApp to send the completed PDF
Send forms automatically instead of one by one: the automation action Assign a form and request form to be filled does this when, for example, a client books for the first time. See Form automations.