Setup Services
Services are what clients book: each one has a name, a duration, the team members who offer it and a price. You manage them in the Catalogue. The same screen creates class services (see Setup Classes) and add-ons, which are extras such as a hot stone upgrade that clients can add to an appointment.
Prerequisites
- Your team members exist. You can link them to services here or on their profile. See Setup Team Member Profile.
- To charge online, connect a payment gateway first. See Online Payment at Booking.
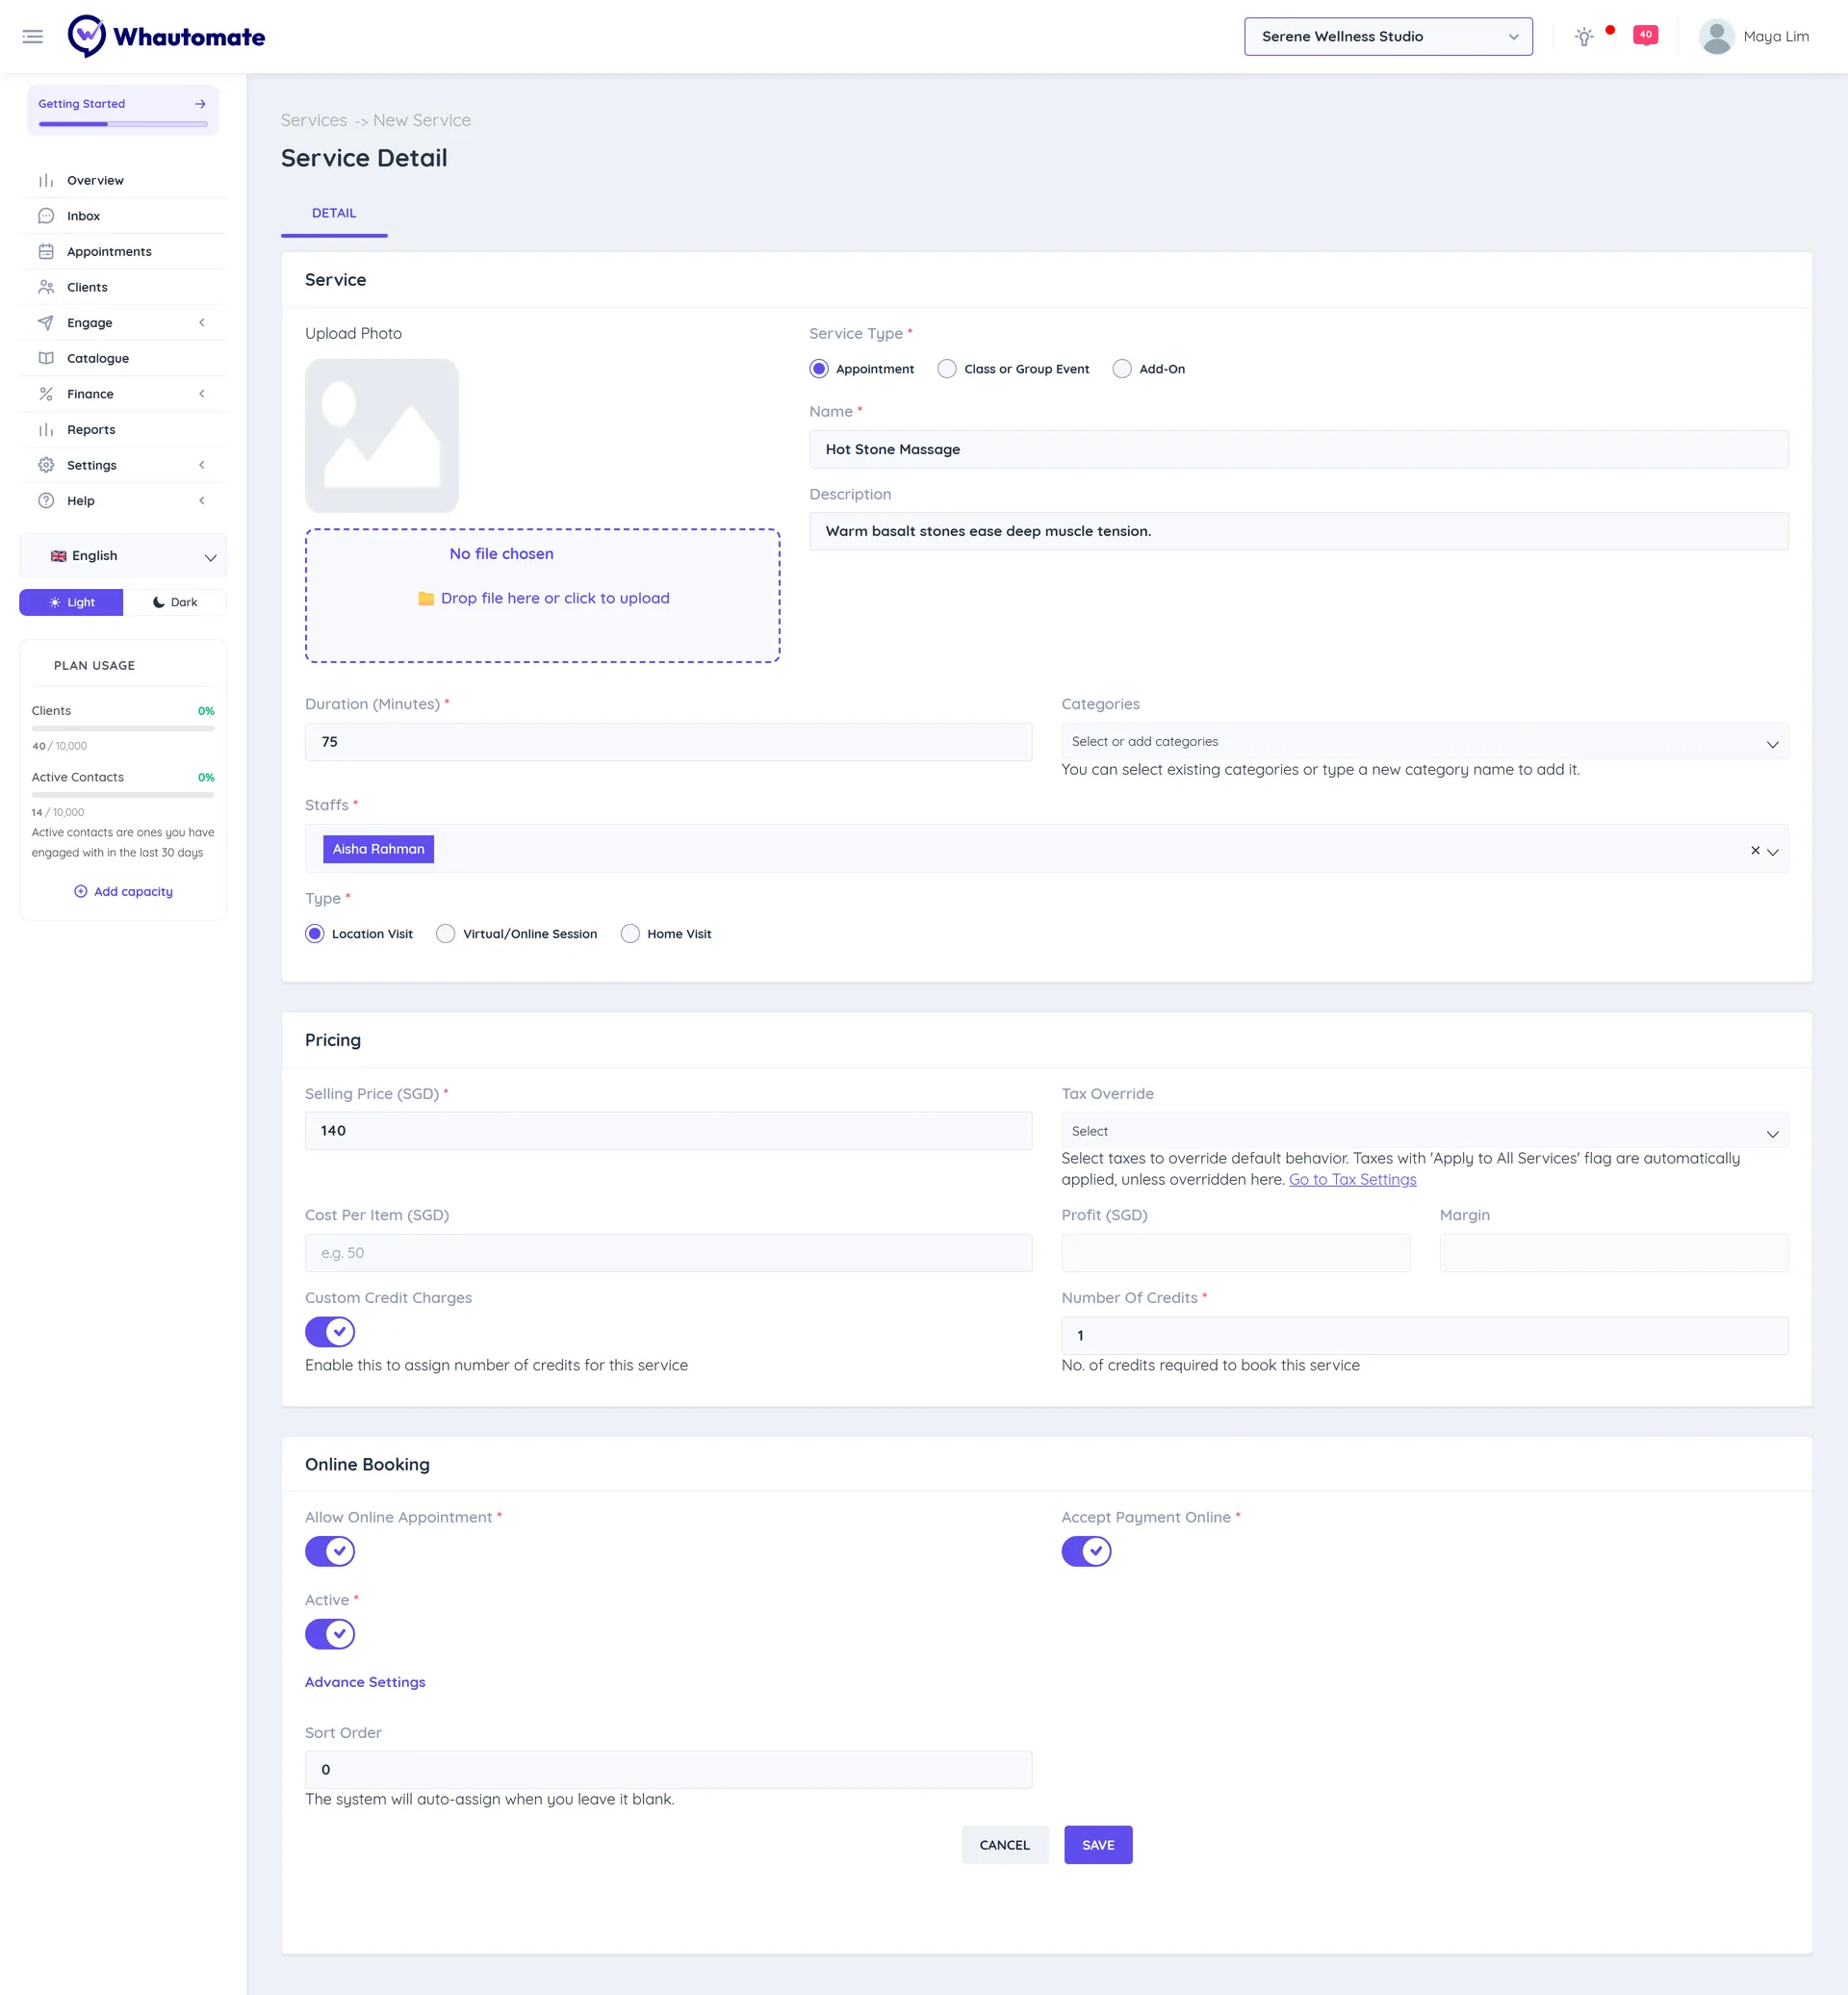
Create an appointment service
- Click Catalogue in the menu. The Services tab opens with the Services List.
- Click Add Service.
- In the Service card:
- Optional: Upload Photo.
- Service Type: choose Appointment.
- Name, and an optional Description (up to 300 characters).
- Duration (Minutes).
- Categories: pick existing ones or type a new name to add it. Categories become filters on your booking page.
- Staffs: the team members who offer this service.
- Type: Location Visit, Virtual/Online Session or Home Visit.
- In the Pricing card, enter the Selling Price. Optional: Tax Override, Cost Per Item (Whautomate shows Profit and Margin), and Custom Credit Charges with a Number Of Credits if clients pay with credits from a package.
- In the Online Booking card:
- Allow Online Appointment: show this service on your booking page, WhatsApp chatbots and AI chatbot.
- Accept Payment Online: clients pay when they book online.
- Active: turn off to hide the service everywhere without deleting it.
- Advance Settings: Advance booking limit for clients (days ahead clients can book) and Block time after appointment (minutes kept free after each booking, for example for cleanup).
- Sort Order: leave blank to let Whautomate order it.
- Click Save.
Create an add-on
Add-ons are optional extras offered while booking an appointment, with their own price.
- In Catalogue > Services, click Add Service.
- Choose Service Type Add-On and enter a Name.
- Enter the Selling Price in Pricing.
- In Applies To, choose All active services or Selected services and pick the Services.
- Set the Online Booking toggles and click Save.
Clients see add-ons in a Select Add-Ons step on the booking page, and your team adds them with the Add-Ons link when booking.
Manage the list
- Filter with Select Type (Appointment, Class or Add-On), Select Category and Search Services. Sort By orders the list.
- Active Services and Inactive Services tabs separate hidden services. Use the Status toggle in a row to switch quickly.
- Click the edit icon (Edit Service) to change a service, then Update.
- Export All downloads the full list (once per week); tick rows and use Export Service(s) for a selection.
- Bulk Import creates or updates services from a CSV file. See Bulk Import Services.
Share a booking link
- Click Get Booking Link.
- Choose Service Type Appointment and optionally a Category.
- Click Generate Link, then copy it or share it via WhatsApp, Email or SMS.
Tips and limits
- The duration plus Block time after appointment decides how long the team member is busy.
- A service only appears online when Allow Online Appointment and Active are both on and at least one bookable team member offers it.
- Payment is set per service; there is no separate deposit option.