Setup Team Member Profile
Every appointment is booked with a team member, so clients only see times when someone who offers that service is working. A team member's profile holds the services they offer, the colours used for them on the calendar, their weekly working hours and any one-off changes such as a day off. Set this up before you open online booking.
- You are the account Owner or an Administrator.
- You have created your services, or will come back to link them. See Setup Services.
Add a team member
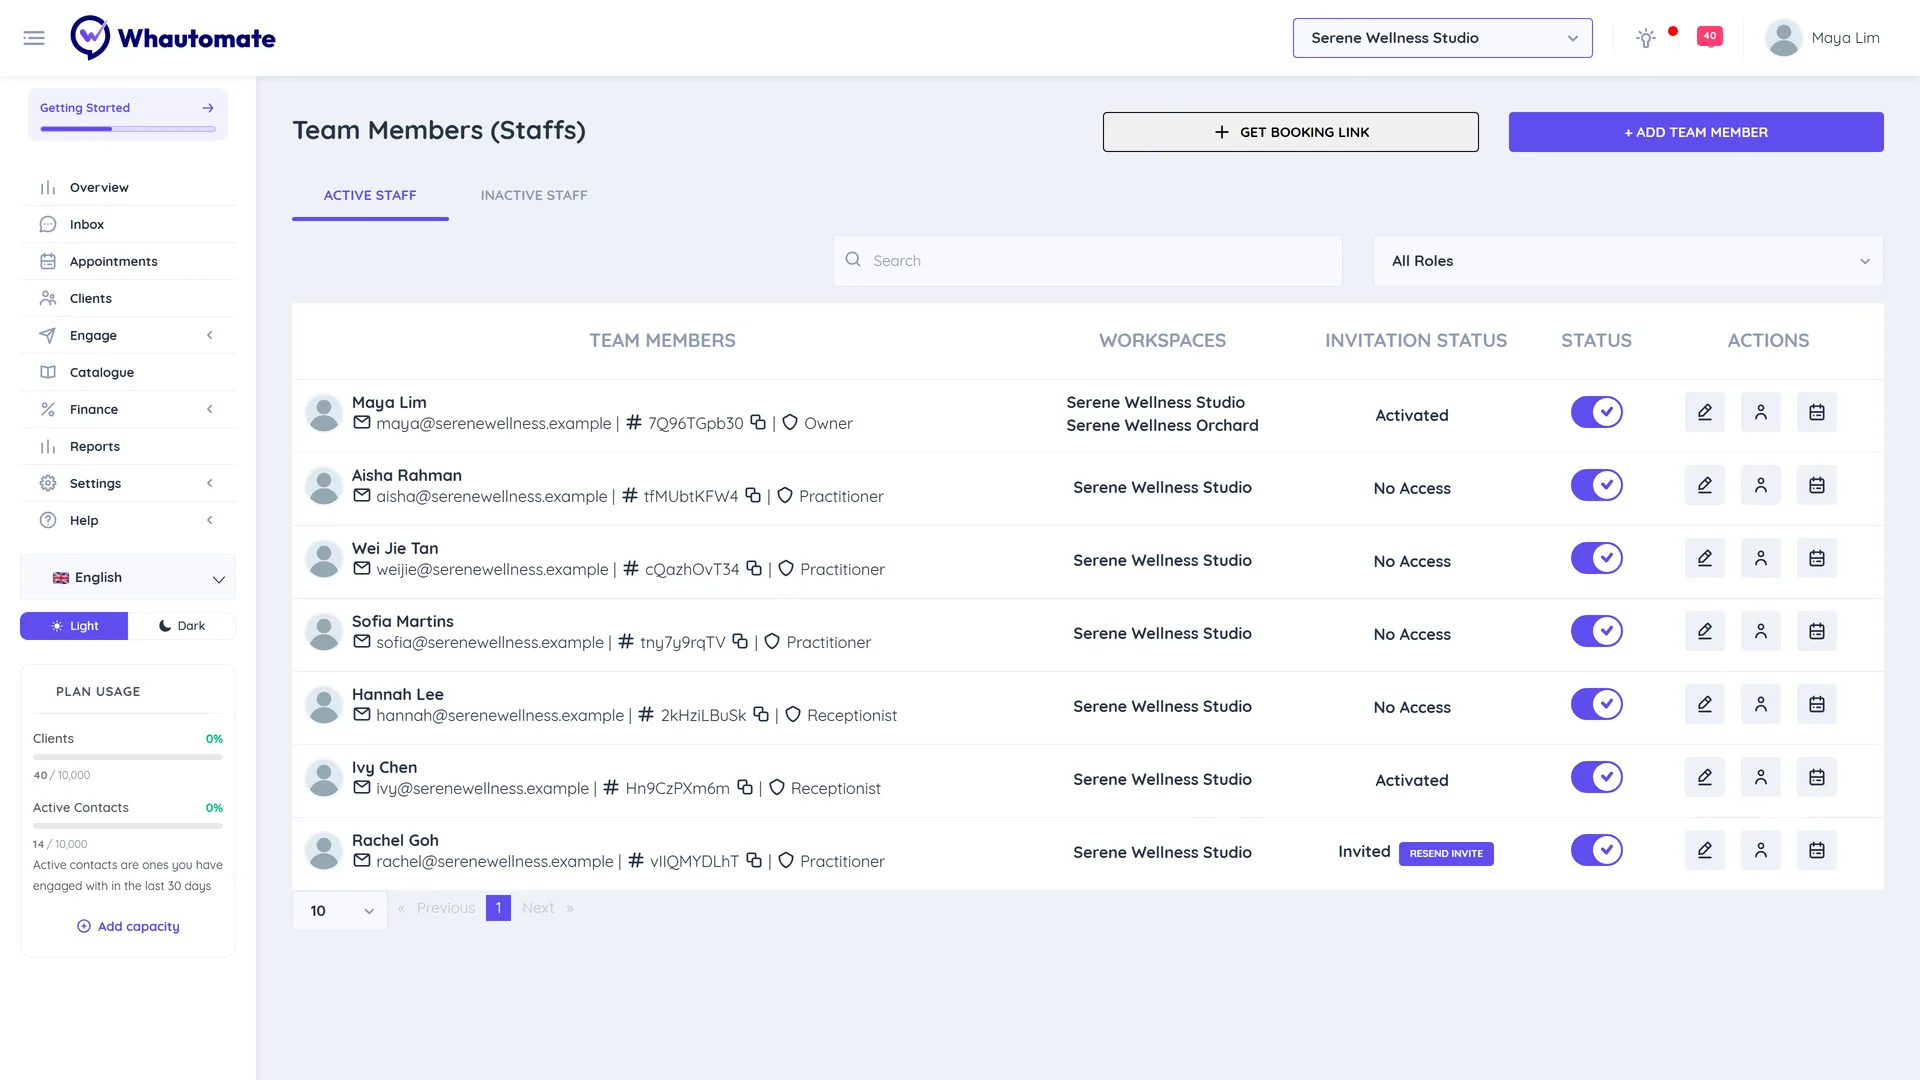
- Go to Settings > Team Members.
- Click + Add Team Member.
- Fill in First Name, Last Name, E-Mail, Country Code and Mobile No.
- Choose a User Access Role and the Workspaces this person works in.
- Leave Internal Staff/Not Available for Appointments off for anyone clients can book. Turn it on for people such as front desk staff who never take appointments.
- Optional: turn on No Application Access for someone who should be bookable but never log in. Use the Granular Access options to hide modules, for example No Finance Module Access.
- Click Save. The INVITATION STATUS column shows Invited until they accept, and Resend Invite sends the invitation again.
Choose services and calendar colours
- In the team member's row, open ACTIONS > Edit Profile.
- Open the Role & Availability tab.
- In Staff Role, pick the Locations and Services this person offers.
- Optional: set Calendar background color and Calendar text color so their appointments are easy to spot on the calendar.
- Click Save in that card.
The Profile tab holds the details clients may see: photo, Language Proficiency, Contact Information, Biography and Qualification.
Set weekly working hours
- In the team member's row, open ACTIONS > Edit Availability. This opens Role & Availability.
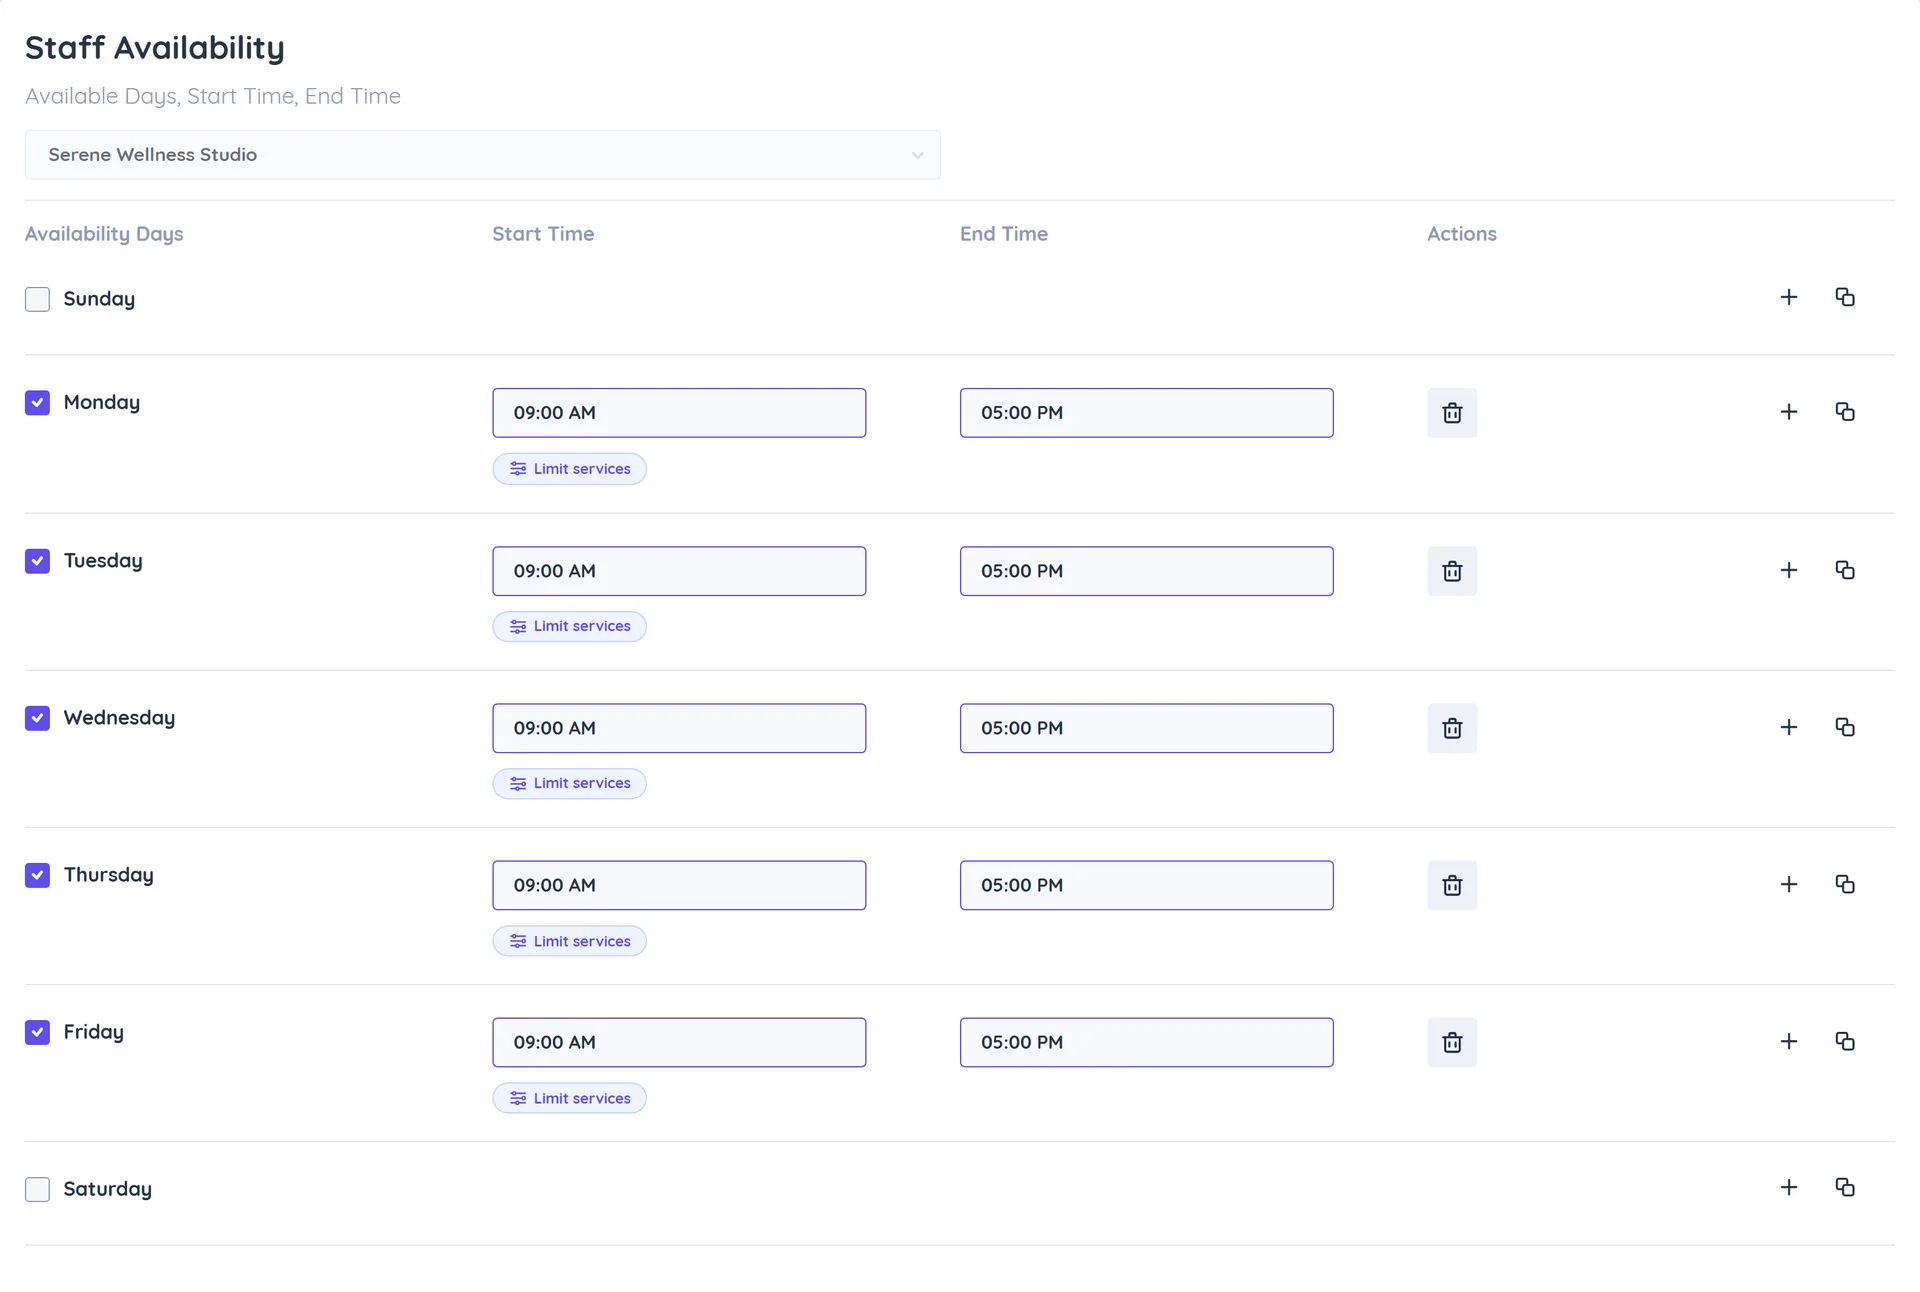
- In Staff Availability, tick each working day under Availability Days.
- Set Start Time and End Time. Click + to add a second slot on the same day, for example after a lunch break.
- To reuse a day's hours, click the copy icon, choose the days in Copy times to... and click Apply.
- Optional: click Limit services on a day to offer only some services that weekday. Leave it empty to offer every service.
- Click Save in the card.
Change hours for specific dates
Use Date Overrides for holidays, extra shifts or a day with different hours. Overrides replace the weekly hours on the dates you pick.
- On Role & Availability, scroll to Date Overrides.
- Click the days on the calendar. Shift-click selects a range, and clicking a weekday letter selects that weekday for the whole month. Shortcuts: Entire month, Weekdays, Weekends, Clear.
- In the side panel, either turn on Unavailable all day or set the hours with Add time slot.
- Optional: Limit services for those days, and add a Note.
- Click Apply to {n} day(s).
Days off show an Off badge. To undo, select the days and click Clear overrides on selected, or click Apply staff's weekly hours.
Blocked time always takes priority. If a date has both an override and blocked time, the blocked hours are removed from the override hours. To block time, use Add New > Block time on the calendar; see Manage the Appointments Calendar.
Calendar integrations
The Calendar Integrations tab of the profile has:
- Google Meet: each team member connects their own Google account with Connect Google Meet. A Meet link is then created for every virtual appointment with them. The card shows Connected or Not Connected.
- Calendar Feed: Get calendar feed gives a URL to add this person's appointments to Google Calendar, Outlook or iPhone. See Sync with External Calendars.
Share a booking link for one team member
On Team Members, click Get Booking Link, pick the Staff and click Generate Link. Clients who open it see only that person's services.
Tips
- Only active team members who are available for appointments appear on booking pages. Set their display order in Appointment Settings.
- If a client sees no times, check that the team member offers the service, has hours that day, and has no override or blocked time.