Live Chat
The live chat widget adds a chat button to your website. Visitors can chat with you right there, or pick WhatsApp, Instagram, Messenger or Telegram if they prefer. Website chats arrive in the Team Inbox next to your other conversations, and your chatbots and automations can answer them too. Live chat is part of every plan.
Before you start
- You need to be an account Owner or Administrator.
- You need to be able to edit your website's HTML, or ask your web developer to add a short code snippet. Whautomate Sites and the online booking page can show the widget without code.
Set up the widget
-
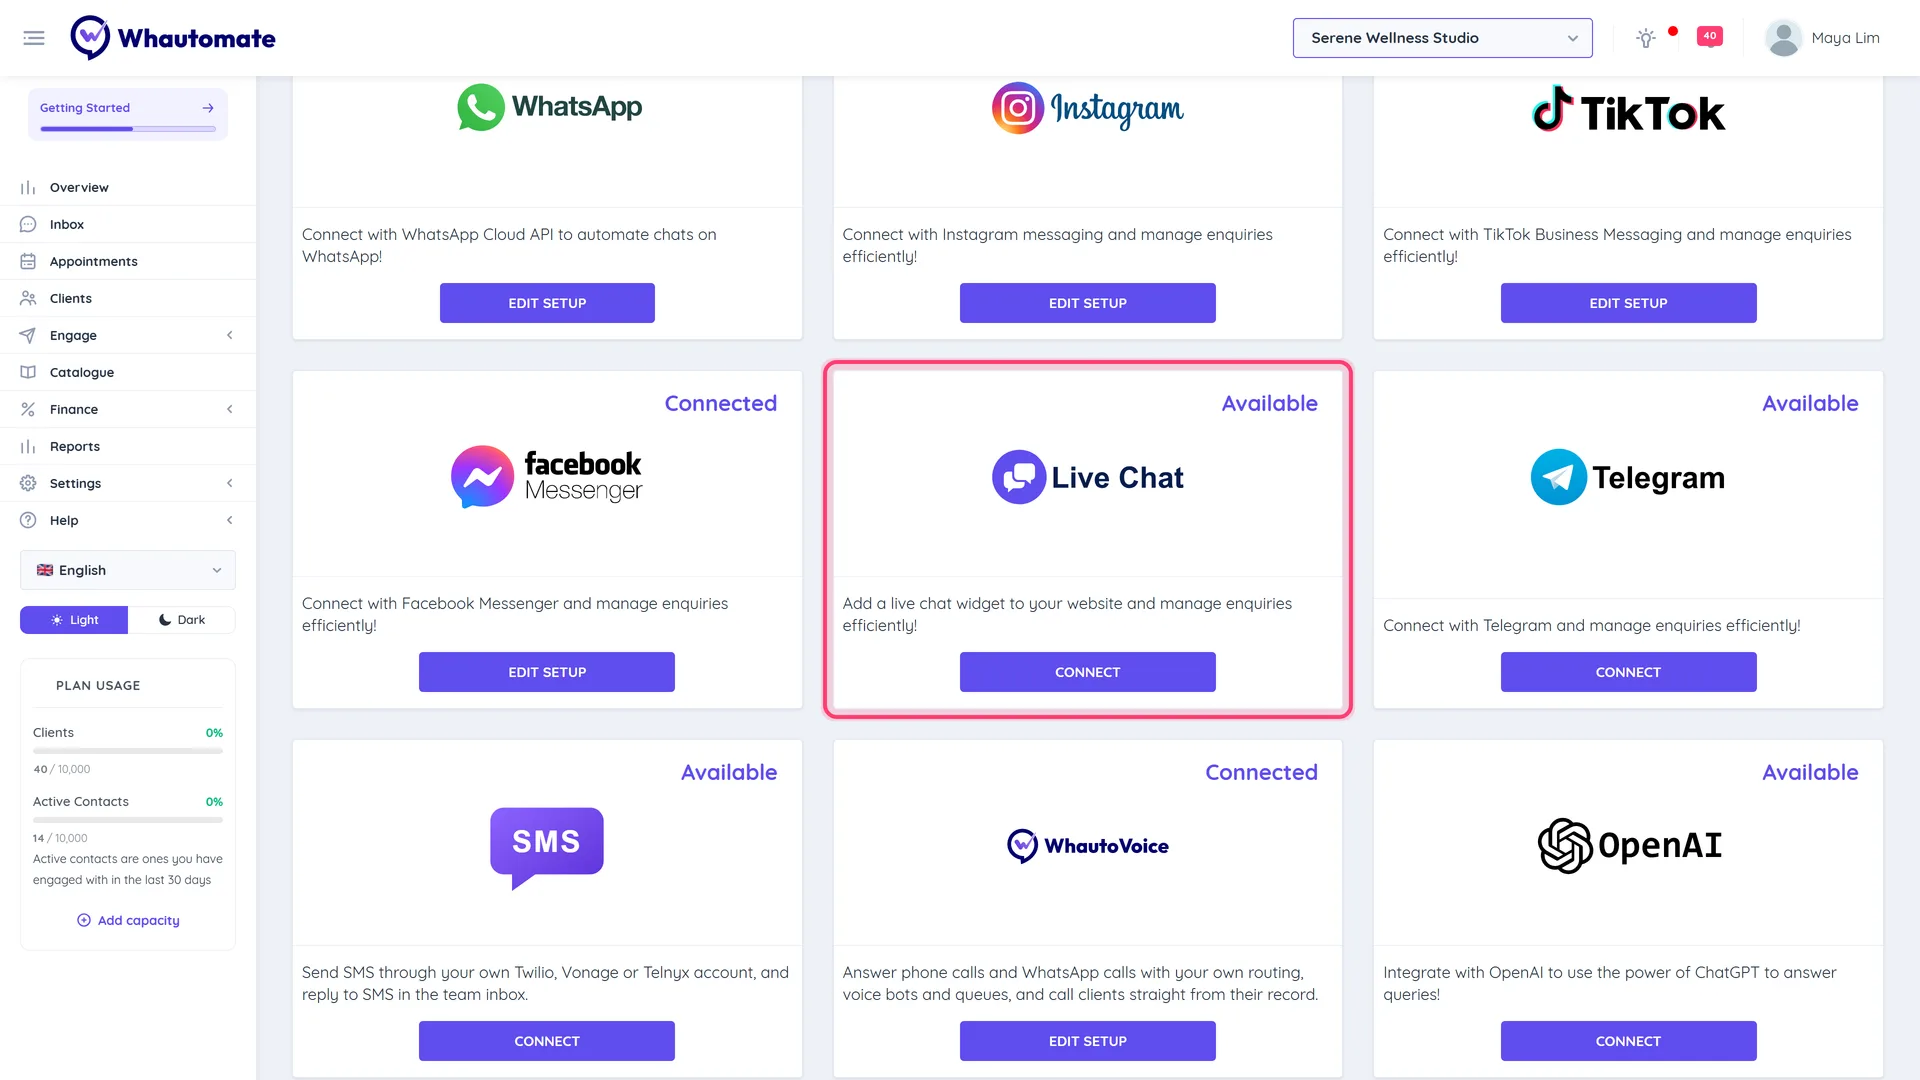
Go to Settings > Integrations, find the Live Chat card ("Add a live chat widget to your website and manage enquiries efficiently!") and click Connect (or Edit Setup).
-
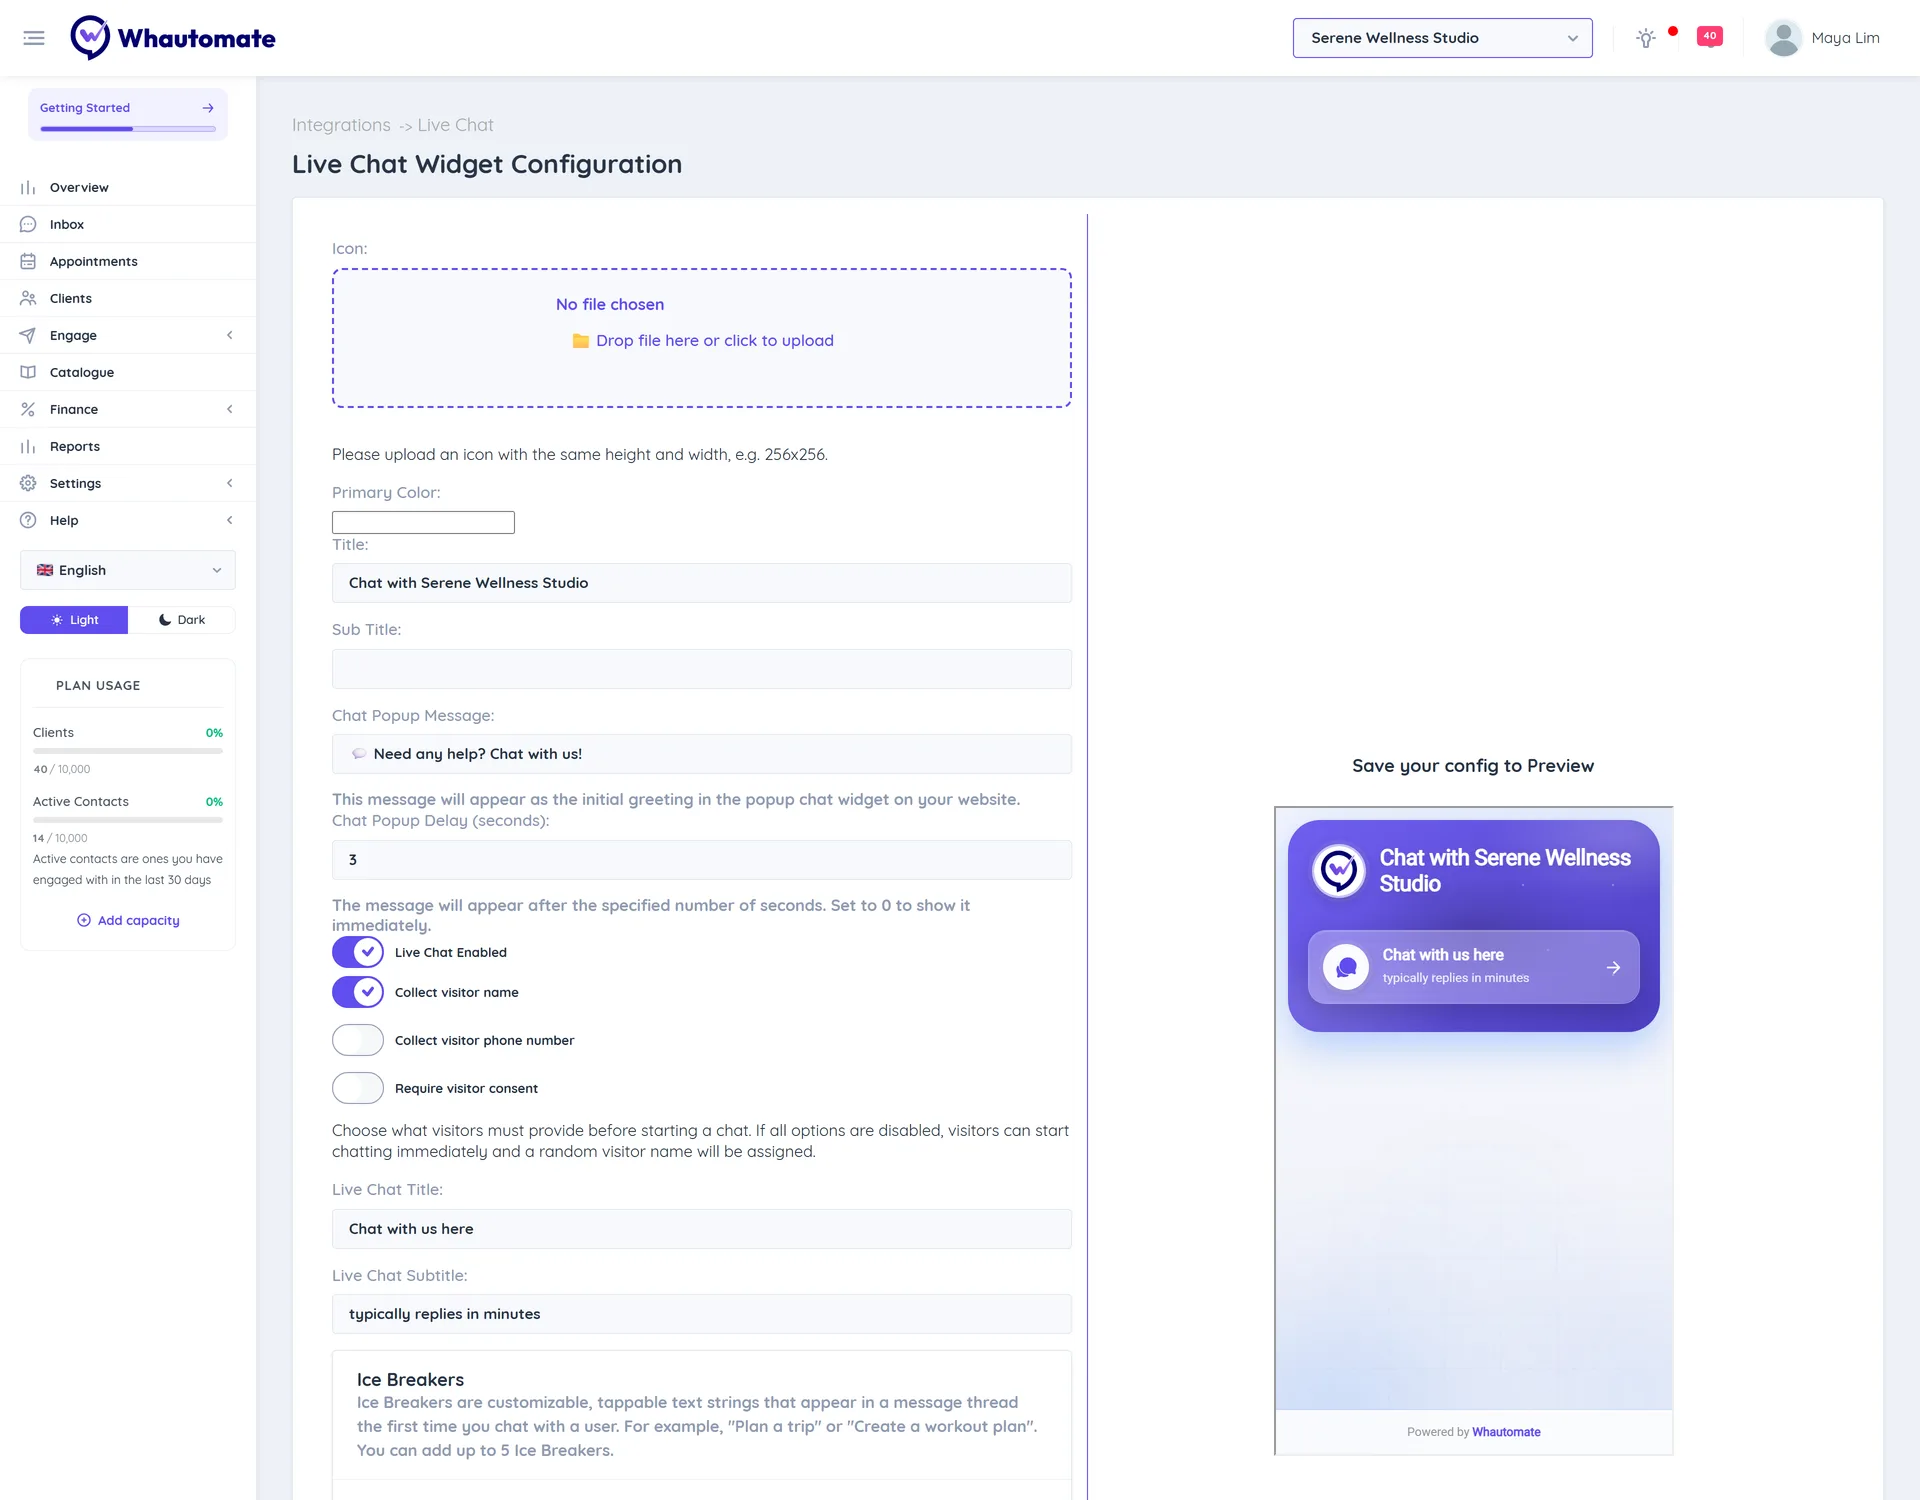
On Live Chat Widget Configuration, set how the widget looks:
- Icon: a square image, for example 256x256.
- Primary Color:, Title: and Sub Title:.
- Chat Popup Message: the greeting bubble shown next to the chat button, and Chat Popup Delay (seconds): how long to wait before showing it (0 shows it straight away).
-
Turn on Live Chat Enabled to let visitors chat on your site, then choose what they must give before chatting: Collect visitor name, Collect visitor phone number and Require visitor consent. If all are off, visitors can start straight away and get a random visitor name. Set the Live Chat Title: and Live Chat Subtitle:.
-
Under Ice Breakers, add up to 5 tappable questions such as "Book a massage" or "Opening hours" (Add Ice Breaker). Visitors see them as buttons when their conversation is still empty; tapping one sends it as the visitor's first message, so your chatbot can answer it.
-
To offer other channels, turn on WhatsApp Enabled, Instagram Enabled, Messenger Enabled or Telegram Enabled and fill in the title, subtitle and URL for each (for example
https://wa.me/6591234567). Click Open to test a link. -
Click Save & Preview. The preview on the right shows your widget.
Add the widget to your website
- Under Installation Instructions, click Copy.
- Paste the code just before the closing
</body>tag of your website, or in your website builder's "custom code" or footer section so it appears on every page. - Publish your website and open it. The chat button appears in the corner.
Other places the widget can appear:
- Online booking page: turn it on in Online booking settings (linked from the live chat page).
- Whautomate Sites: turn on Livechat Widget on the Website in your site's configuration.
What visitors see
- Bot check: when a visitor starts a conversation, Cloudflare Turnstile checks in the background that they are a person. Most visitors never notice it; Cloudflare shows a short challenge only when it is unsure. If the check fails, the widget shows Verification failed. Please try again.
- Messages and files: visitors can send text, images, videos, documents and audio files (up to 16 MB). Voice notes and audio, from your team or the visitor, play in the chat with the same player as the Team Inbox.
- Ice breakers appear until the first message is sent.
Answer website chats
Website chats appear in the Team Inbox with a browser icon. Reply as you would on any channel. If the visitor gave a phone number, you can click Message on WhatsApp in Contact Info to continue on WhatsApp.
If your account is at its active contact limit, a new visitor can still start a chat, but it arrives locked: it gets no automated replies and your team sees Upgrade to see this conversation until you are under the limit. See Active contact limit.
To block someone who misuses the chat, turn on Block Contact in their contact details. They see You are blocked from messaging this business.