Workspaces
A workspace is one location or branch of your business inside your Whautomate account. If you have two studios, two practices or a shop and a salon, give each one its own workspace. Each workspace has its own address, opening hours, team members and calendar, while your plan, billing, account settings and logins are shared across the account.
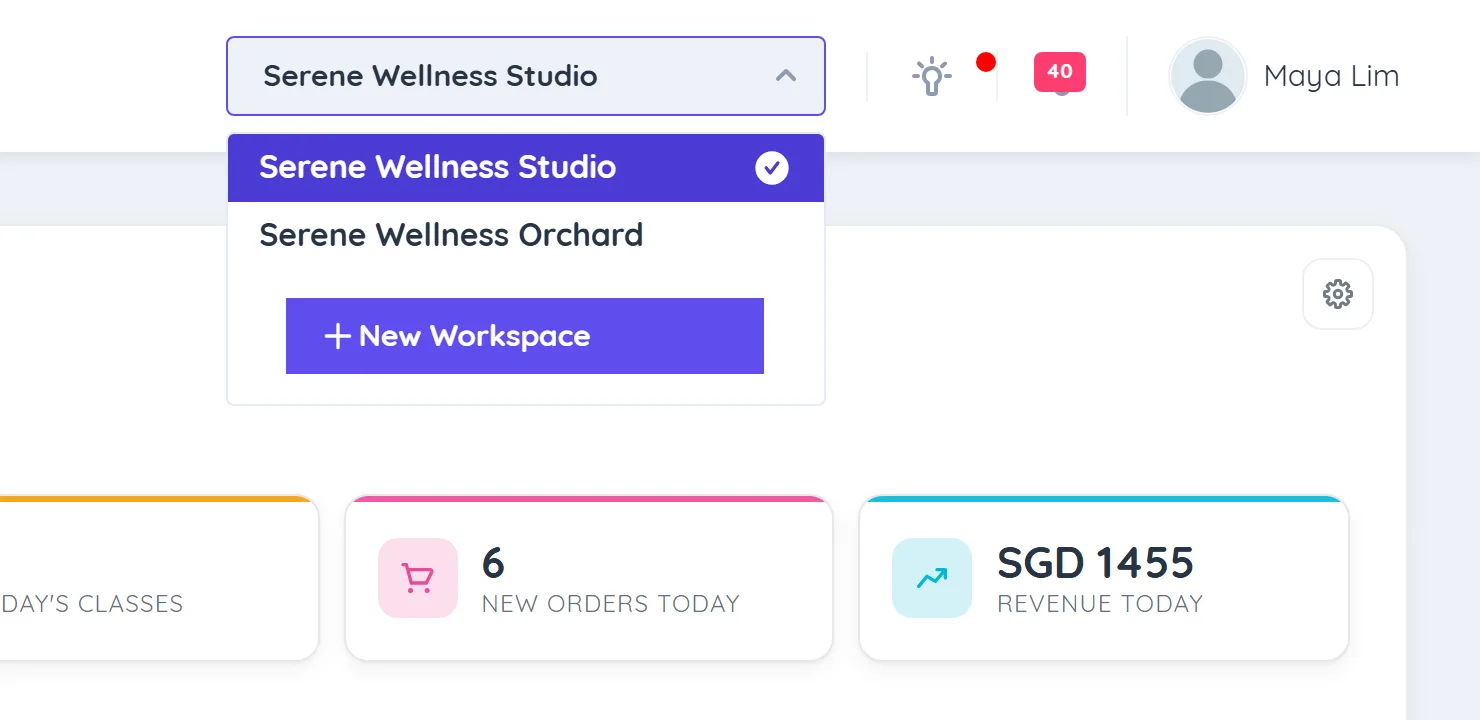
Everything you see in the app belongs to the workspace selected at the top of the screen. Switch workspace to work in another location.
Before you start
- Only the account Owner and Administrators can create workspaces.
- Your plan includes a number of locations. To add more, buy an Extra location add-on. See Whautomate Add-ons. For prices, see our pricing page.
Switch workspace
- At the top of the screen, open the workspace dropdown. It shows the name of the workspace you are in.
- Choose another workspace. The current one has a tick.
- In Switch Workspace, check the name after You're about to switch to and click Okay, Continue.
Whautomate opens the new workspace. Team members see the workspaces they are assigned to in their team member profile.
Create a workspace
- Open the workspace dropdown at the top of the screen and click New Workspace.
- Enter the Workspace Name and choose a Category.
- Under Search Address, type and pick your address, or click Or Type Address Manually and fill in Address Line 1, Unit/Suite etc, District/Locality, City and Postal Code.
- Click Create Workspace. You see New Workspace created successfully!
If you see You have reached maximum number of locations, your plan has no free location. Add an Extra location or deactivate a workspace you no longer use first. See Deactivate or Delete.
After creating a workspace, add team members to it (edit each member and tick the workspace under Workspaces), connect its channels and set up its services. See Invite, Activate or De-activate Members.
Edit a workspace
- Switch to the workspace you want to edit.
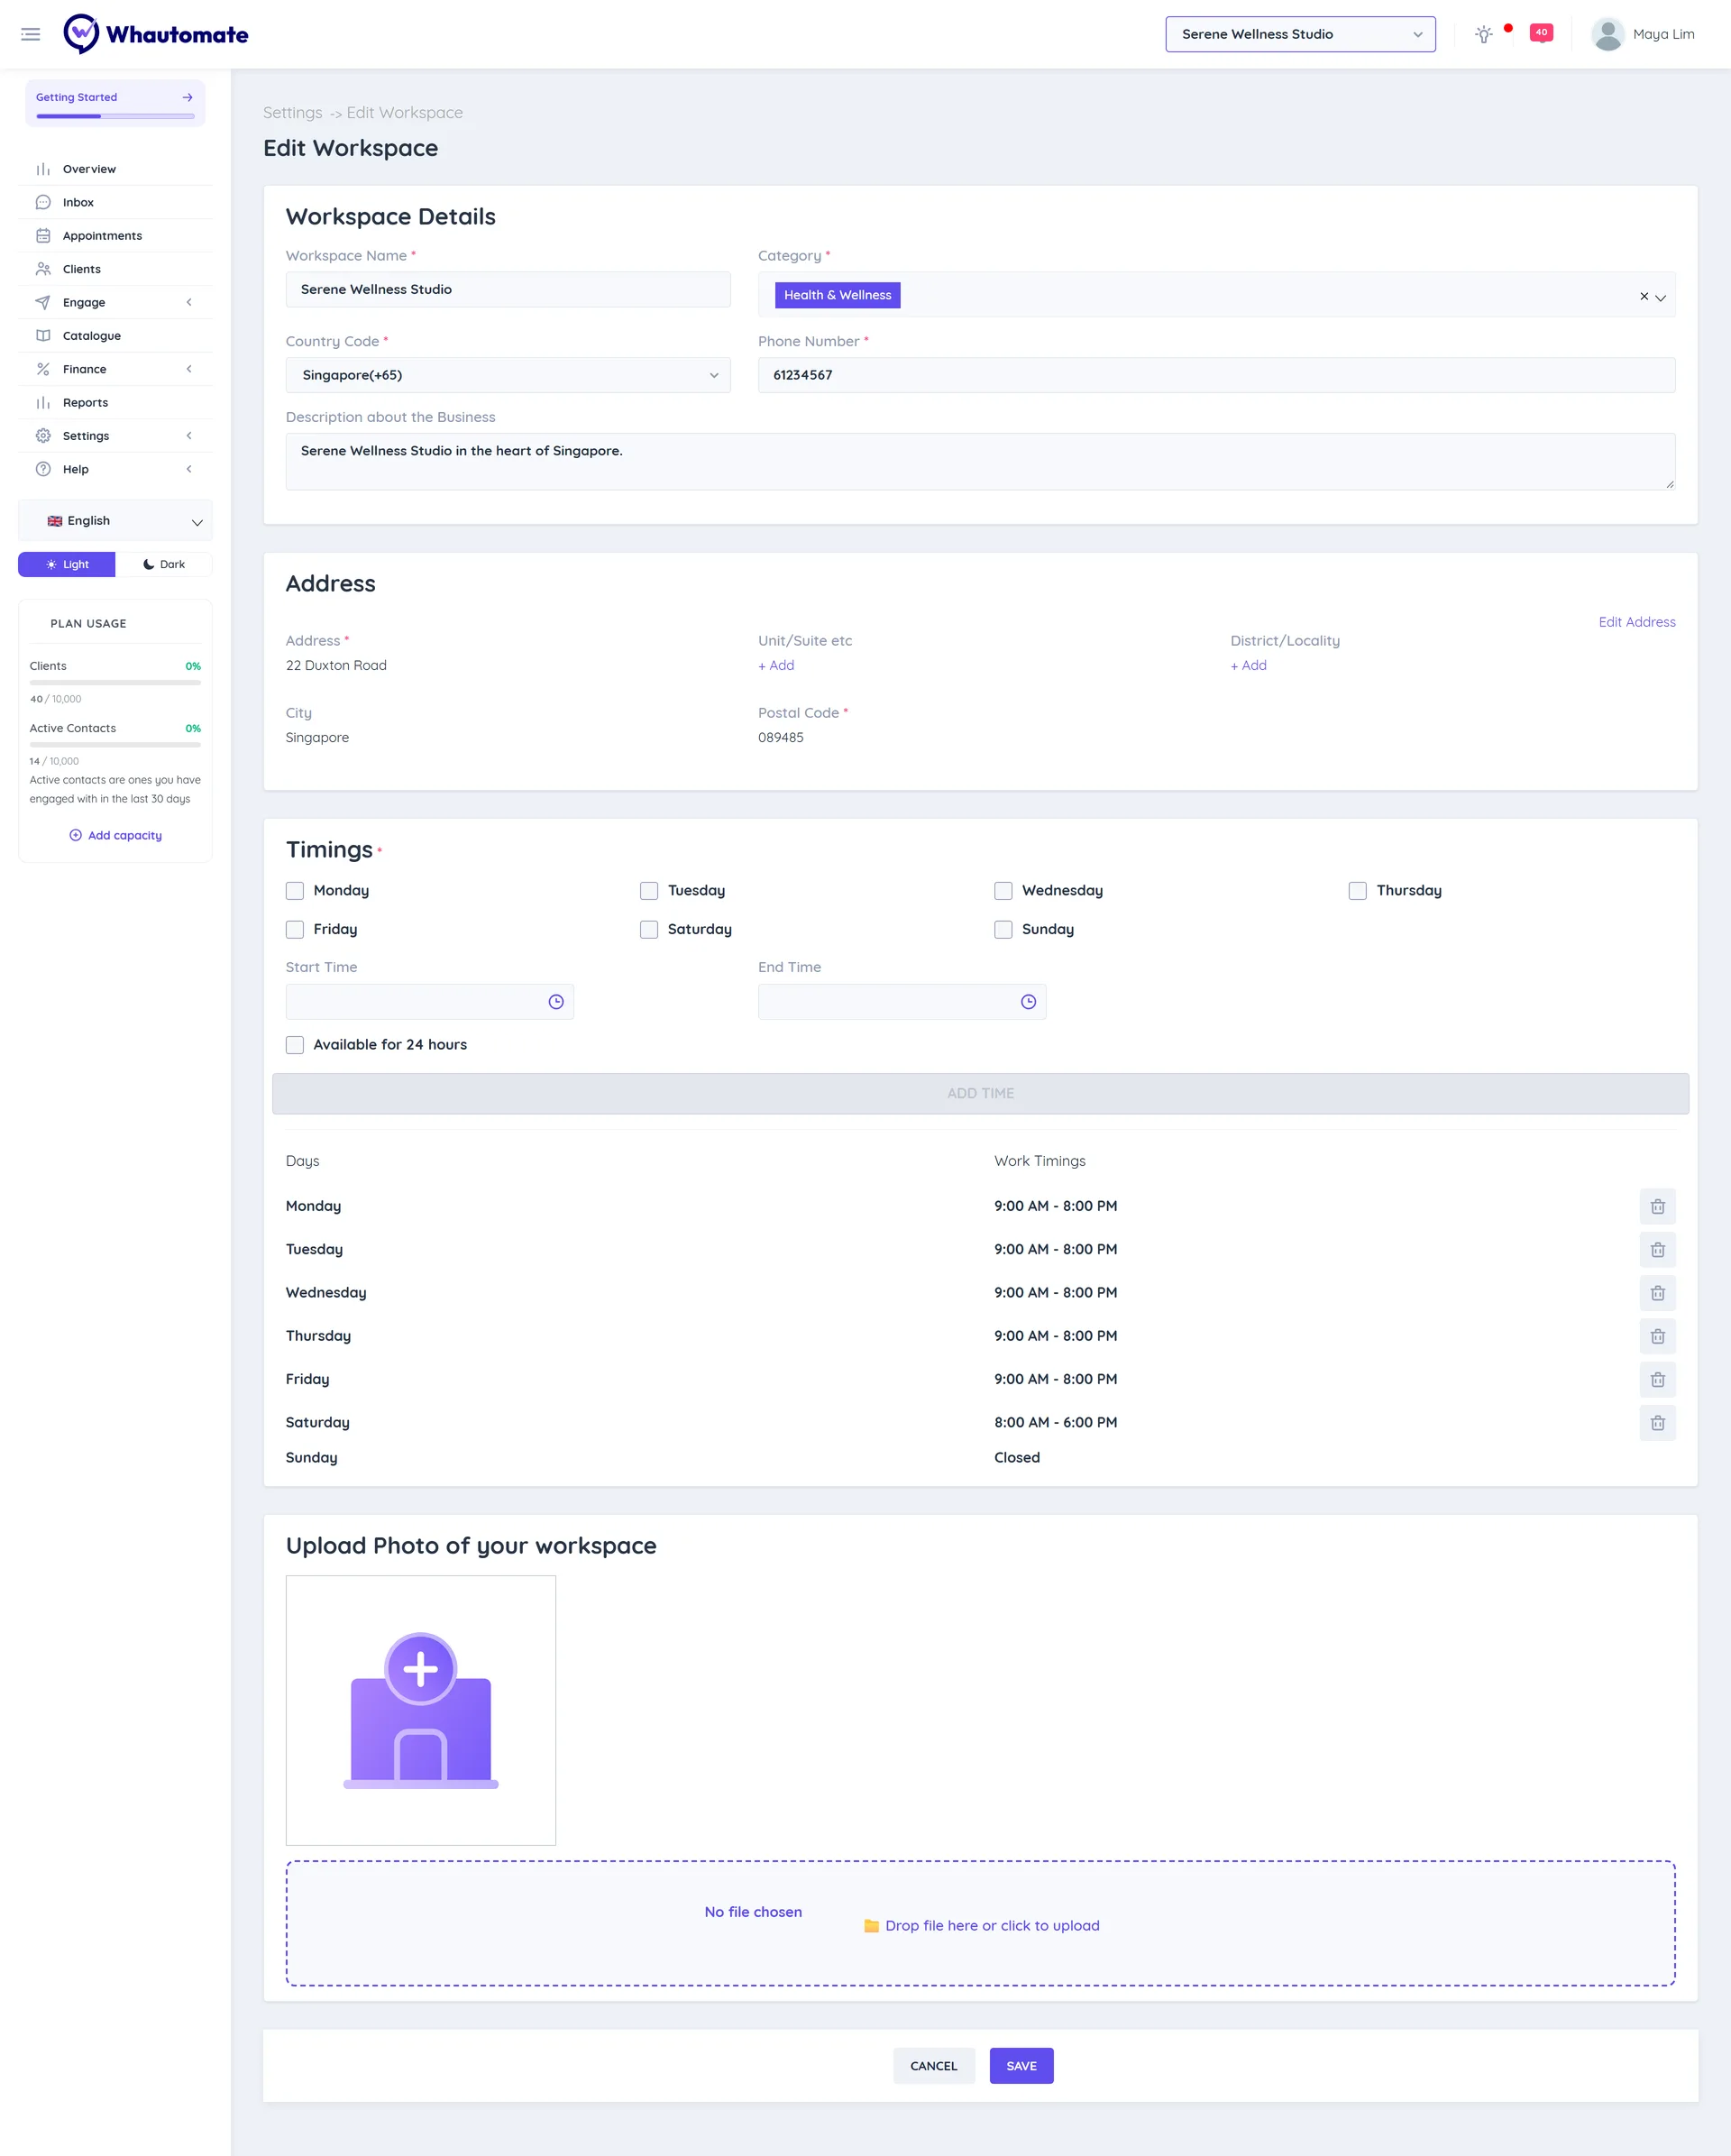
- Go to Settings > All Settings and, under Account & Team, click Edit Workspace.
- Under Workspace Details, update the Workspace Name, Category, Country Code, Phone Number and Description about the Business.
- Under Address, click Edit Address (or + Add) to change the address.
- Under Timings, set your opening hours:
- Tick the days, choose a Start Time and End Time, and click Add Time. Add more than one time range for a day if you close for lunch.
- Tick Available for 24 hours for days you never close.
- Days without hours show Closed.
- Under Upload Photo of your workspace, add a JPG or PNG photo (up to 20 MB).
- Click Save. You see Workspace Successfully Updated.
The Scheduler and Accountant/Finance Manager roles cannot edit a workspace.
Reports across workspaces
Most reports show the workspace you are in. The Clients report can filter by Primary Workspace, the Activity Log can filter by Workspaces, and the weekly Performance Report combines all your workspaces.