Sites
Sites is a website builder for your business. Start from a ready-made template, edit pages with drag and drop, and publish on a free subdomain or your own domain. Use it if you do not have a website yet, or want a simple, fast site with your live chat widget and links to your booking portal, without paying for a separate website builder.
Before you start
- CRM Suite includes one website. To build more, add extra websites as an add-on. If you reach your limit, creating a site shows "You have reached your website limit".
- Only admins can open Sites.
Create a site
- In the main menu, open Settings > Sites (or Settings > All Settings > Sites under Website & Booking Portal).
- Click Create Site.
- In Select Template, filter with Select Category or Search templates.... Click Preview to look at a template.
- Click Use Template on the one you like, or Create site from Scratch.
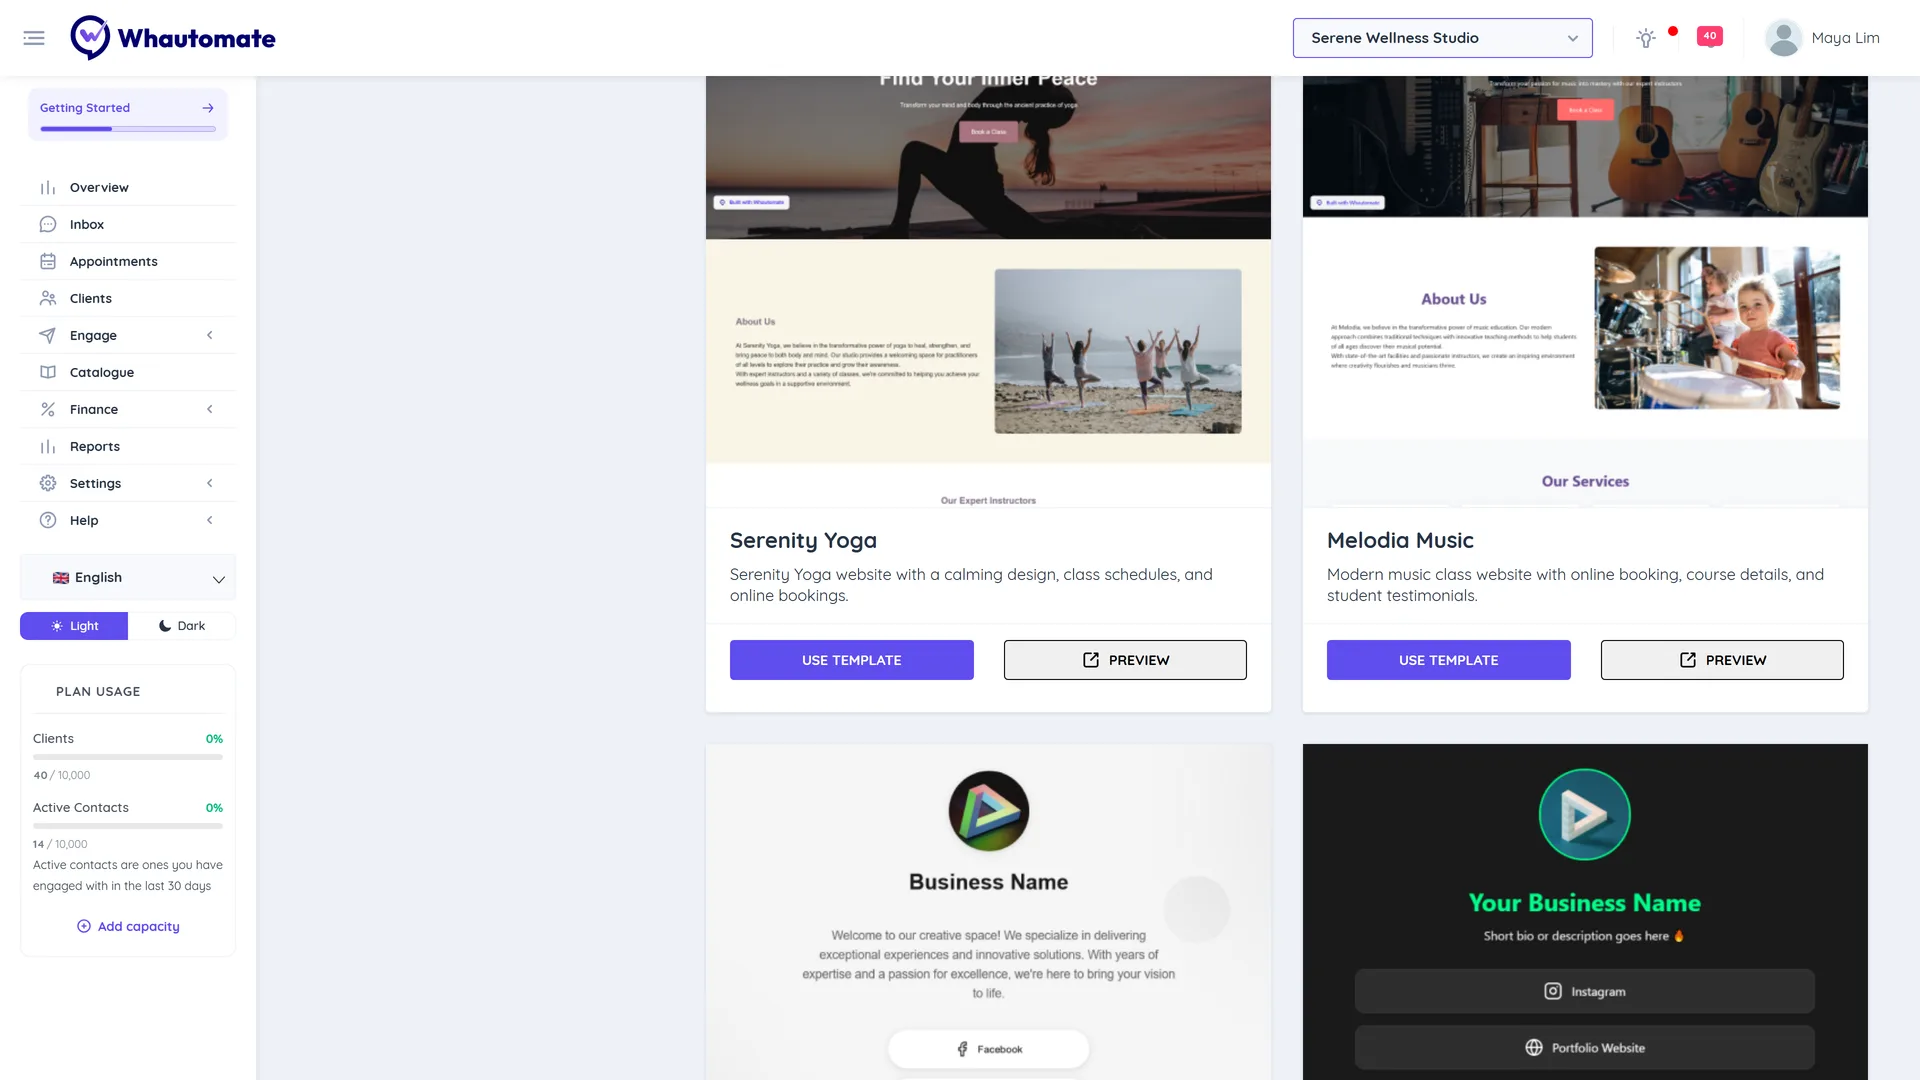
The new site opens with three tabs: Pages, Website Settings and Domain.
Edit pages
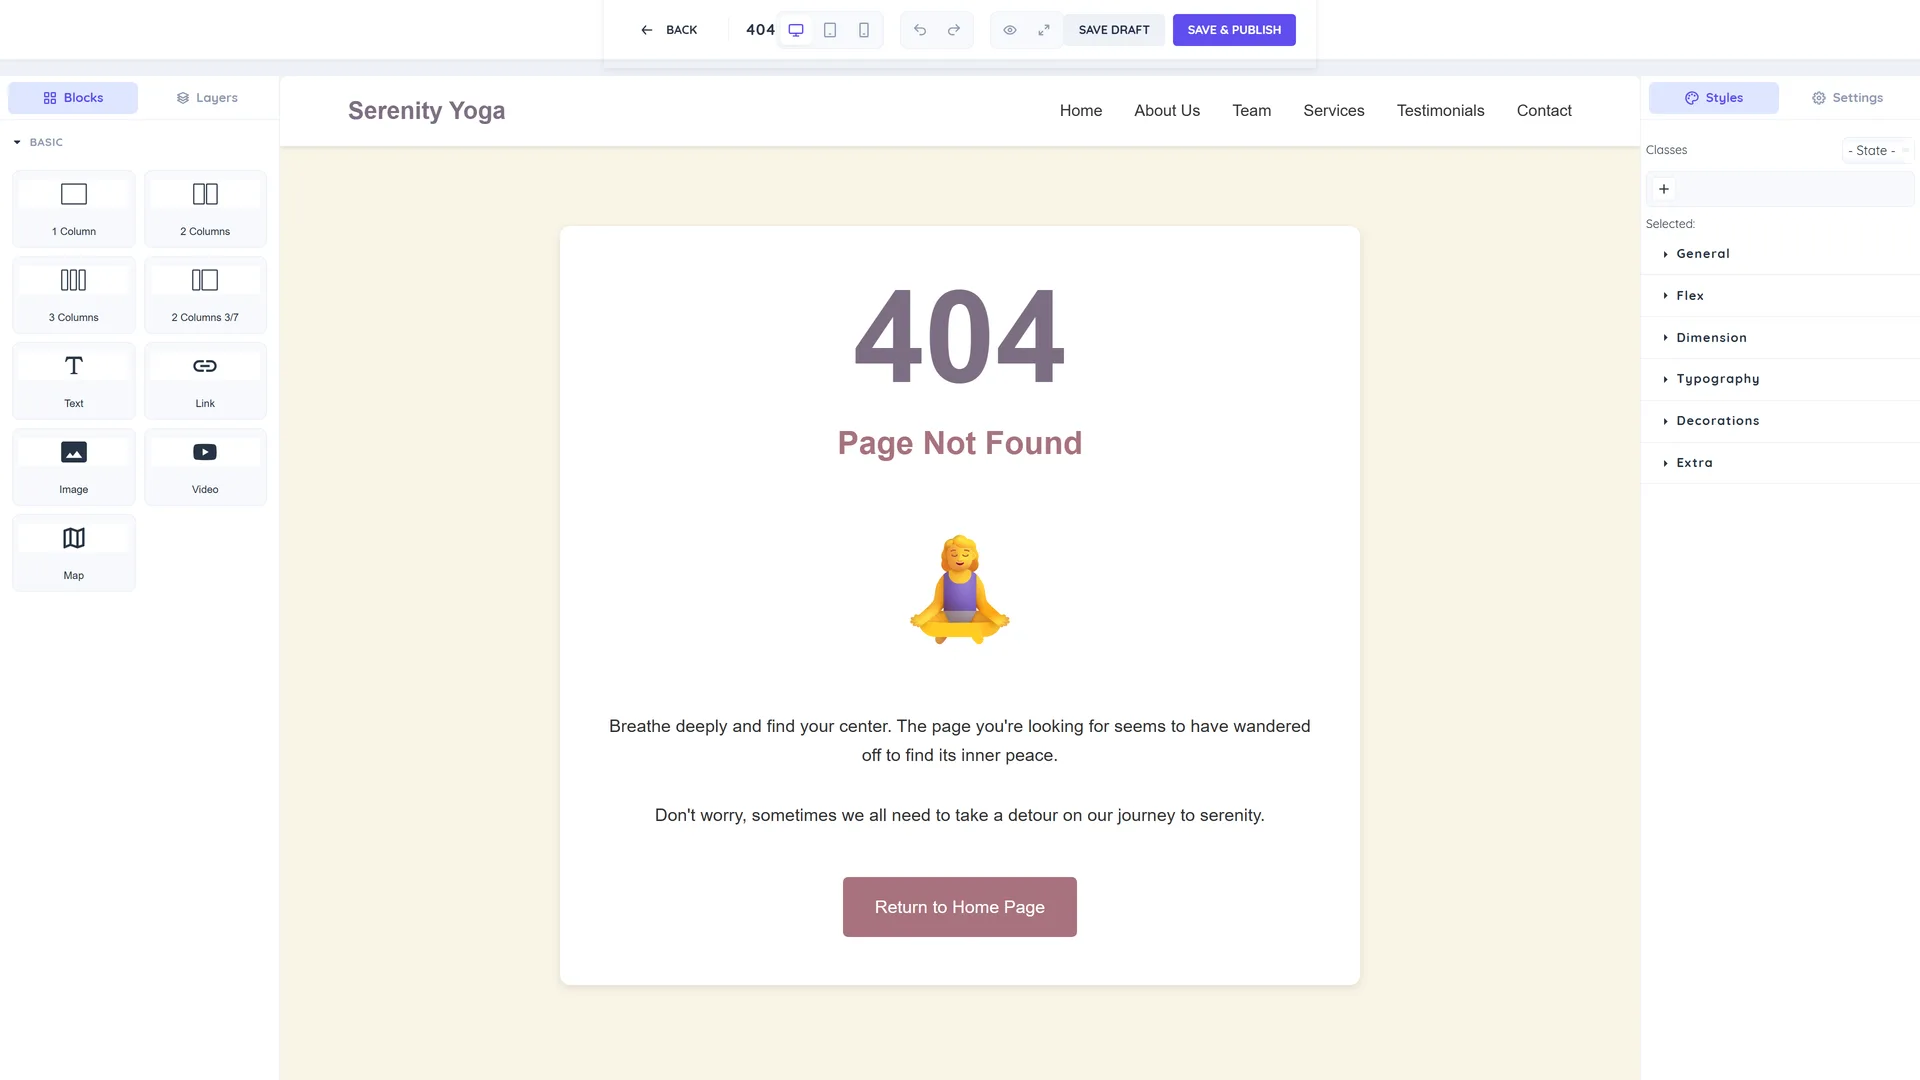
- On the Pages tab, click Edit Page on a page. The page editor opens.
- Drag blocks onto the page, click text and images to change them, and adjust styles.
- Click Save Draft to keep your changes without publishing, or Save & Publish to make them live. Click Back to return.
To add a page, click Create Page, enter a Name and a Slug (the last part of the page link: lowercase letters, numbers and hyphens, for example about-us), and click Save.
The More Actions menu on each page offers:
- Visit Page to open the live page
- Clone Page to copy a page with a new name and slug
- Metadata to set the Page Name, Slug, Is Home Page?, SEO Meta Title, SEO Meta Description and Keywords
- Page Versions to open, edit or delete earlier versions of the page
Website settings
On the Website Settings tab, under General Configuration:
- Website Name for your reference.
- Upload Your favicon: the small icon in the browser tab. Use a square image of at least 32 x 32 px.
- Livechat Widget on the Website: shows your live chat widget on every page. Click Manage Live Chat Configuration to change it.
- Enable Google Analytics: enter your Google Analytics Measurement ID (it starts with
G-) to track visits.
Click Save.
Set up your domain
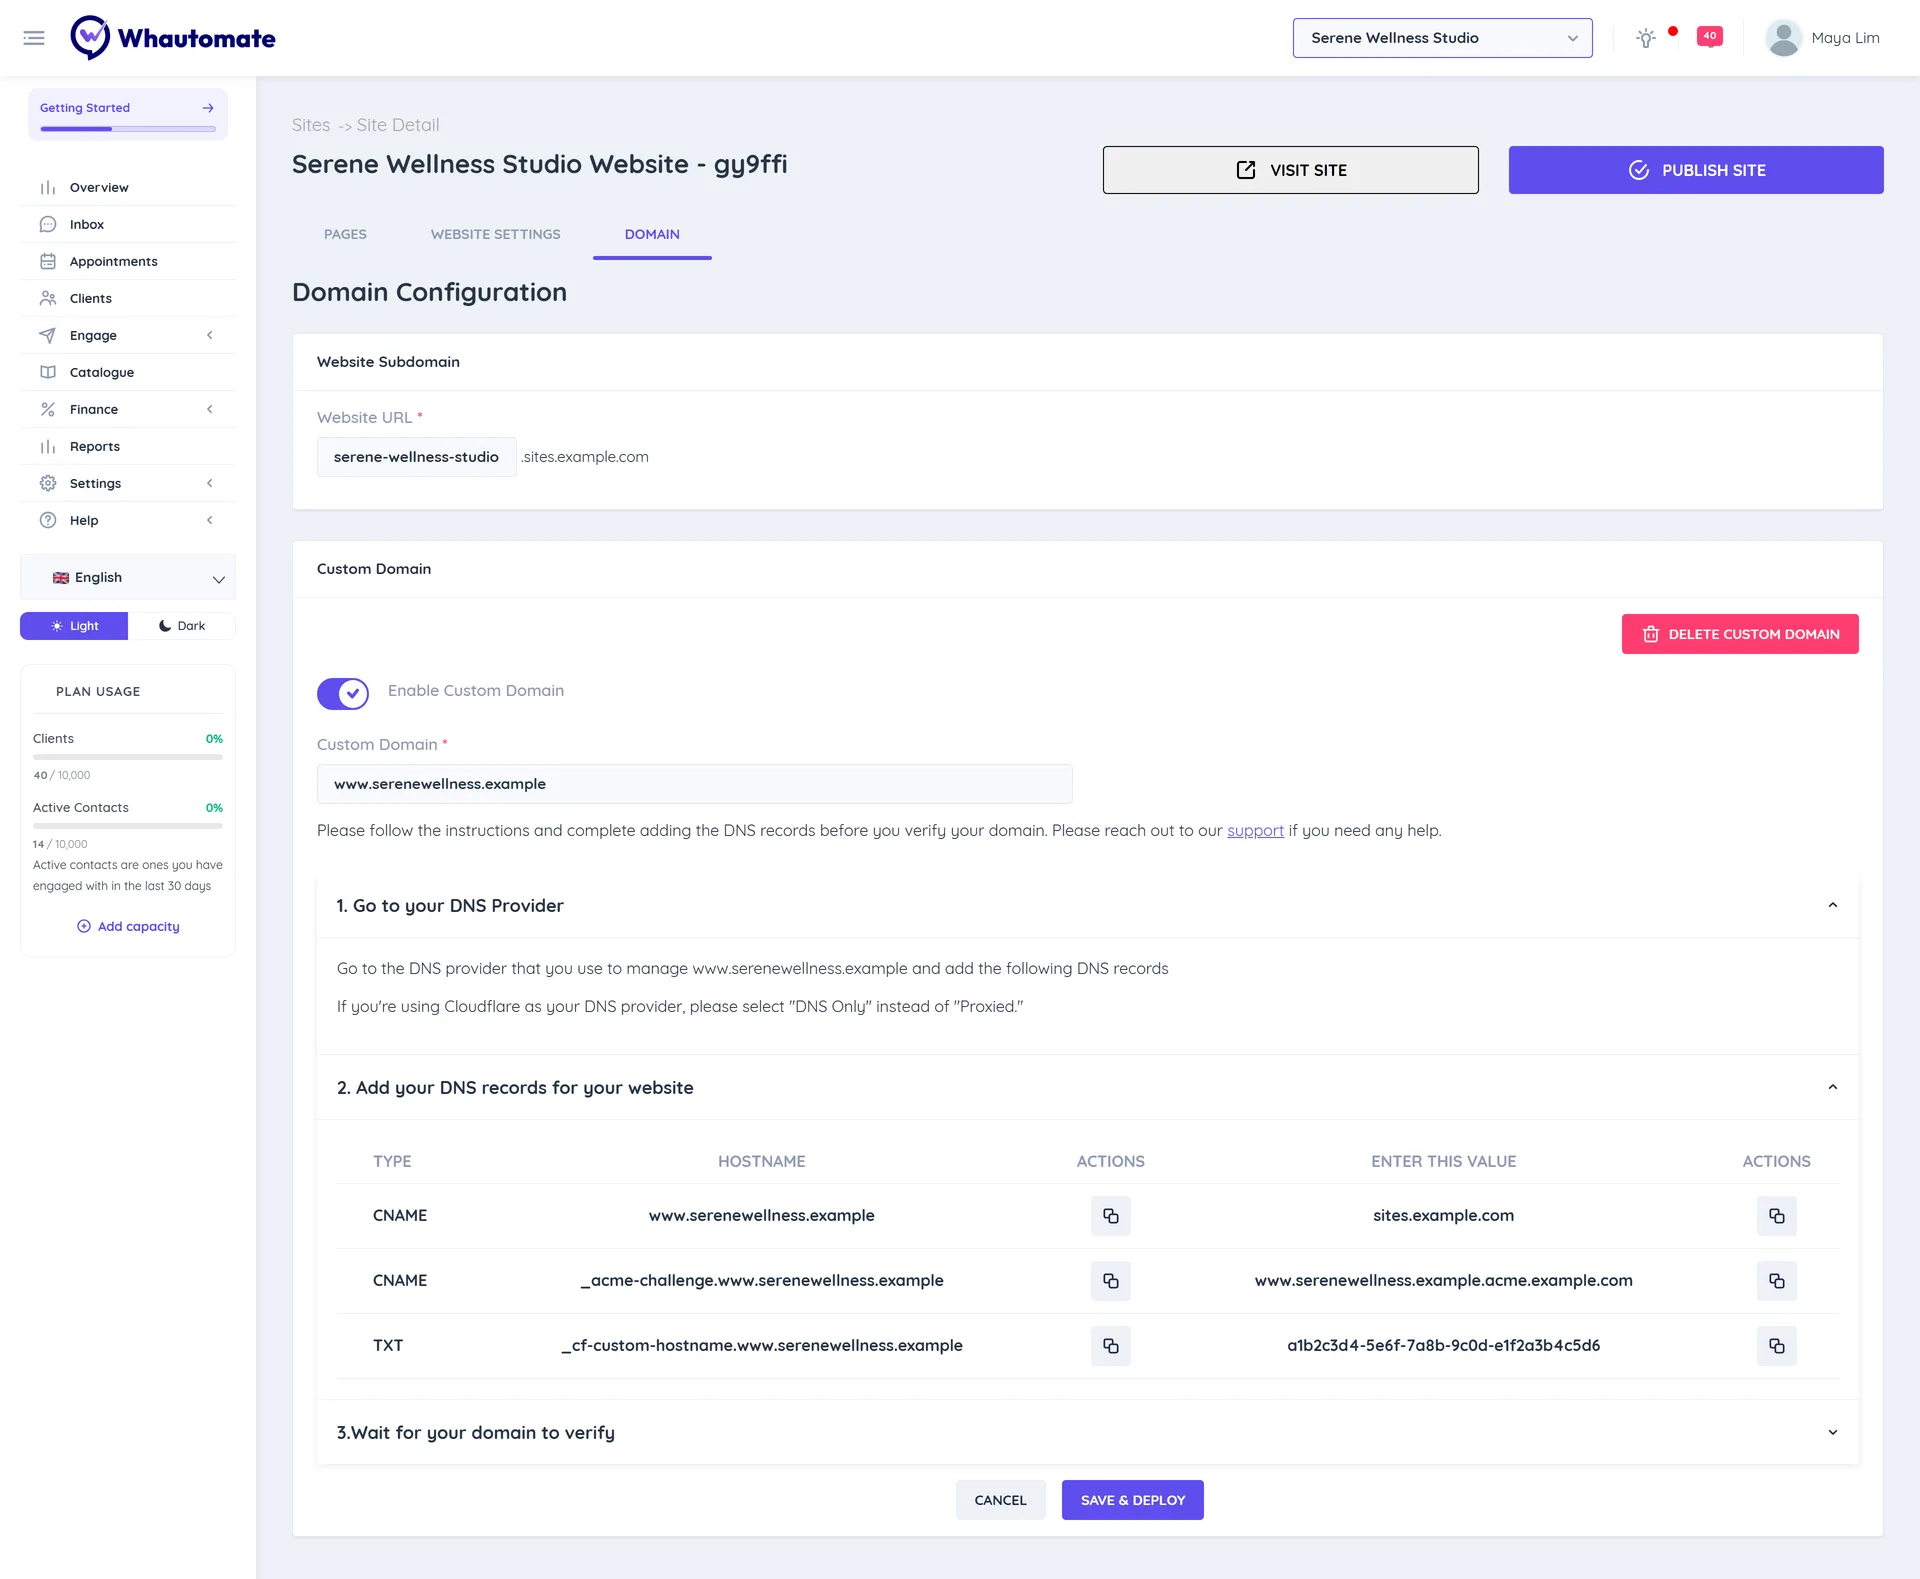
Every site gets a free subdomain. On the Domain tab:
- Under Website Subdomain, change the Website URL if you like and click Save & Deploy.
- To use your own domain, turn on Enable Custom Domain under Custom Domain and enter it, for example
www.serenewellness.com. - Go to your DNS provider and add the DNS records shown in the table (Type, Hostname, value). Use the copy buttons to avoid typos.
- Wait for your domain to verify. DNS changes can take a while to reach everyone, depending on your DNS provider.
Set the records to DNS Only, not Proxied, or the domain cannot be verified.
Publish
Click Publish Site on the site, or open More Actions in the sites list and choose Publish Site. A Website - Deployment in Progress banner shows while it goes live. Click Visit Site to see it. To take a site offline, choose Unpublish Site in the sites list.
Related
- Client portal
- Live chat
- Web forms to embed a form on your site
- Whautomate add-ons