Setup Classes
A class has two parts. The class service describes what you offer: name, price, credits and the usual number of places. The class sessions are the dated occurrences on your calendar, such as "Morning Yoga Flow, Monday 7:00 AM with Sofia". Create the service once, then schedule as many sessions as you need, one at a time or as a recurring series.
Your instructors are set up as team members. See Setup Team Member Profile.
Step 1: create the class service
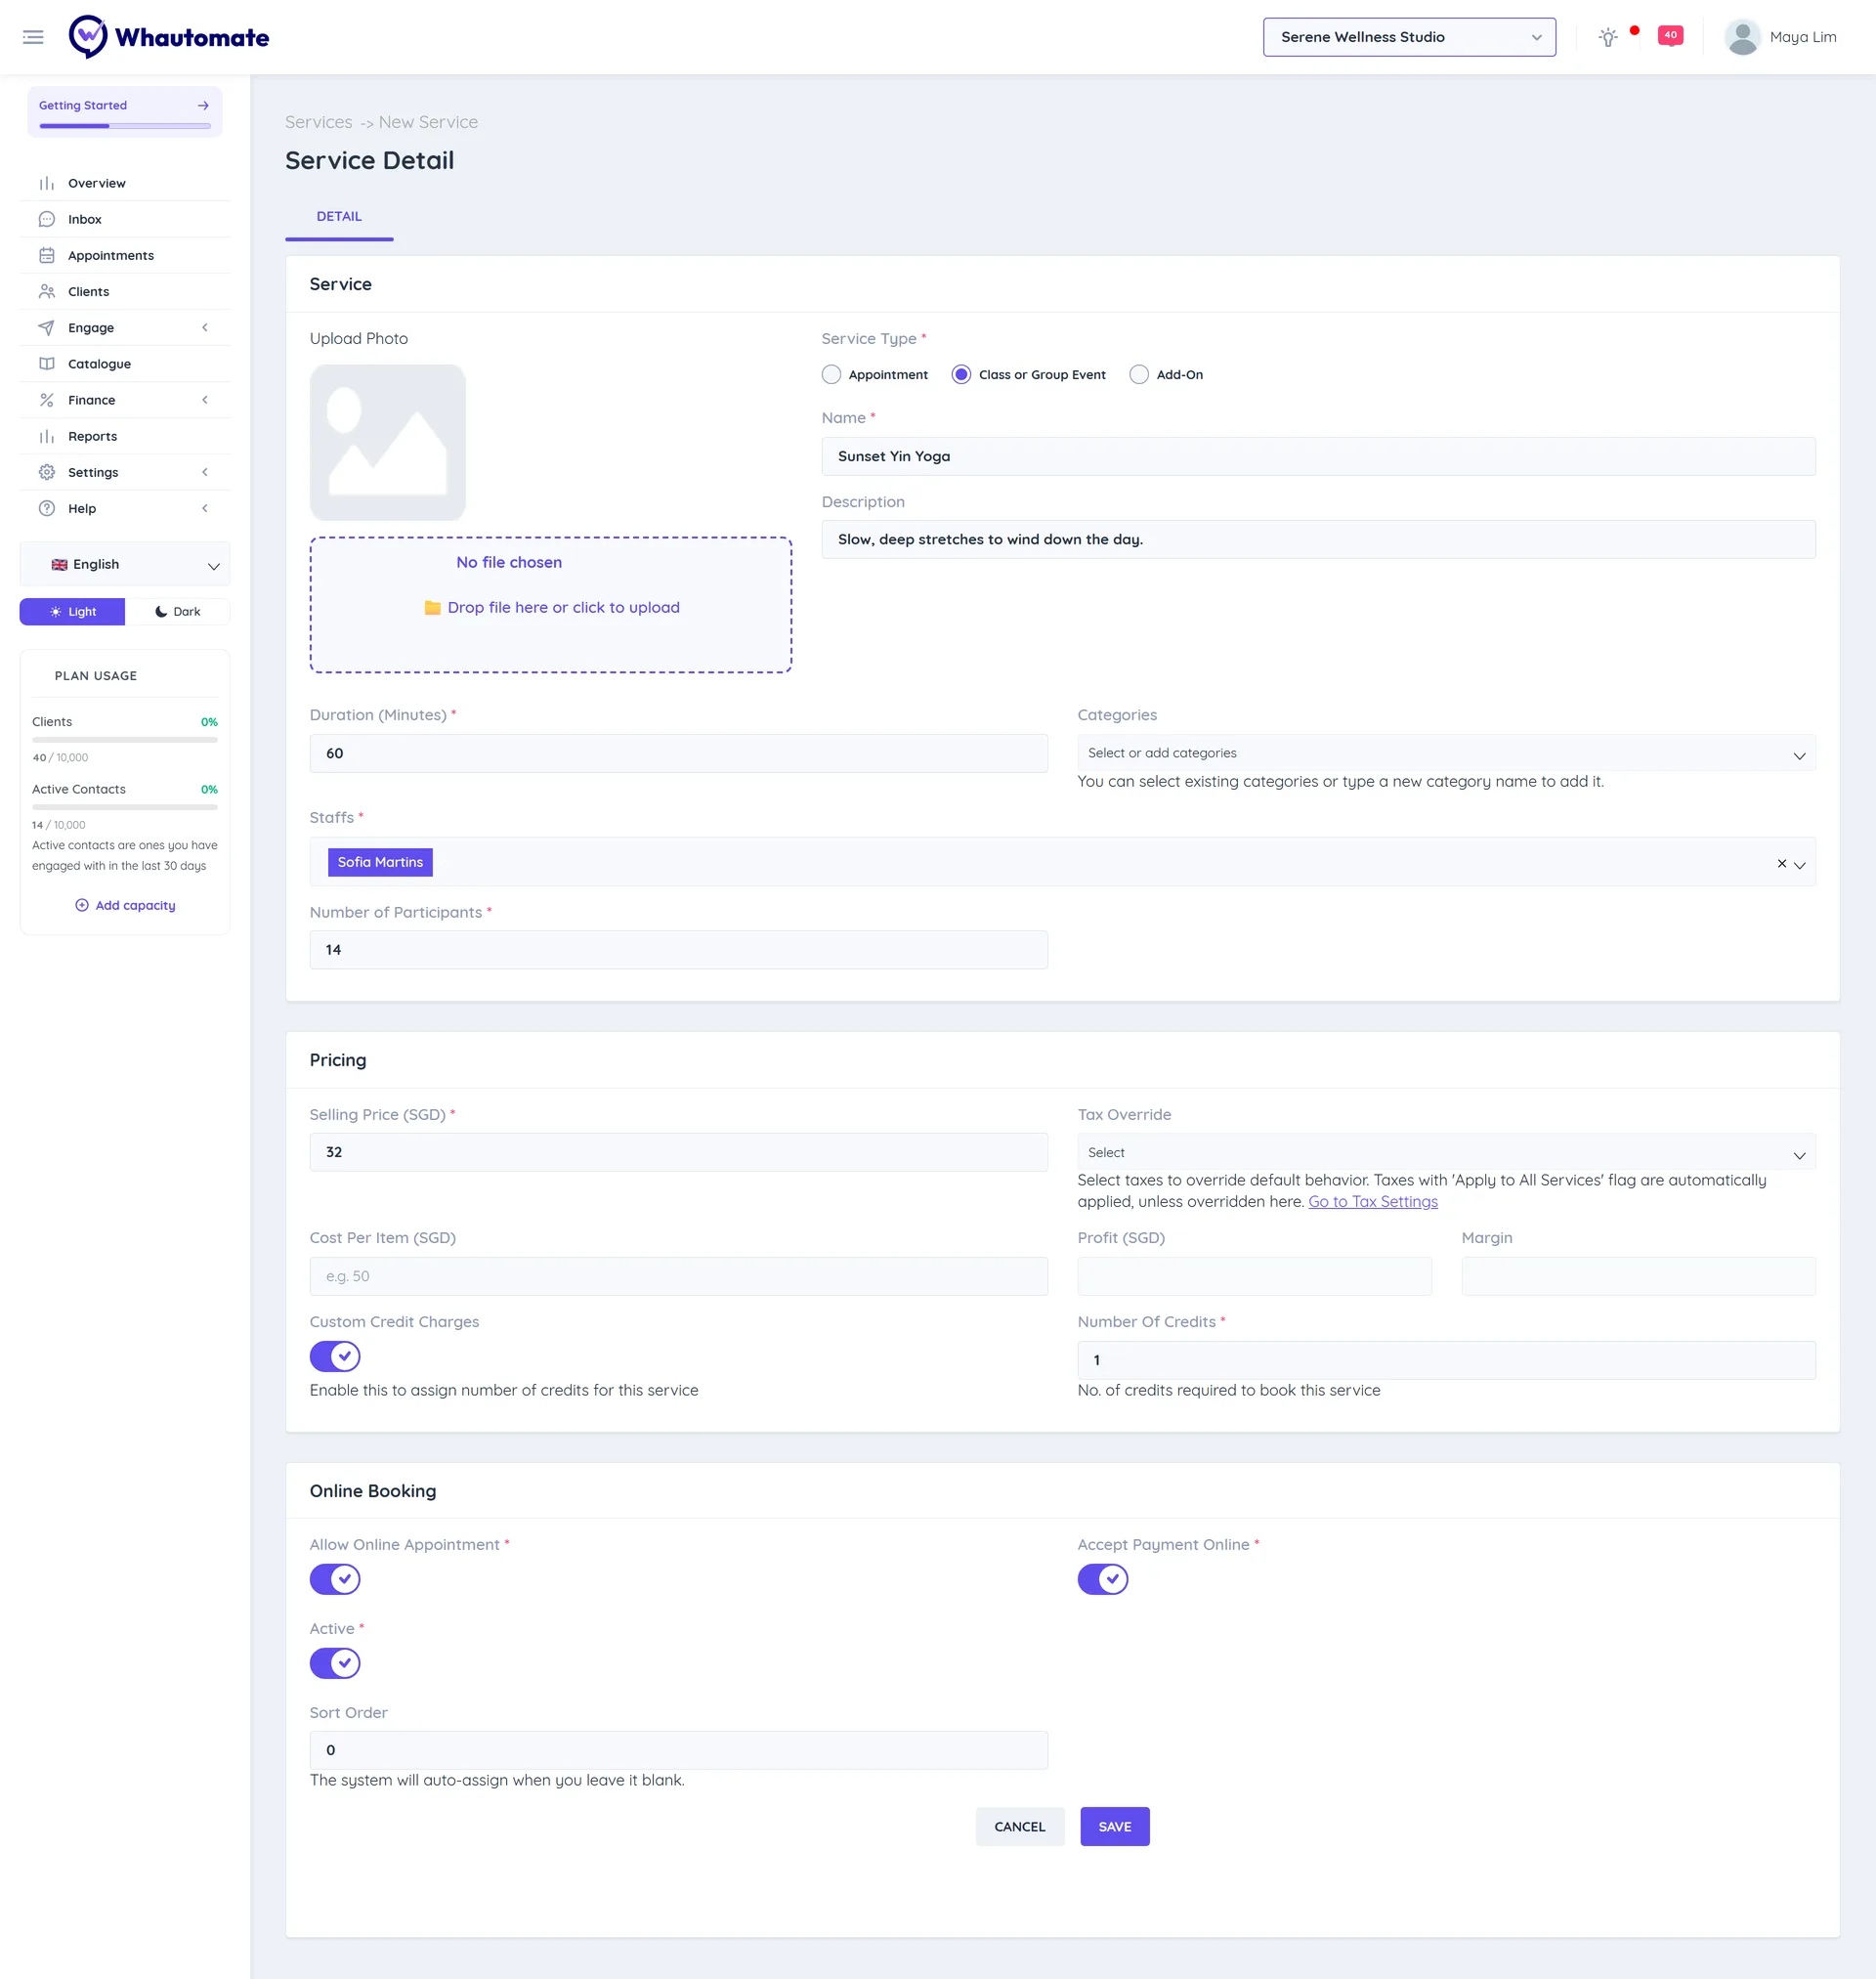
- Go to Catalogue > Services and click Add Service.
- In Service, choose Service Type Class or Group Event.
- Enter the Name, Description, Duration (Minutes), Categories and Staffs (instructors).
- Set Number of Participants: the default capacity for each session.
- In Pricing, set the Selling Price. Turn on Custom Credit Charges and set Number Of Credits if clients book with credits from a class pack.
- In Online Booking, turn on Allow Online Appointment so clients can book online, and Accept Payment Online to charge at booking.
- Click Save.
Step 2: schedule sessions
- Open the class service and go to the Classes tab, then click Add Class. You can also use Appointments > Add New > Class.
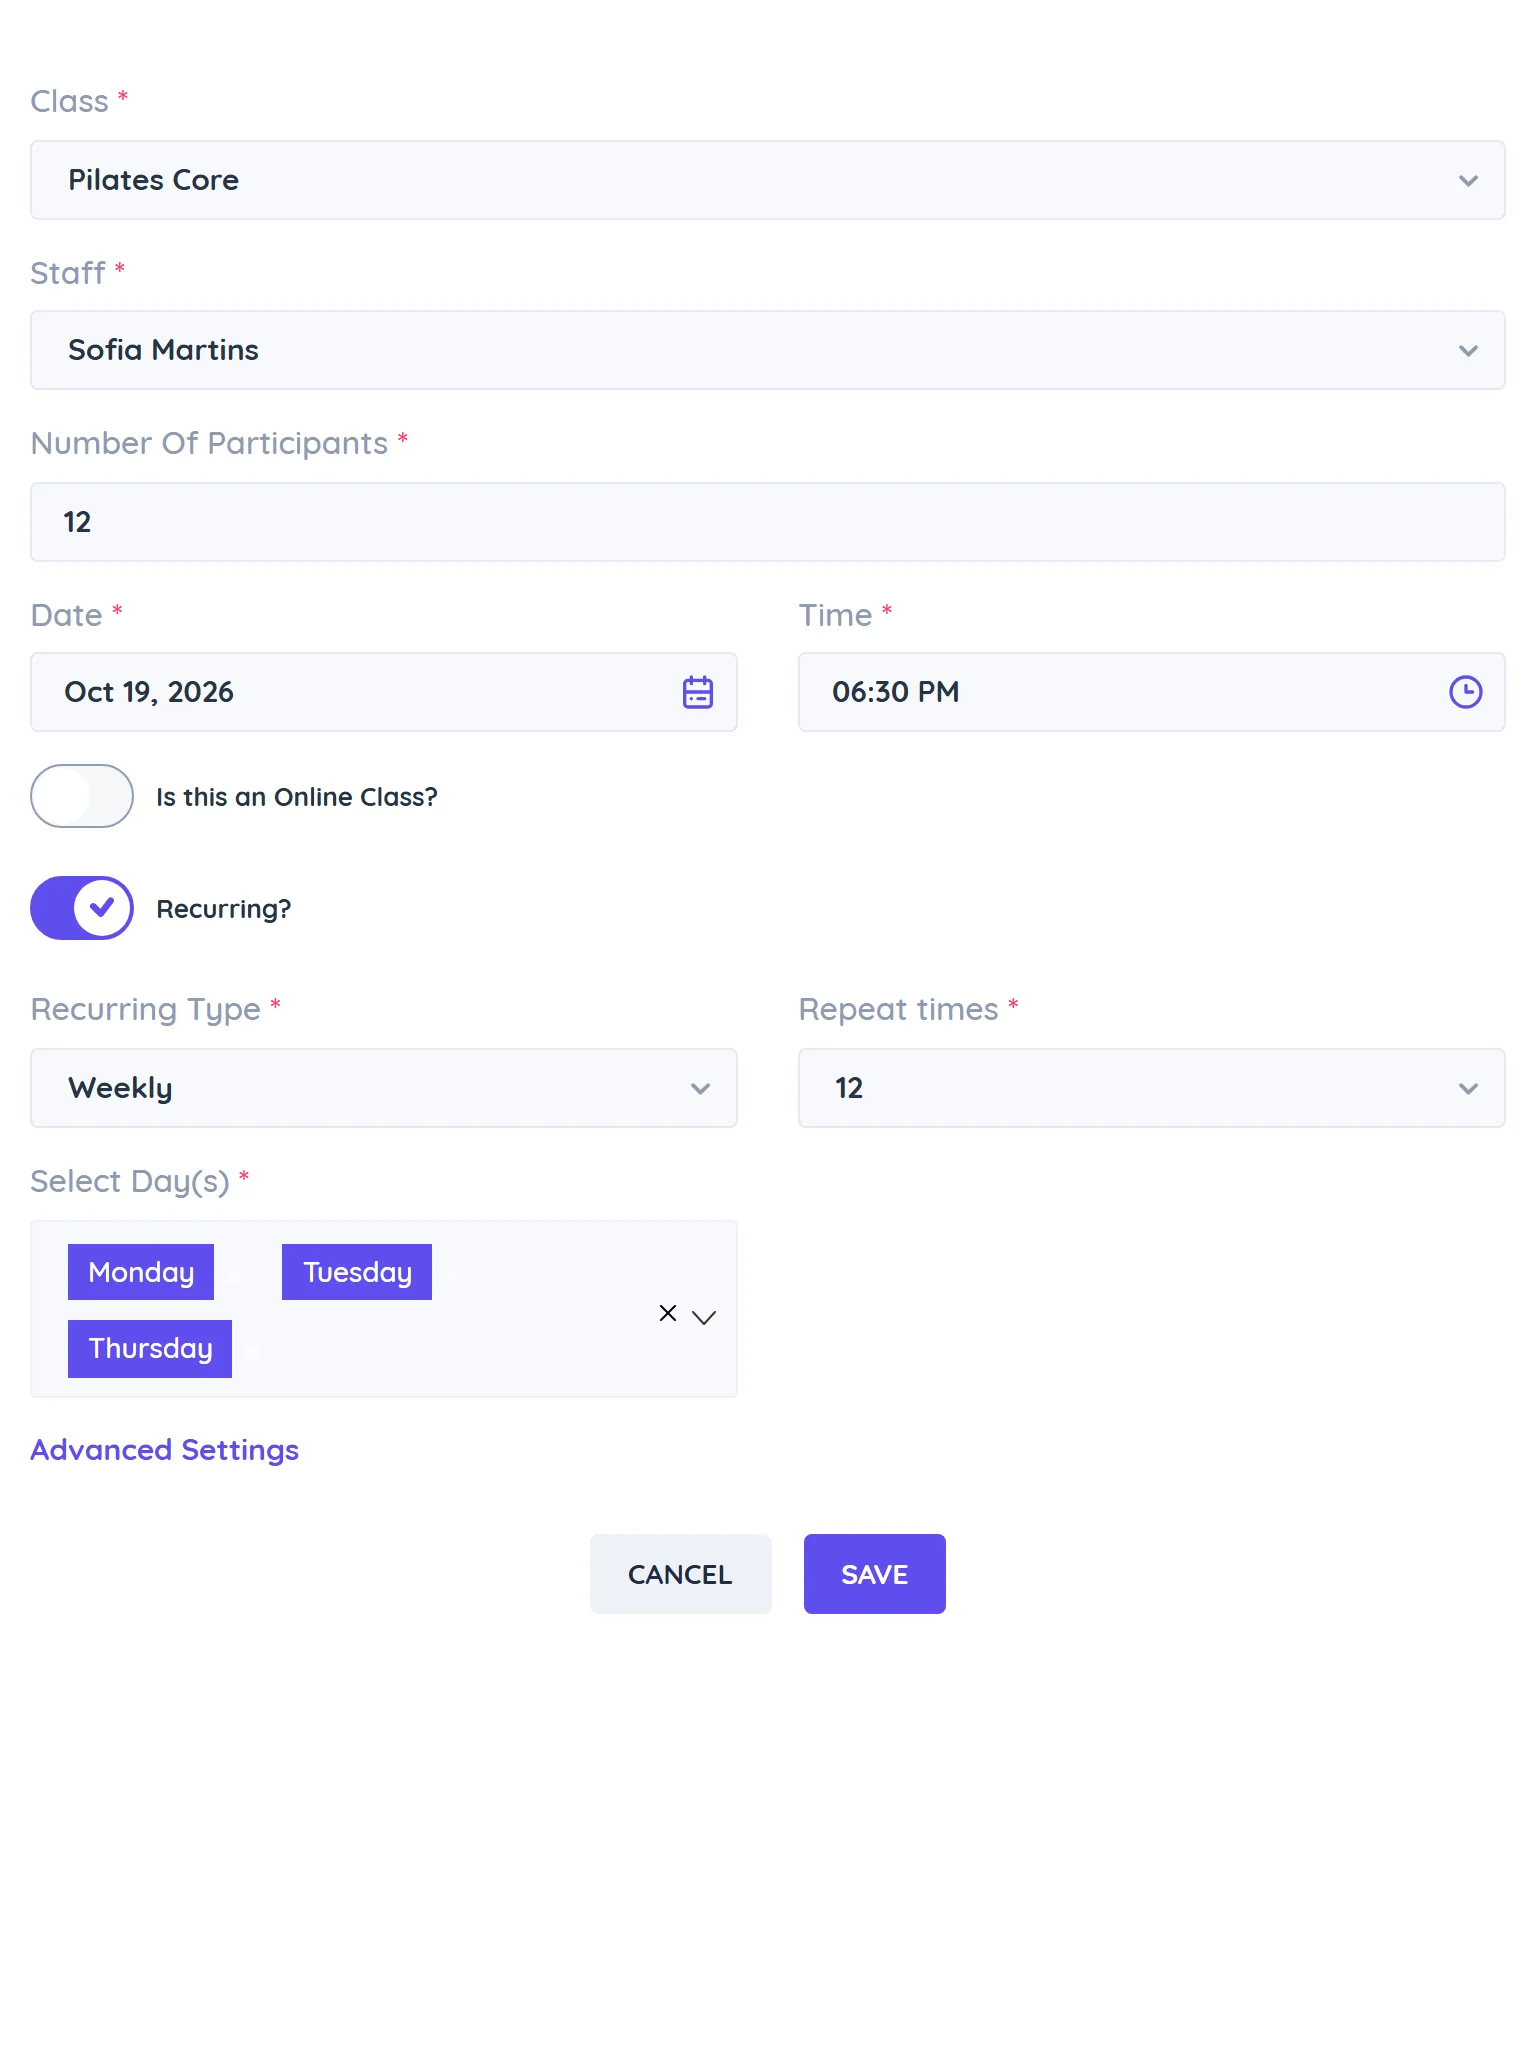
- In Add new Class, choose the Class, the Staff and the Number Of Participants for this session.
- Pick the Date and Time.
- For an online class, turn on Is this an Online Class? and enter the Online Class Link and, if needed, the Online Class Passcode.
- For a series, turn on Recurring? and choose the Recurring Type:
- Daily: Repeat times up to 31.
- Weekly: Repeat times up to 52 and Select Day(s), for example Monday, Wednesday and Friday.
- Monthly: Repeat times up to 12 and Select Date(s).
- Optional, under Advanced Settings: Close class registrations, [n] minutes in advance, Allow clients to cancel classes [n] minutes in advance and Hide staff name for class. These override the defaults in Appointment Settings.
- Click Save. You see "Class created successfully!".
Manage scheduled sessions
The service's Classes tab lists every session with its Schedule, Participants (booked of total), Staff and Status (Scheduled, Rescheduled, Completed or Cancelled). Filter with Date Range and Filter by status. From a row's menu:
- View Class Details to see and manage participants. See Manage Class Participants.
- Edit Class to change the time, instructor or capacity. Changing the time reschedules it.
- Add Participant or Add Batch.
- Cancel Class.
Tick several sessions to Delete Selected Classes, Cancel Selected Classes or Complete Selected Classes. Sessions also appear on the Appointments calendar, where you can drag them to a new time.
Tips
- Turn on Enable Waitlist for Classes in Appointment Settings to let clients join a waitlist when a session is full.
- Many sessions to create? Use Bulk Import Classes.