Setup Plans
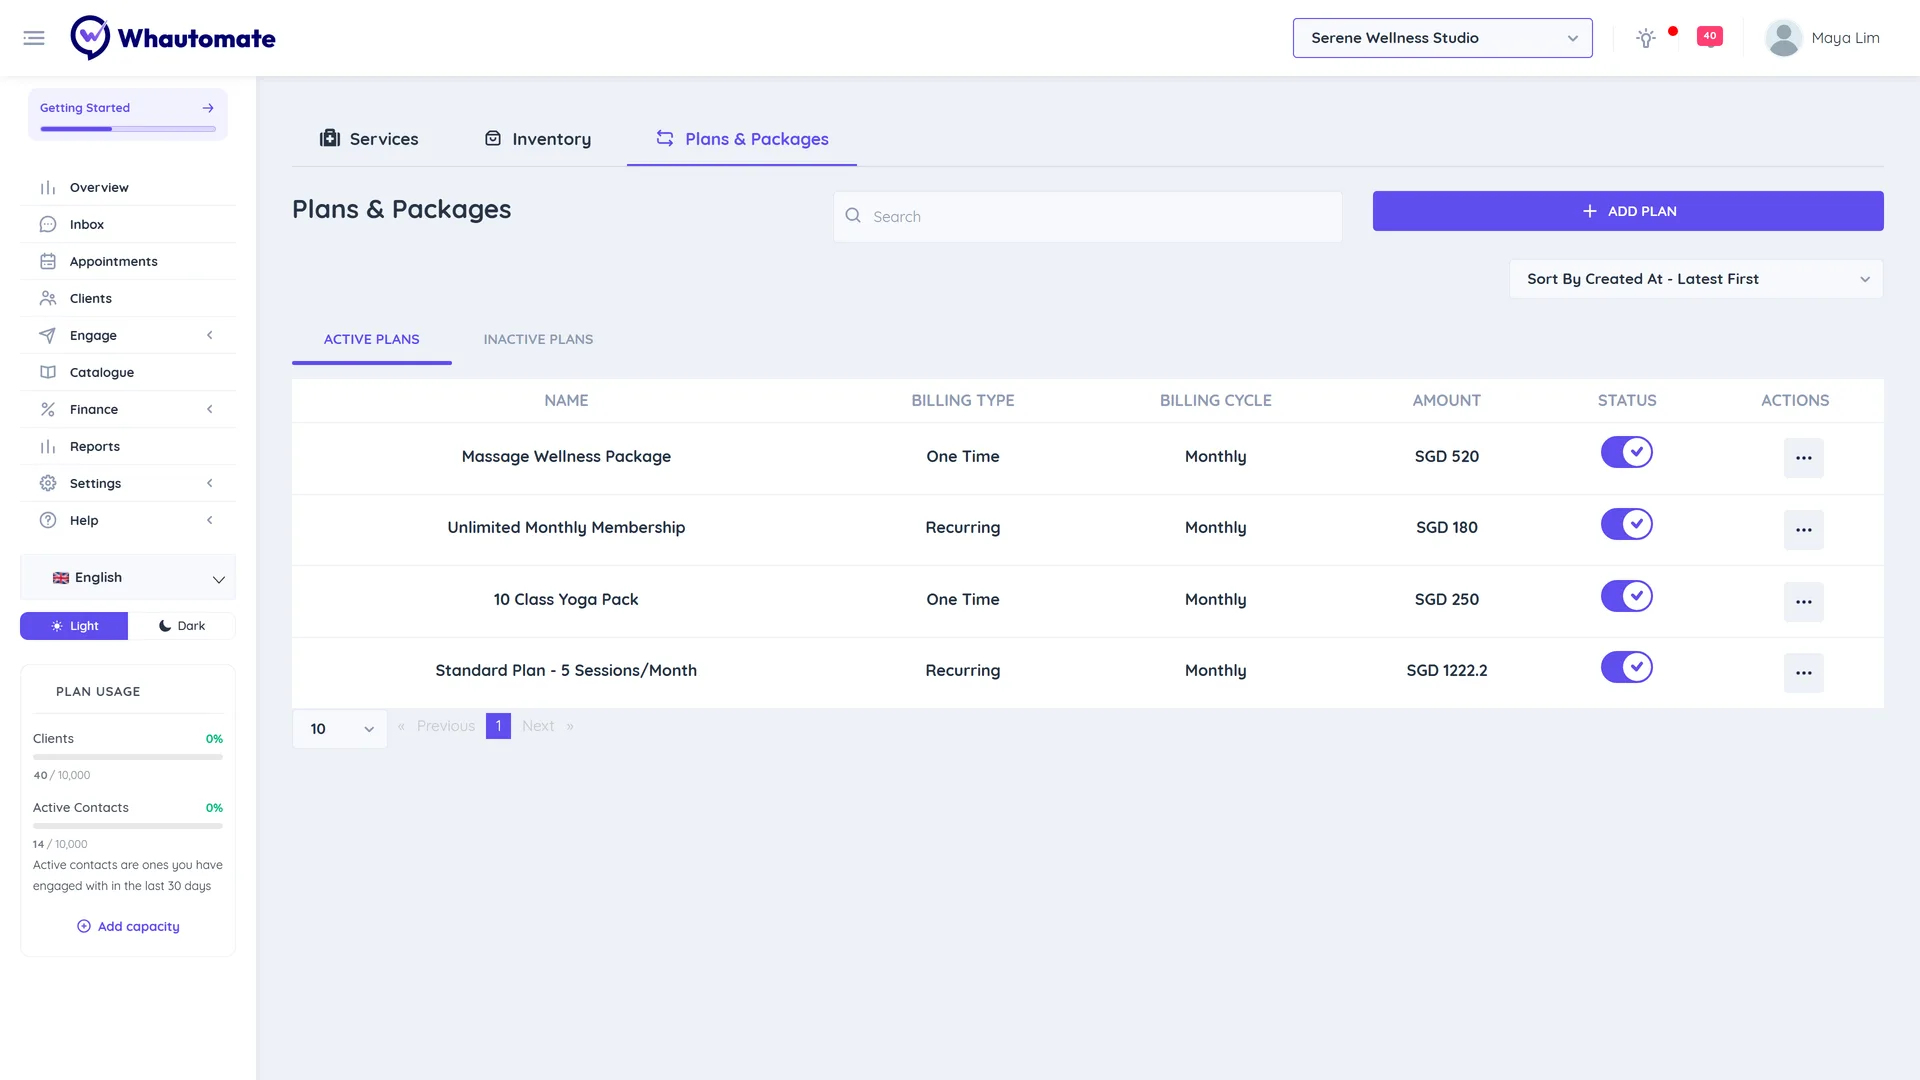
A plan is something clients buy once or on repeat: a class pack, a monthly membership, a treatment package or a product box delivered every month. Each plan has a price made of invoice items, a billing type, and optional credits that clients use to book services. Create plans when you sell sessions in bulk or want recurring income; then sell them to clients as subscriptions.
Before you start
- Add the services the plan covers in Catalogue > Services (and products in Inventory if the plan includes products).
- To charge cards automatically, connect Stripe. Other gateways work with payment links.
Create a plan
- Go to Catalogue and open the Plans & Packages tab.
- Click + Add Plan.
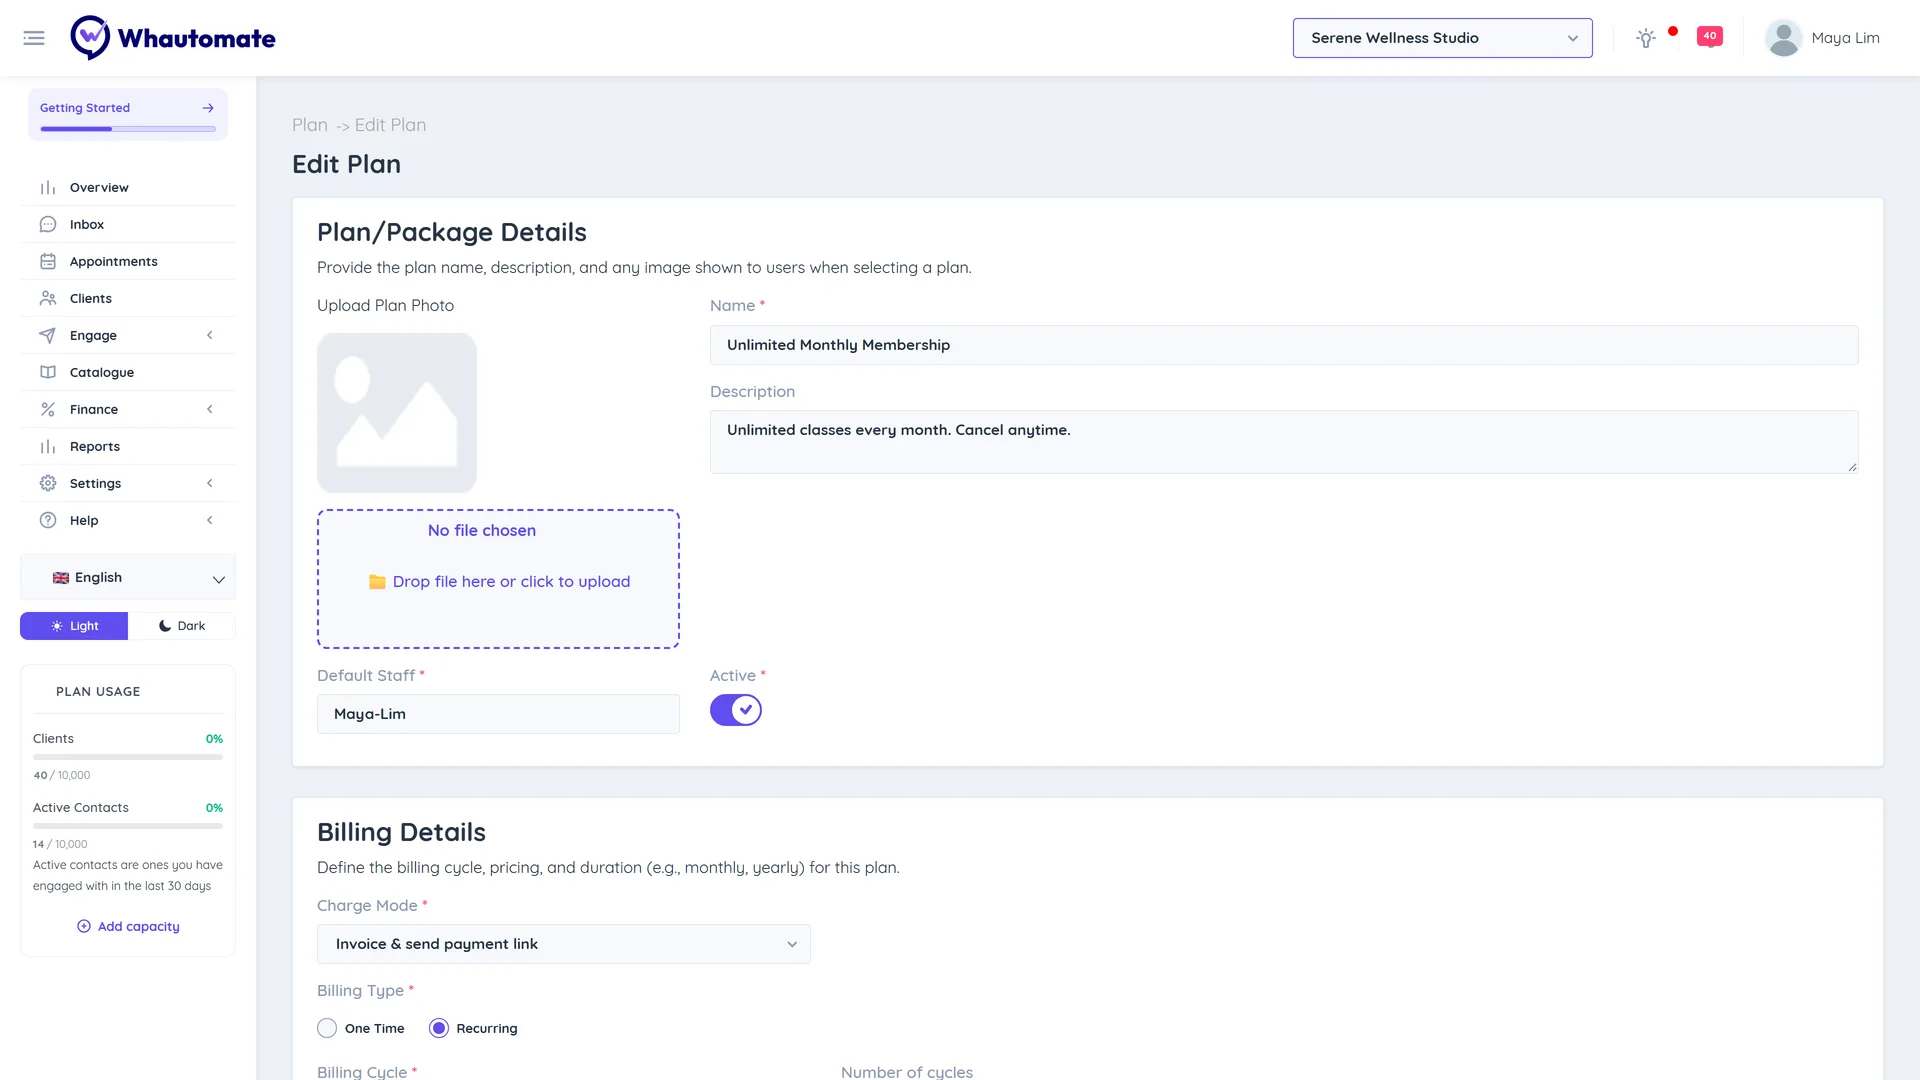
- Under Plan/Package Details, add a photo with Upload Plan Photo, then enter the Name, Description and Default Staff. Leave Active on.
- Under Billing Details, choose the Charge Mode:
- Save card & auto-charge (Stripe only): the client saves a card once and is charged each cycle.
- Invoice & send payment link: each cycle creates an invoice and sends a payment link.
- Choose the Billing Type:
- One Time for packs paid once, such as "10 Class Yoga Pack".
- Recurring for memberships, such as "Unlimited Monthly Membership". Then pick the Billing Cycle (Daily, Weekly, Monthly, Yearly or Custom with a Period and Cycle), and the Number of cycles (leave blank to charge until cancelled).
- For recurring plans, turn on Send Reminder Prior Billing and set No. of days prior to remind clients before each charge.
- Under Notification Channels, pick WhatsApp, Email and/or SMS for invoices and reminders.
- Under Invoice Items, click + Add Service or + Add Product and set the unit, price, discount and tax. The Total is the plan price.
- Under Credits Setup, set what the client can book (see below).
- Under E-Commerce, turn on Available on Online Store to sell the plan on your customer portal, and add Plan Images. Turn on Is this an order? if each cycle should create an order for products.
- Click Save.
Set up credits
Credits let clients book services without paying each time. Turn on Enable Credits, then:
- Credit Expiry and Period: how long credits last, for example 3 Month(s). Leave blank if credits do not expire.
- Assign workspaces to use credits: the locations where credits can be used.
- Then choose one of two ways to give credits:
- Per service (leave Customize Credits off): add rows with a Service and Quantity, for example "Yoga Class" x 10. Each booking uses one.
- Credit pool (turn on Customize Credits): set Total Number of Credits per billing cycle (or Credits Unlimited) and Applies To All active services or Selected services. Each service uses the number of credits set in its Number Of Credits field on the service.
Credits are issued every time the plan's invoice is paid, so a monthly membership gets a fresh batch each month.
Manage plans
The Plans & Packages list shows NAME, Billing Type, Billing Cycle, Amount and Status on Active Plans and Inactive Plans tabs. Use the switch to activate or deactivate a plan. Click the ... menu to:
- Edit Plan
- View Checkout Link: shows a QR code and link where clients can buy the plan themselves. Use Copy checkout link to share it on WhatsApp or social media.
- Delete Plan