How to Install the Whautomate Booking Page App?
Your customers can install your business’s Whautomate Booking Page as a mobile app on both iPhone and Android devices using Progressive Web App (PWA) technology. Once installed, customers can quickly access your booking page directly from their home screen like a normal mobile app.
Install the Booking Page on iPhone (iOS)
Important: On iPhone/iPad, PWAs can only be installed using the Safari browser.
1. Open the Booking Page in Safari
Open your business booking page link using the Safari browser on your iPhone or iPad.
2. Tap the Share Button
Tap the Share button in Safari (on newer iOS versions, open the Safari menu first and tap Share).
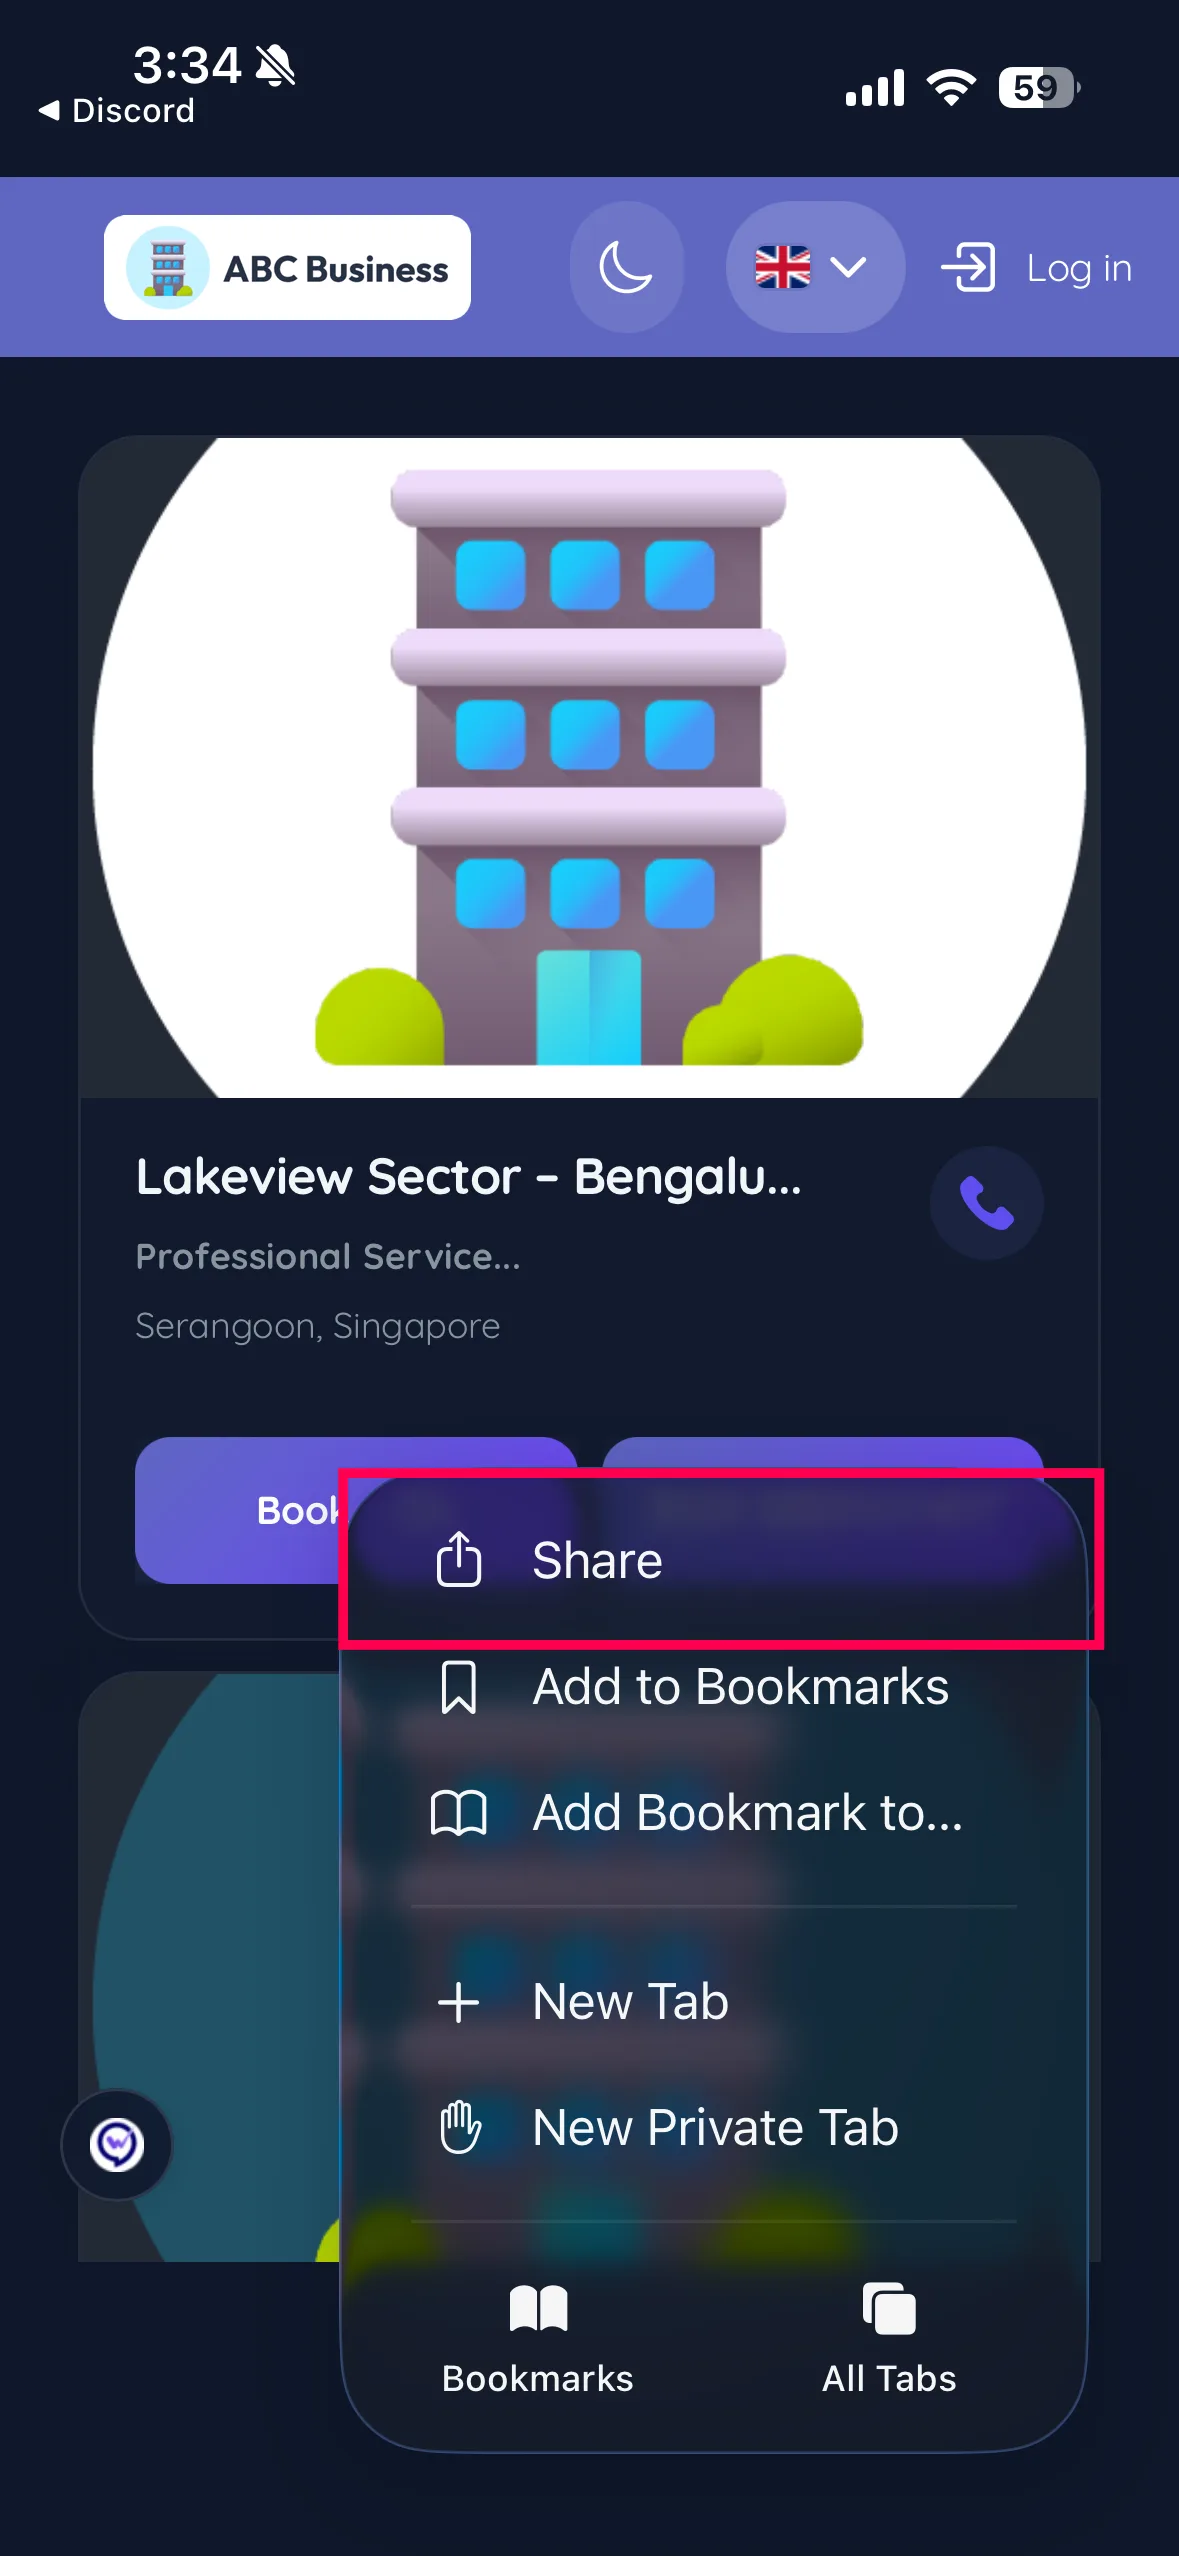
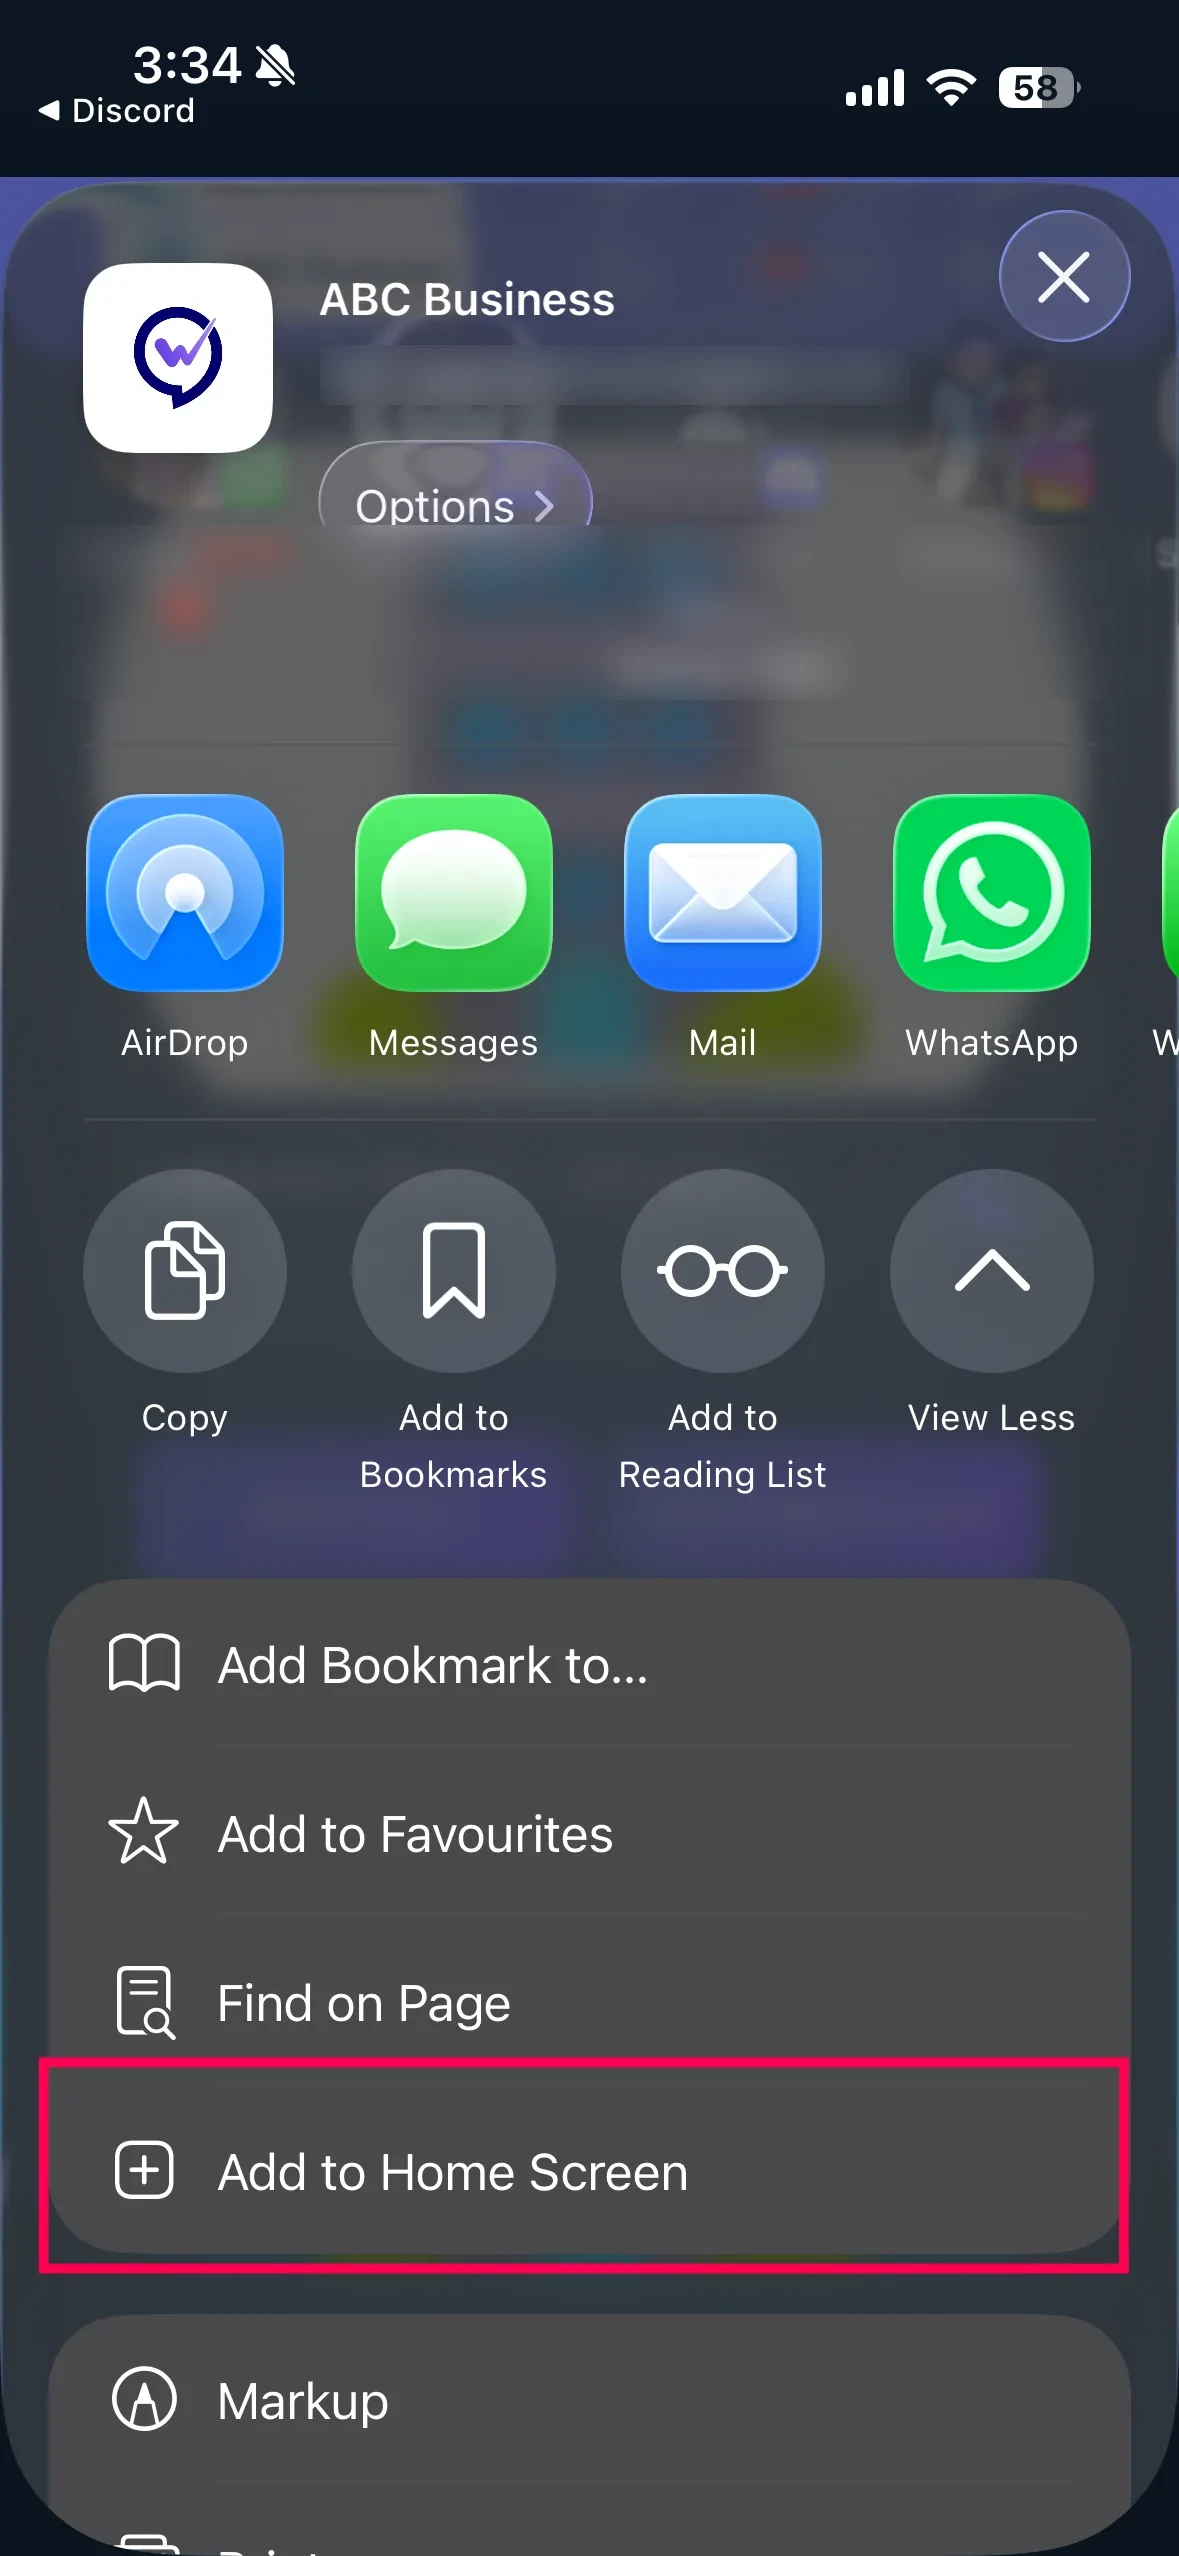
3. Select “Add to Home Screen.”
From the pop-up menu, scroll down and tap Add to Home Screen.
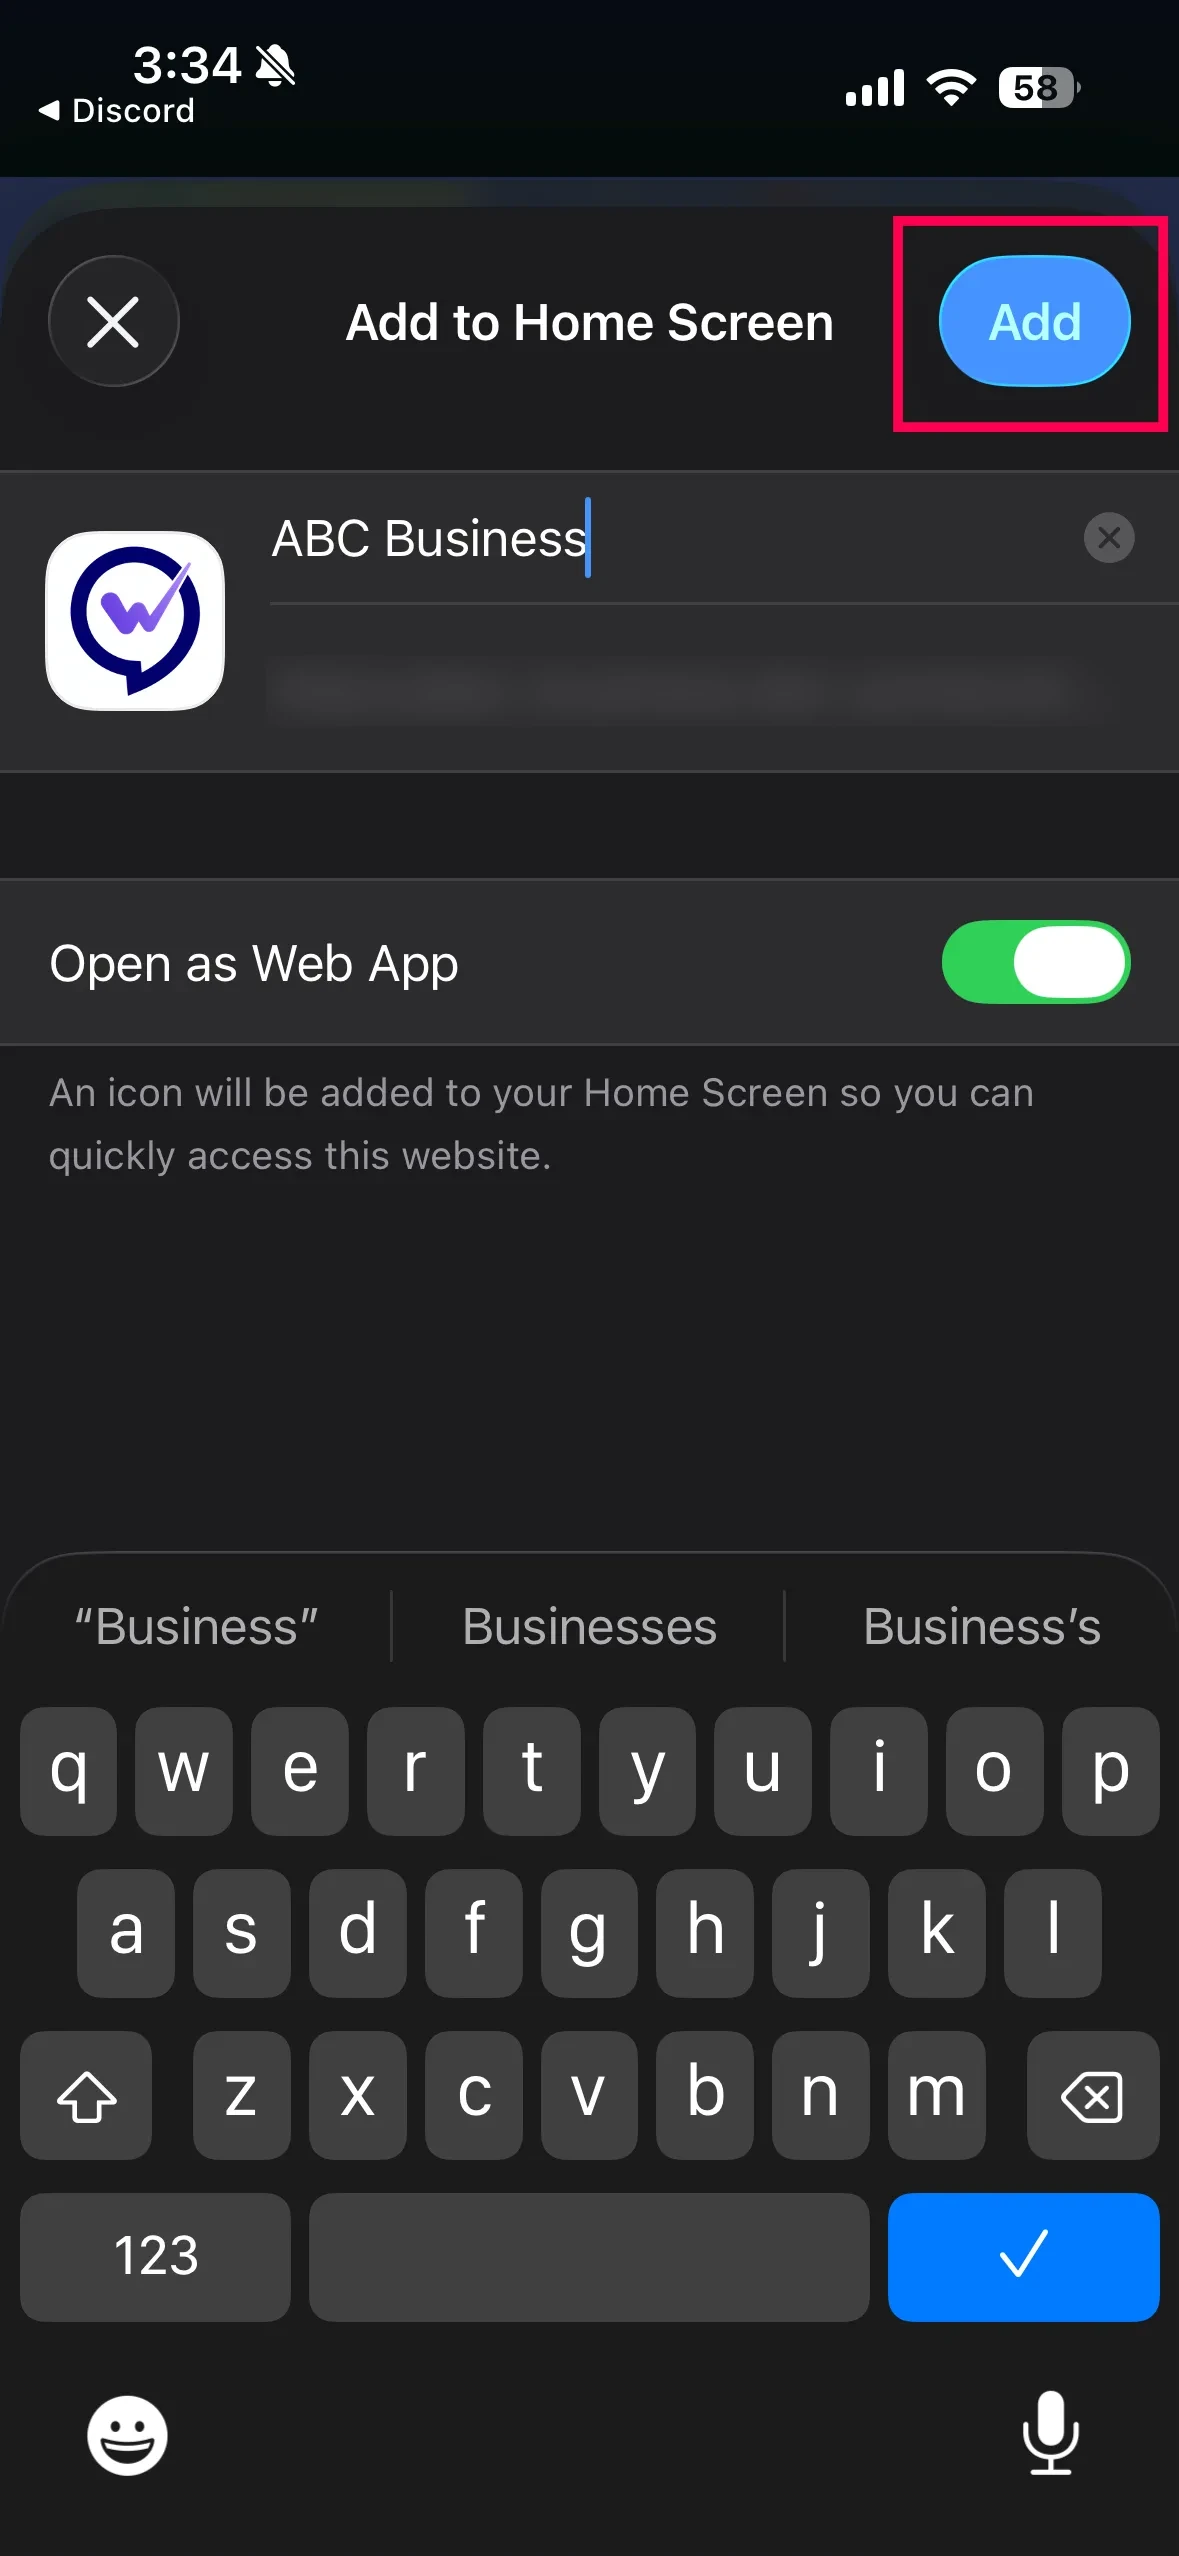
- Tap “Add”
Tap the Add button in the top-right corner to finish installing the app.
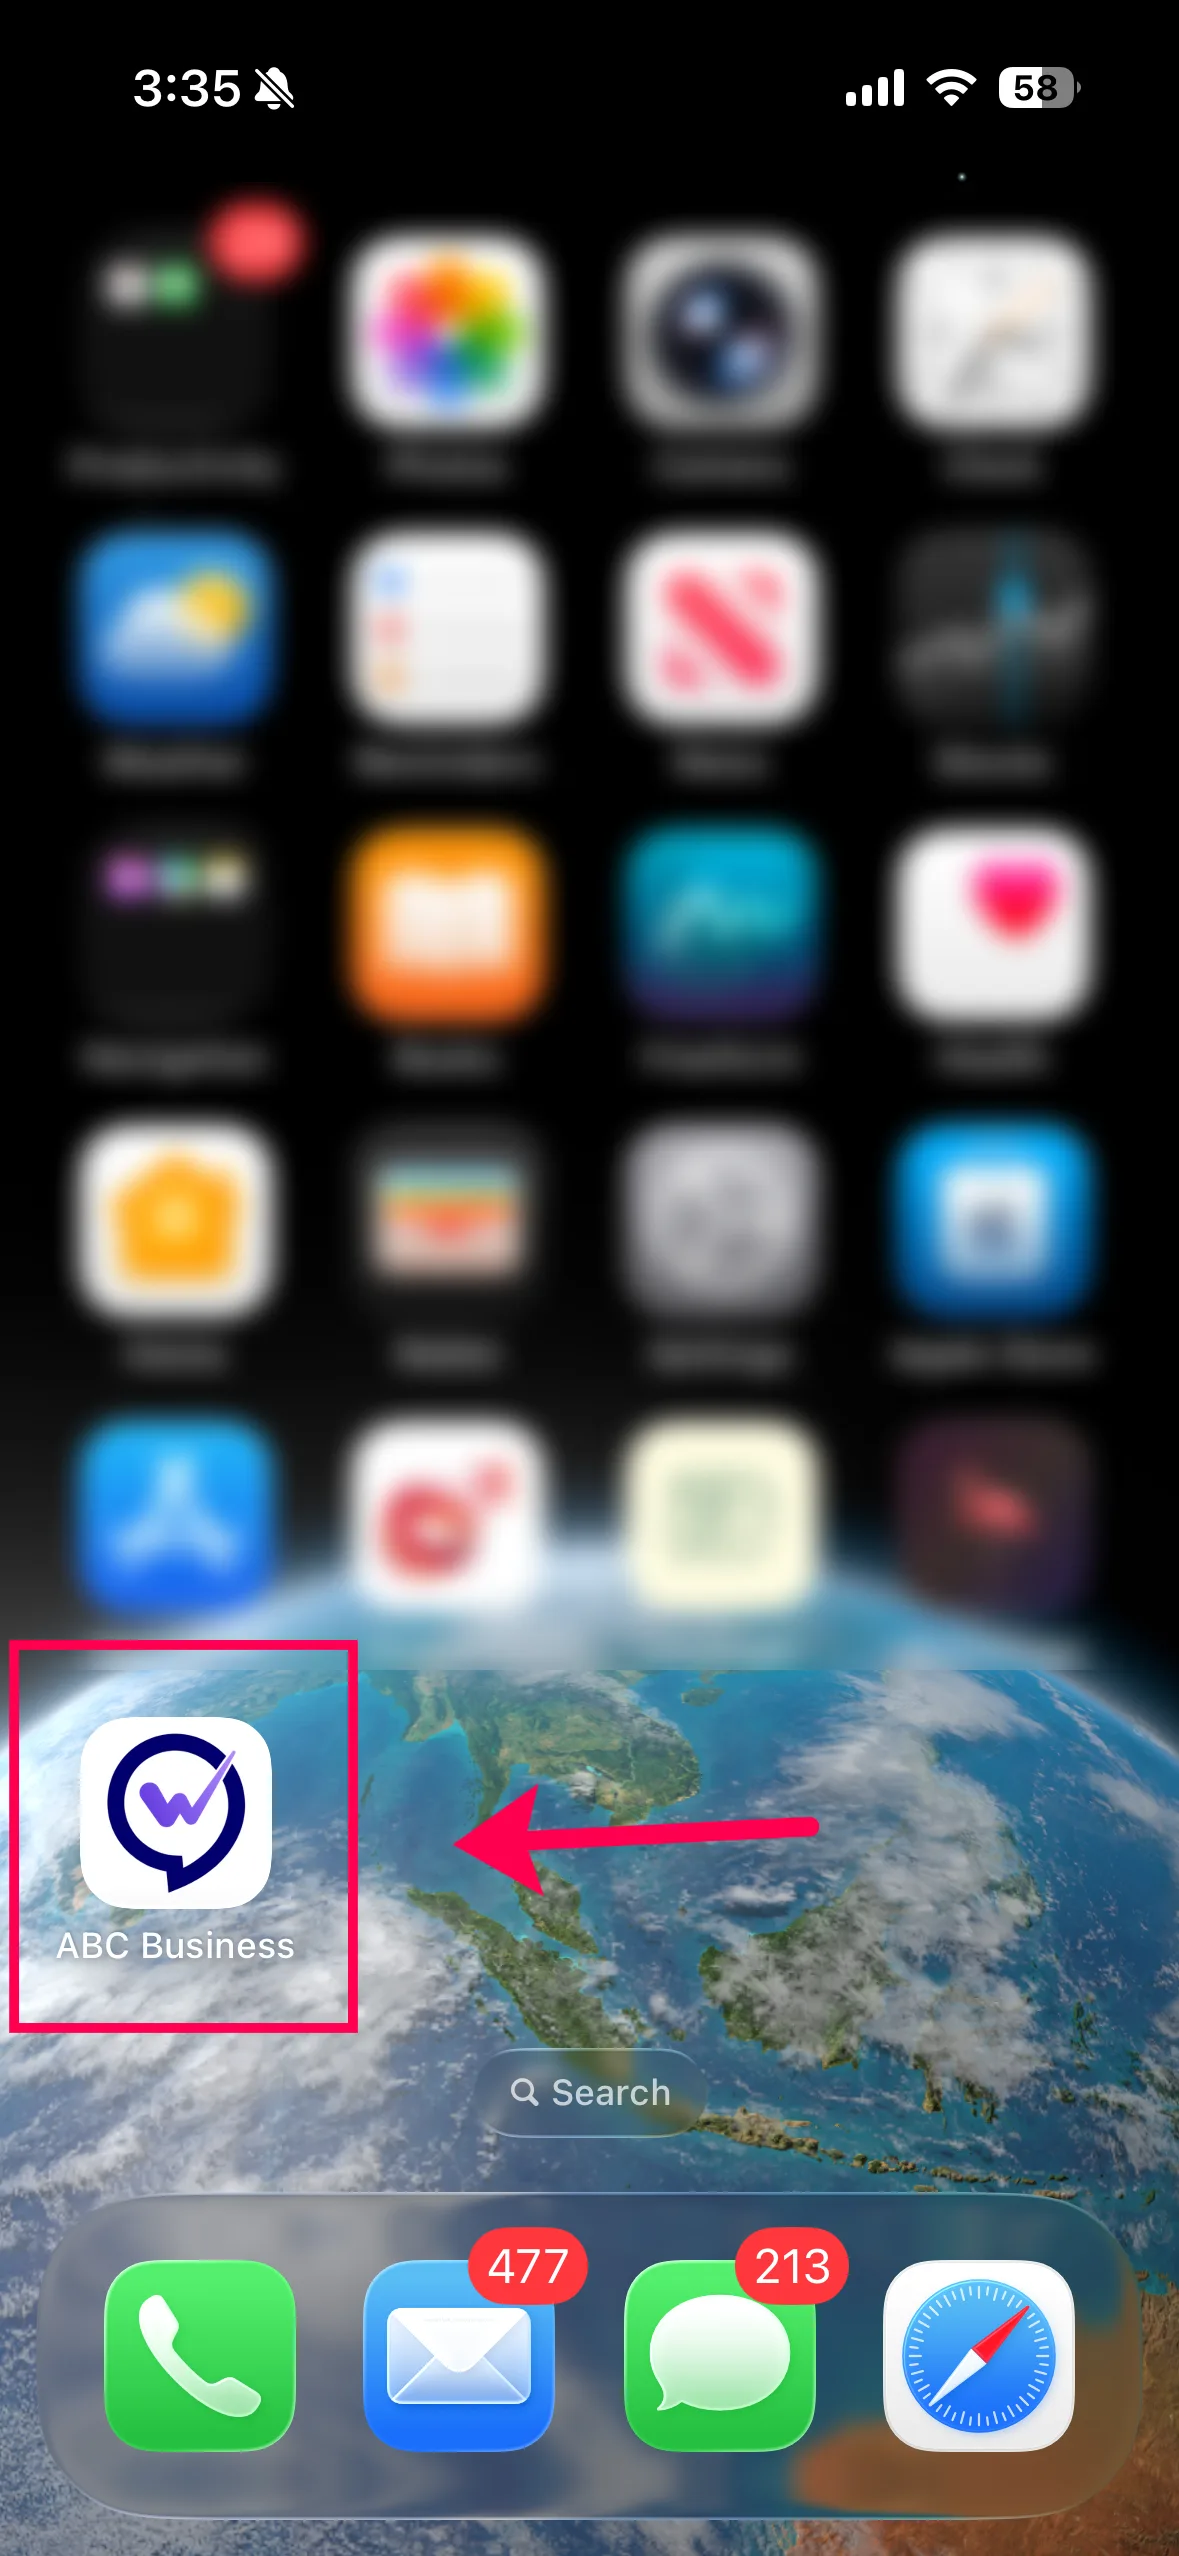
5. Access the Booking Page App
The Booking Page app will now appear on your iPhone home screen and can be opened like a regular mobile app.
✅ Important Note:
The screenshots shown in this guide may use a demo or test booking page. You should install the actual booking page link shared by the business you are associated with.
Install the Booking Page on Android
Important: Android PWAs can be installed using the Google Chrome browser.
1. Open the Booking Page in Chrome
Open the booking page link using the Google Chrome browser on your Android device.
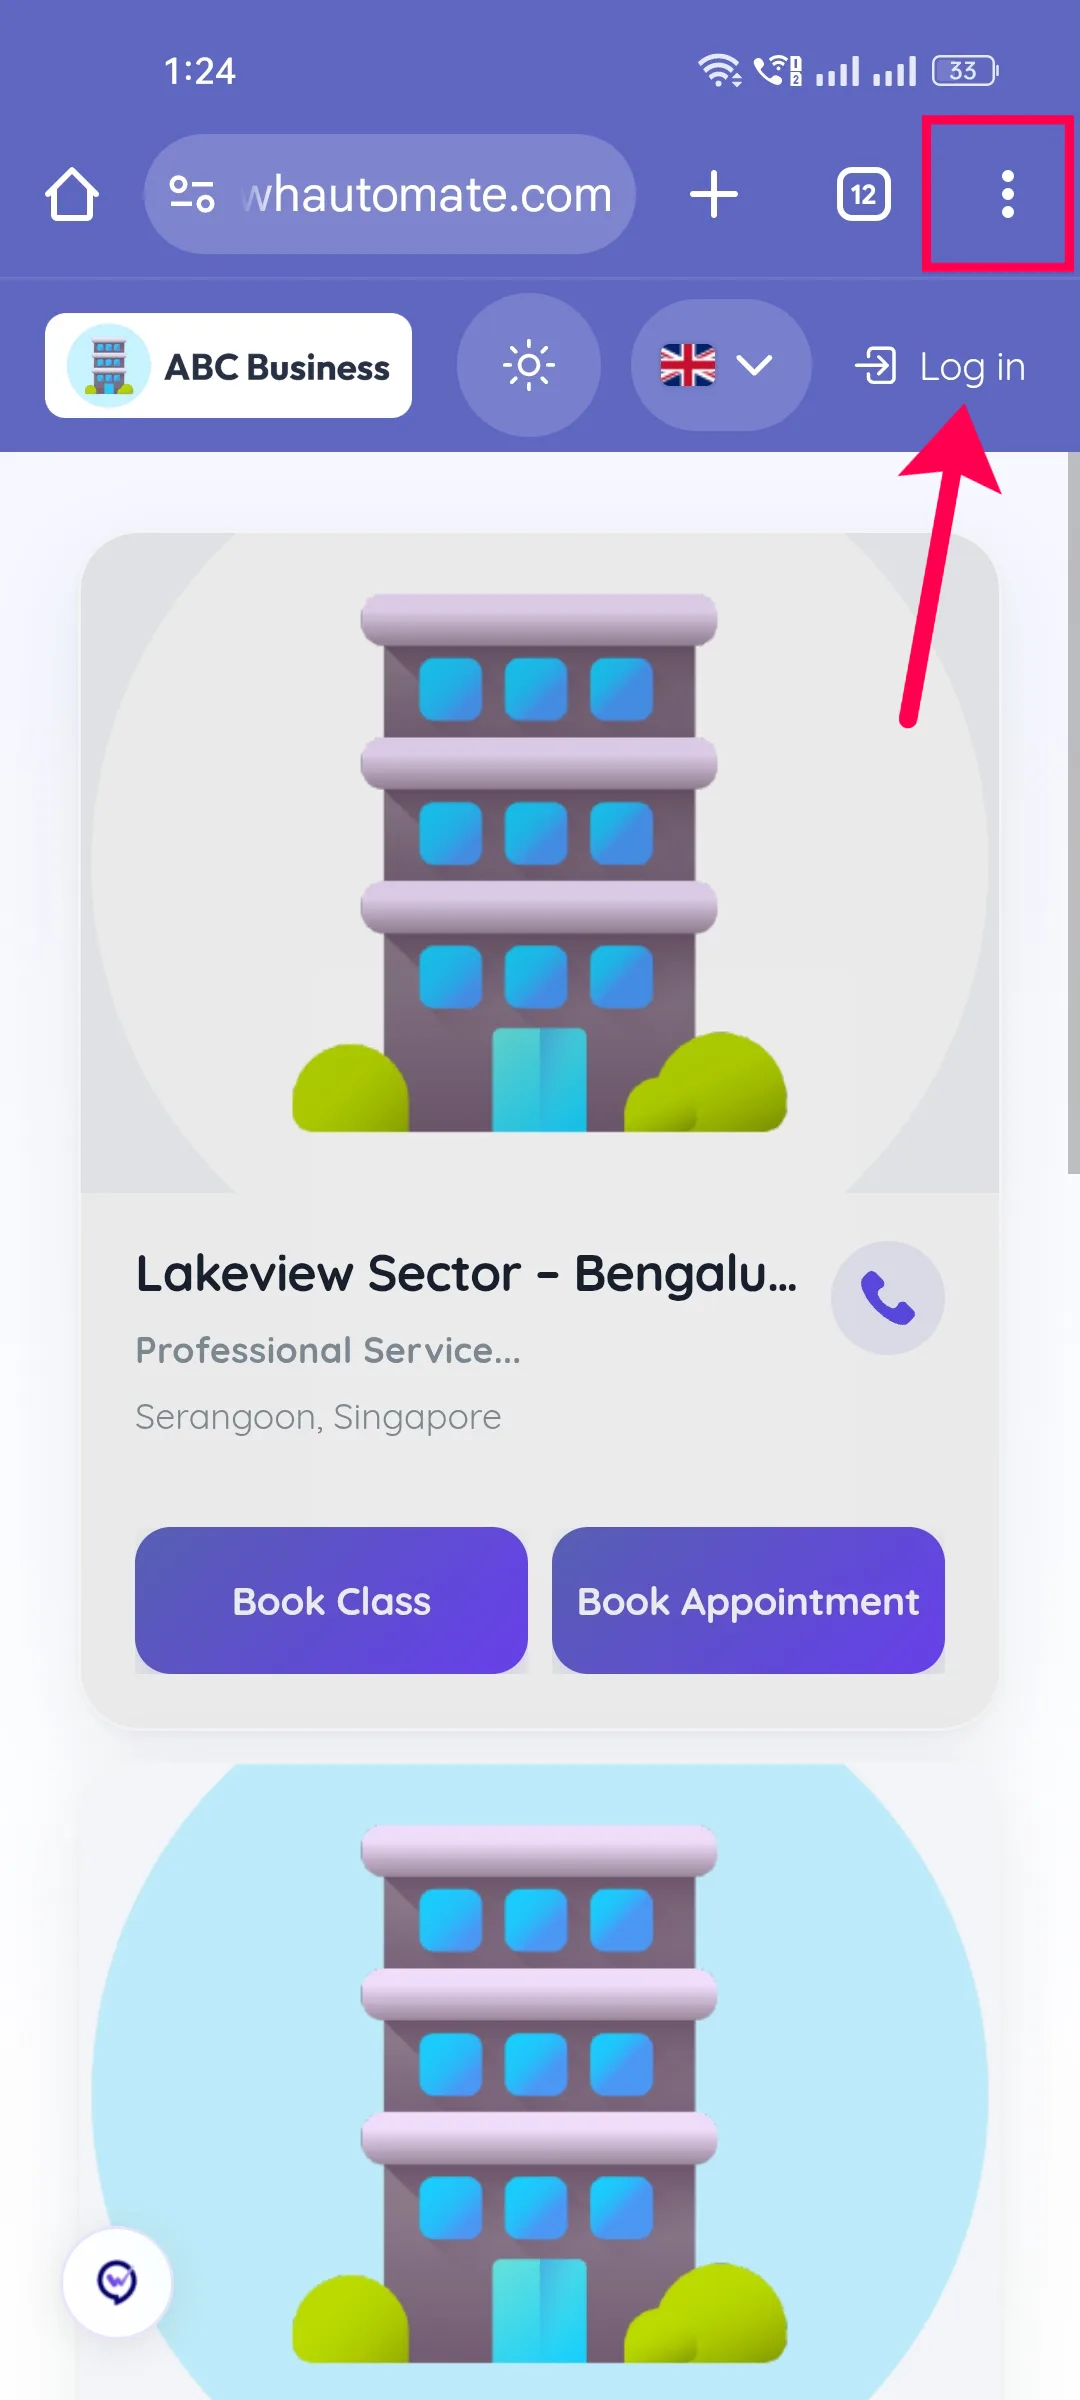
2. Open the Chrome Menu
Tap the three-dot menu icon in the top-right corner of Chrome.
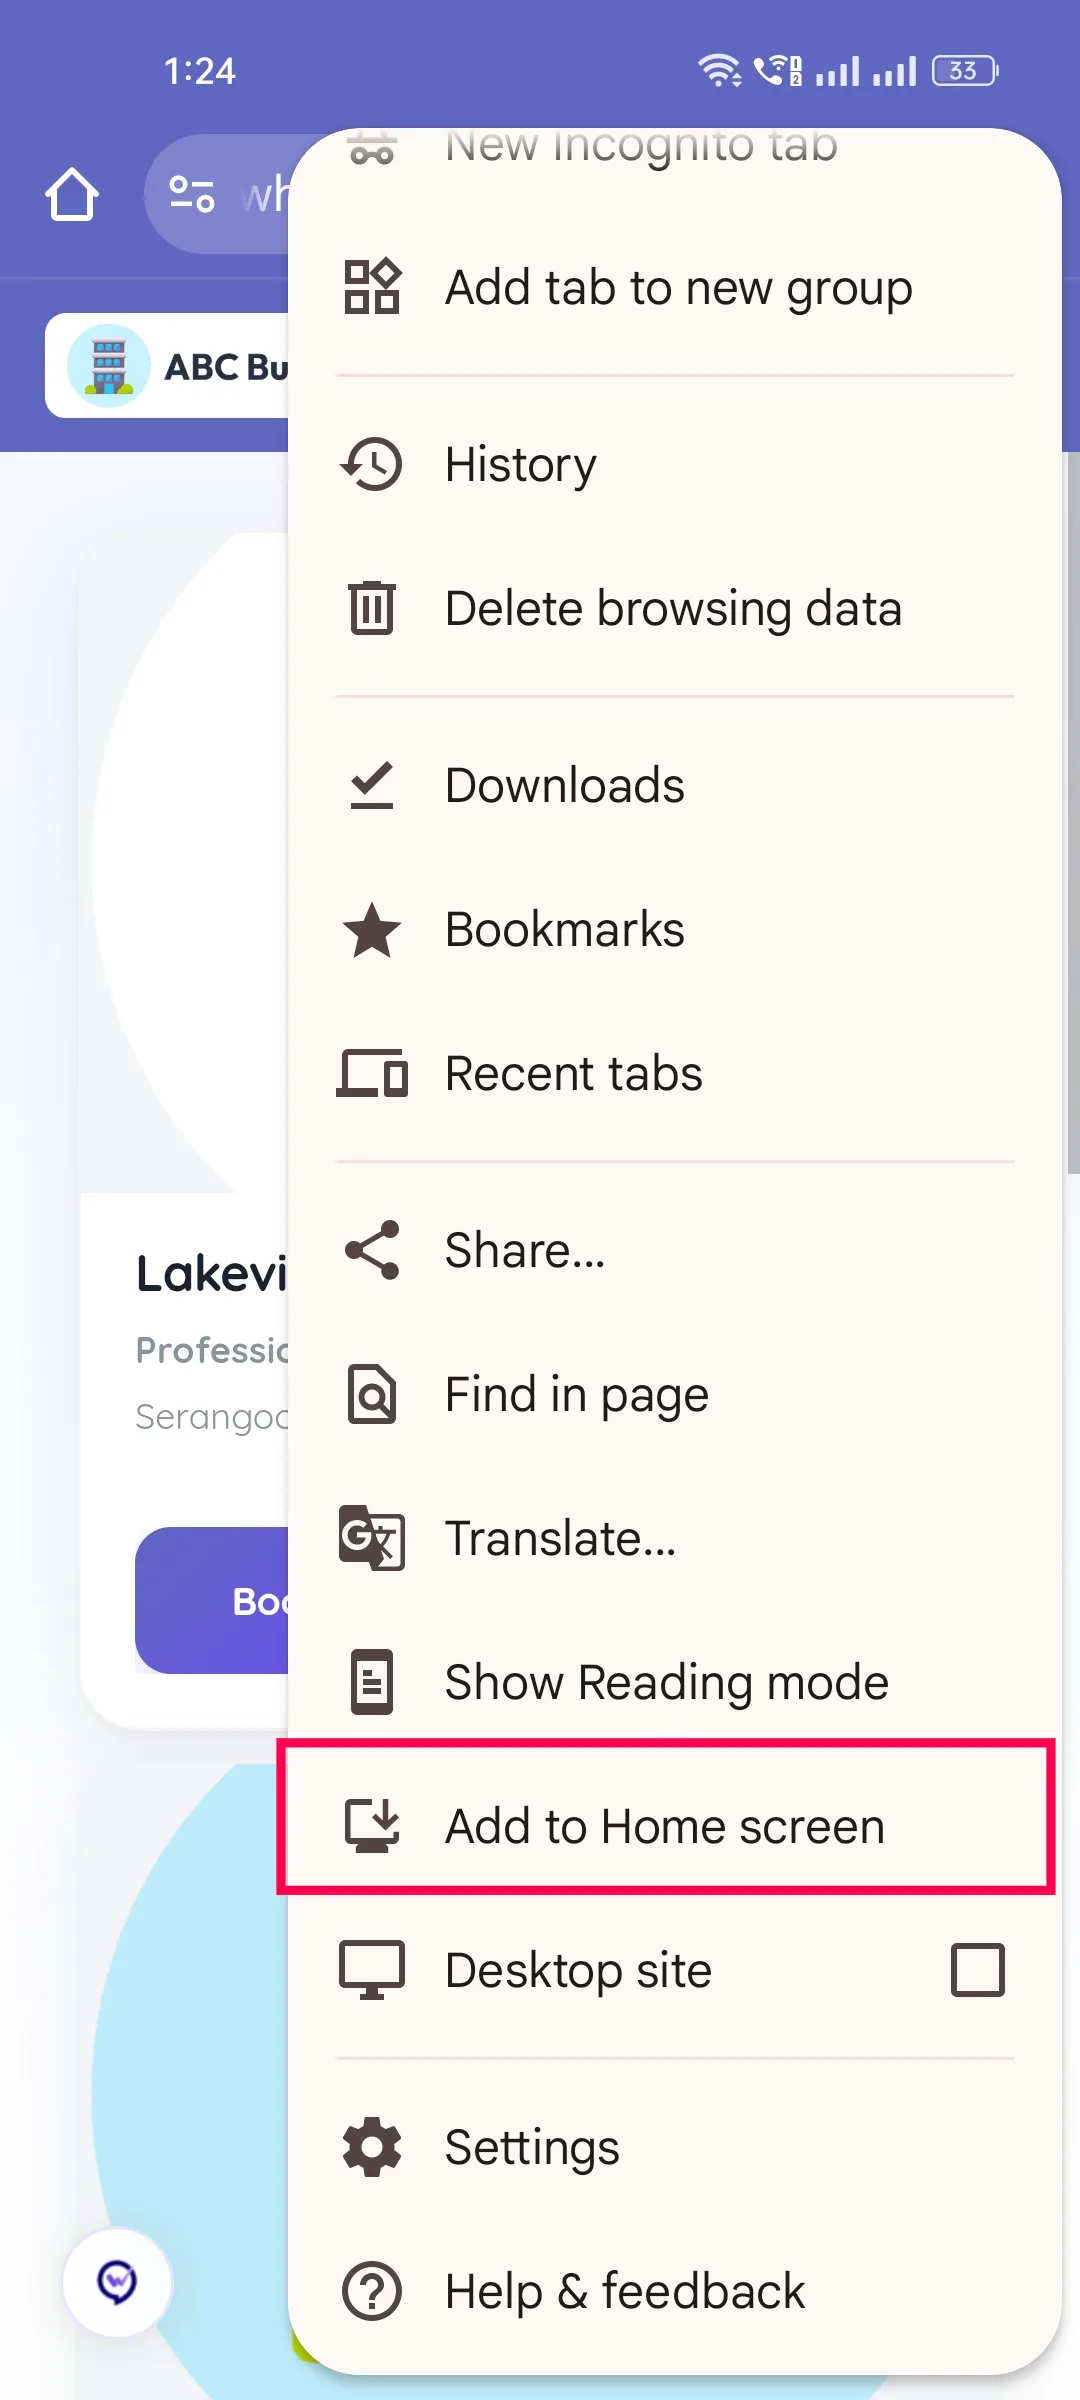
3. Select “Add to Home Screen” or “Install App.”
Scroll down and tap either:
- Add to Home Screen, or
- Install App
(depending on your Android version and Chrome browser version)
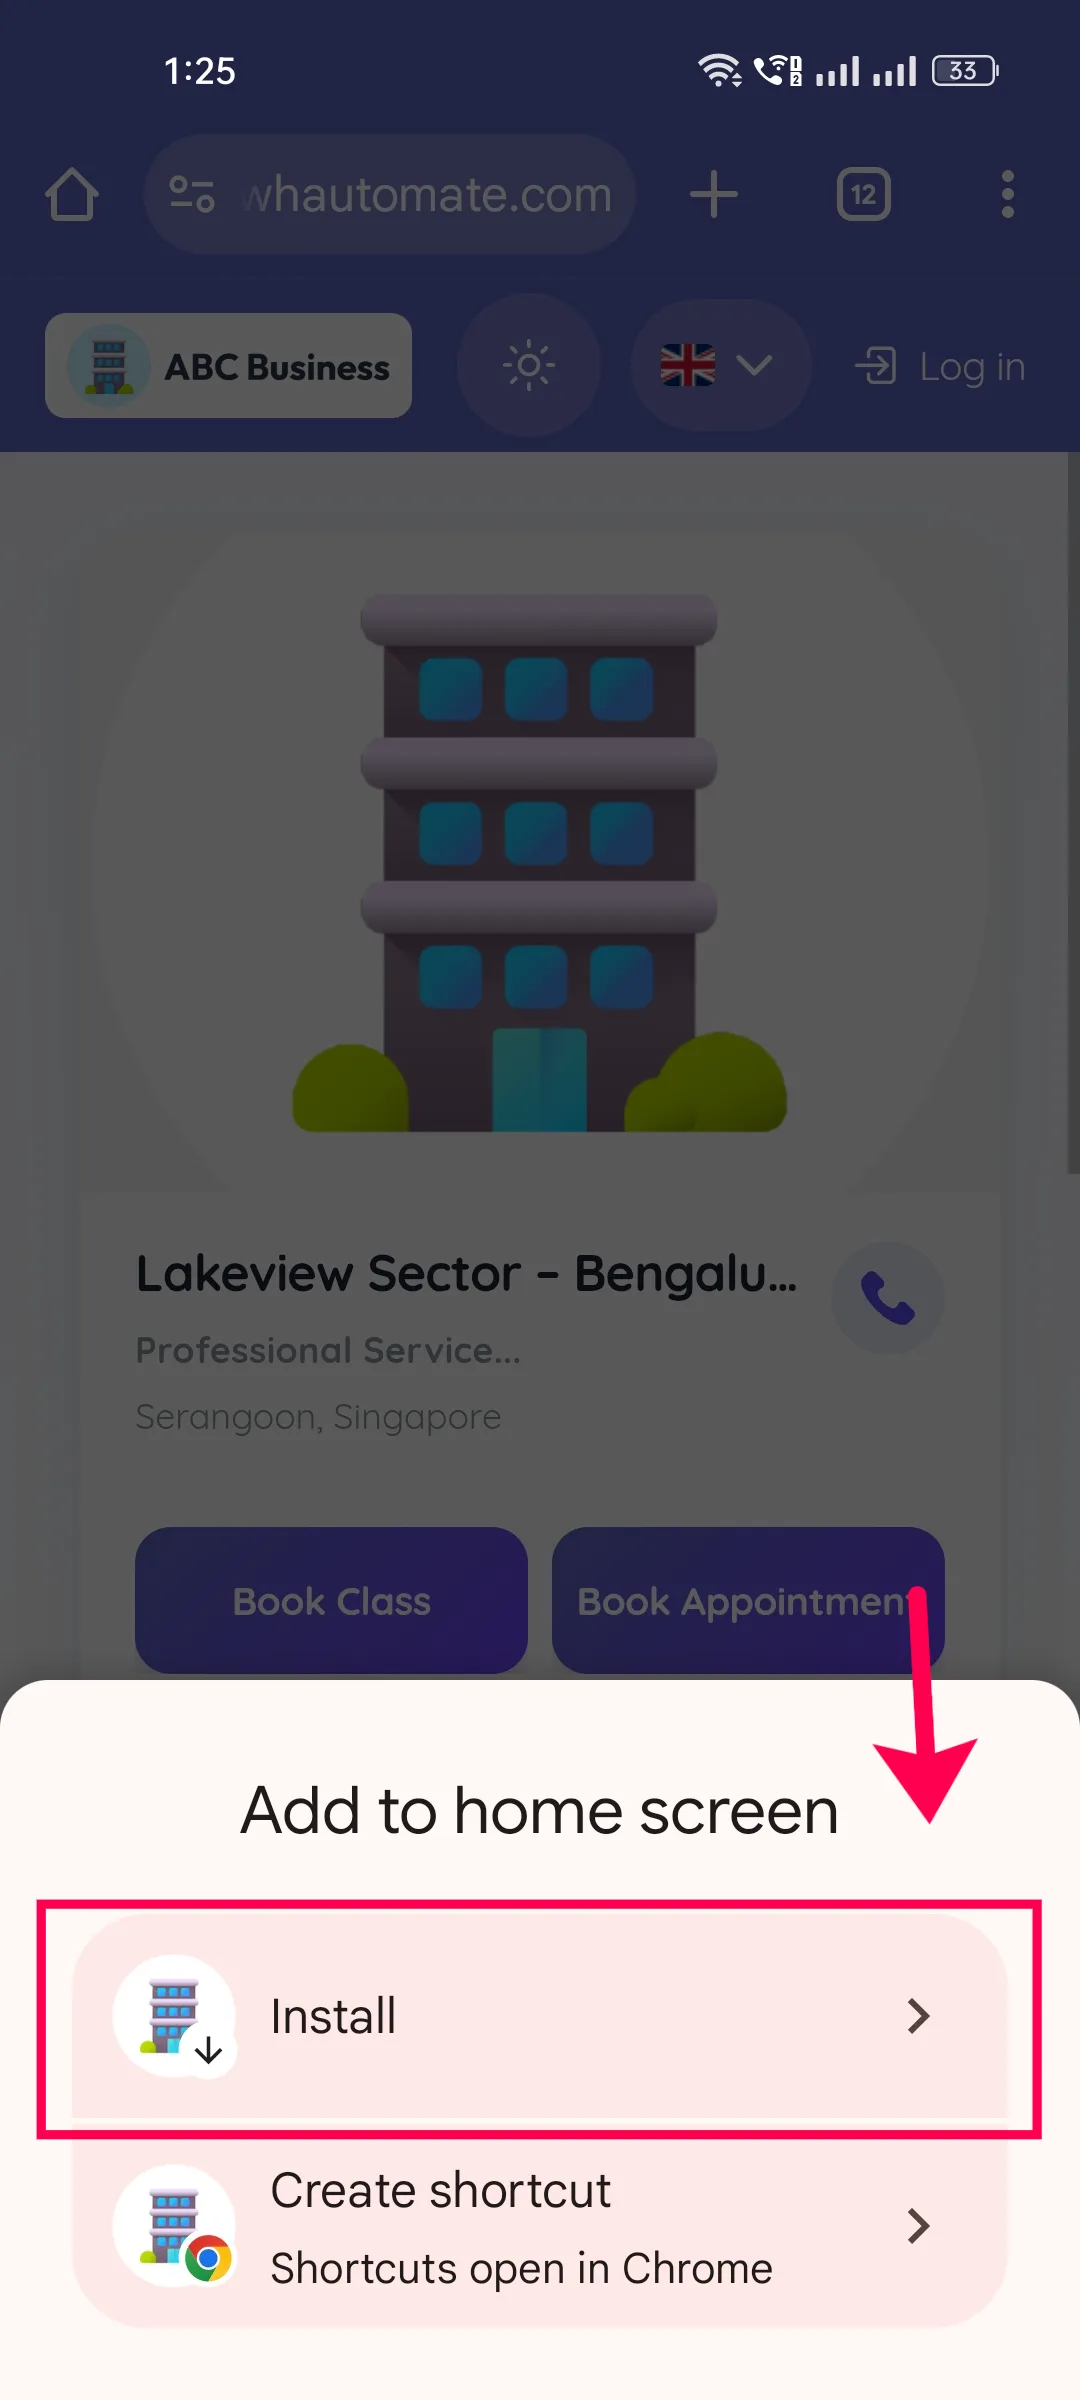
4. Tap “Install”
A pop-up will appear with options such as:
- Install
- Create Shortcut
Tap Install to continue.
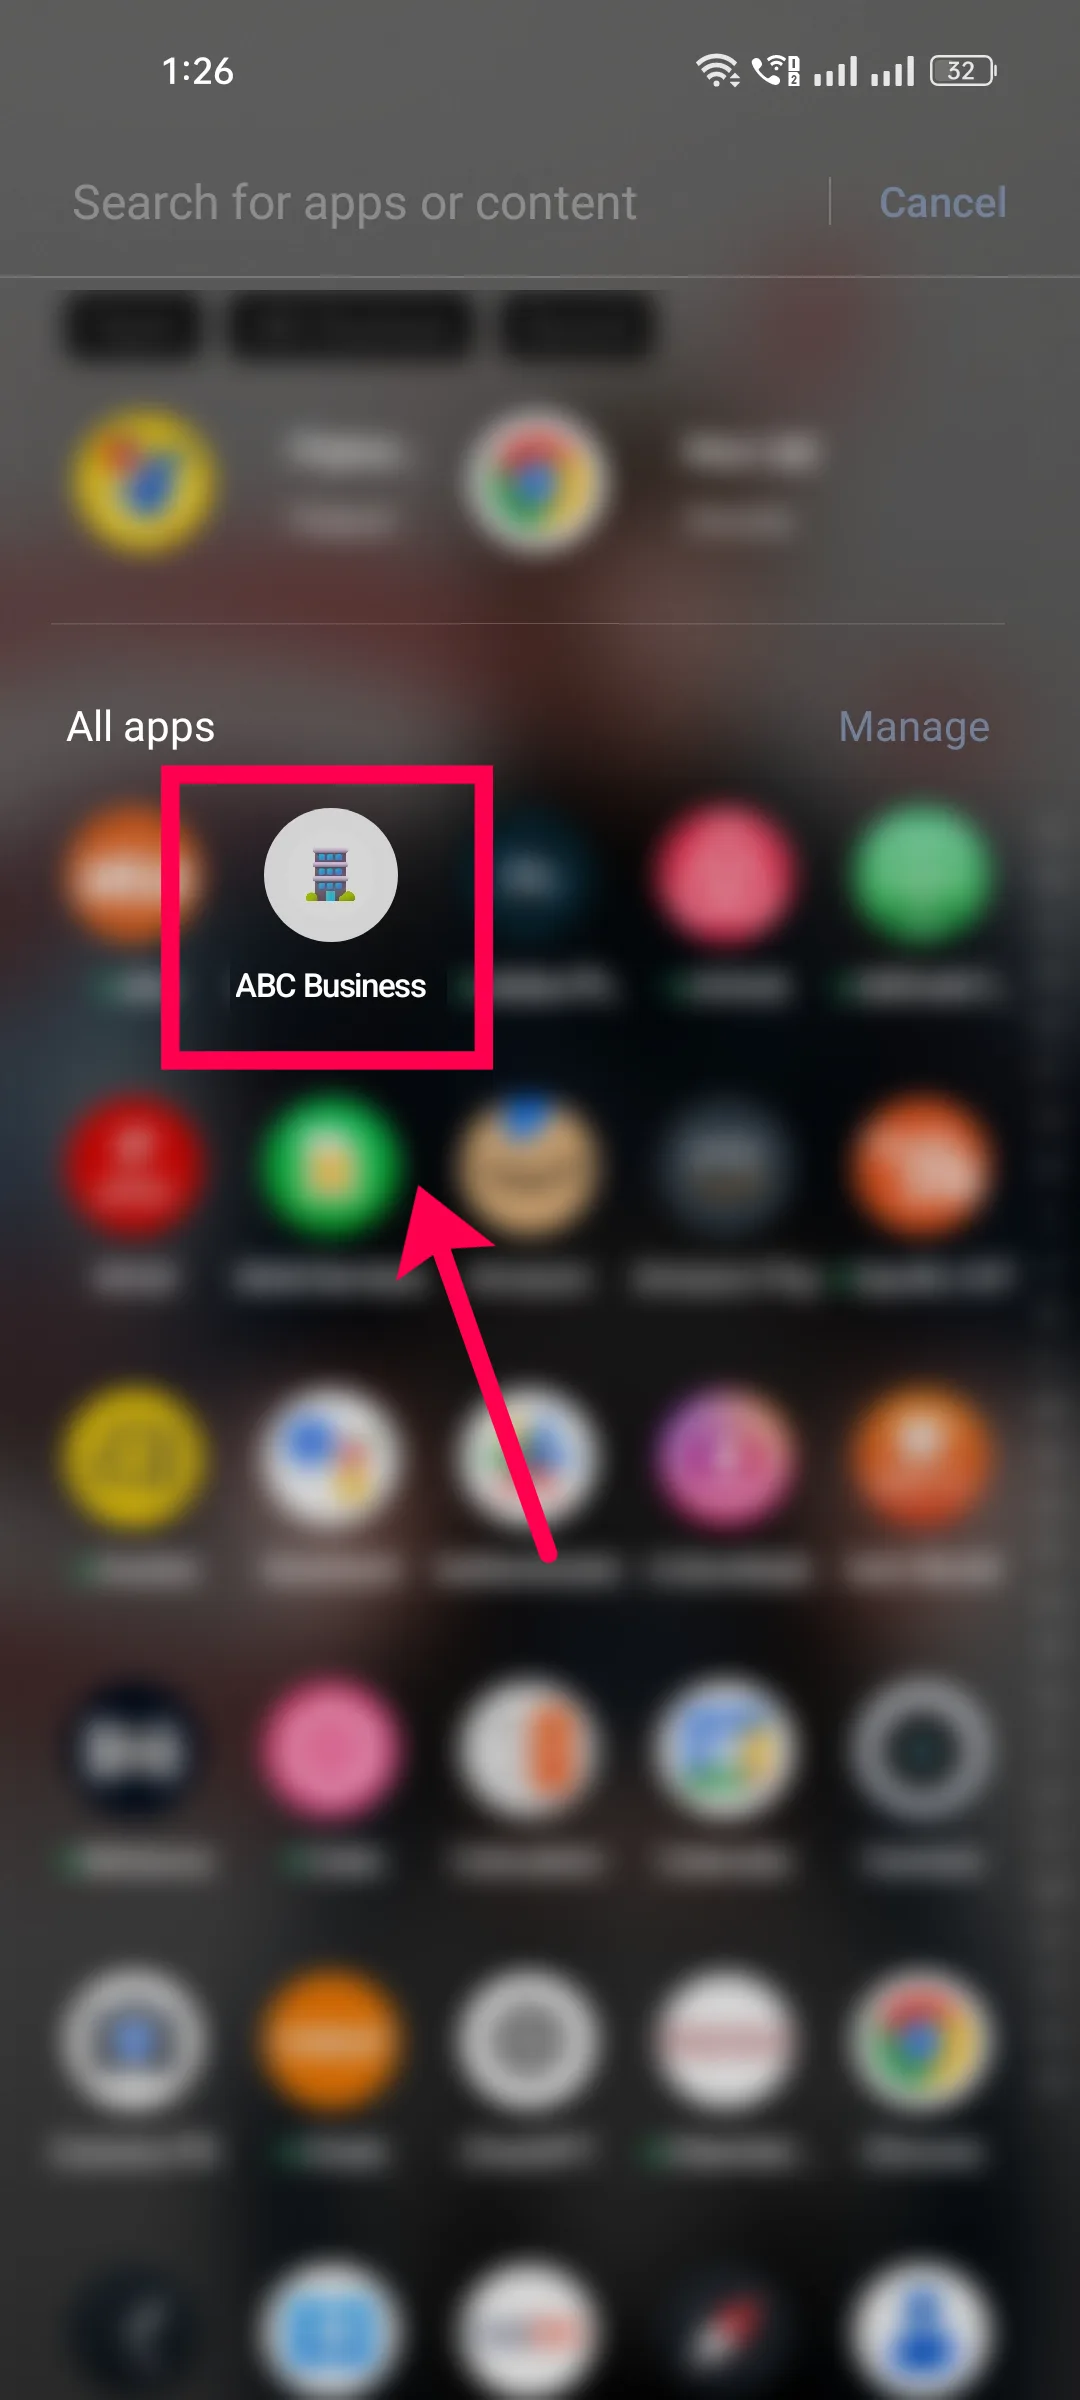
5. Launch the Booking Page App
The Booking Page app is now installed and available on your Android home screen.
✅ Important Note:
The screenshots shown in this guide may use a demo or test booking page. You should install the actual booking page link shared by the business you are associated with.