Invoice Settings
Invoice settings control how every invoice looks and when clients are reminded to pay. Set them once before you send your first invoice: the title and numbering, which client and order details appear on the PDF, the default note and terms, and up to three automatic payment reminders.
Before you start
- You need an administrator or finance role to open finance settings.
Set up invoice details
- Go to Settings and, under Finance, click Invoices.
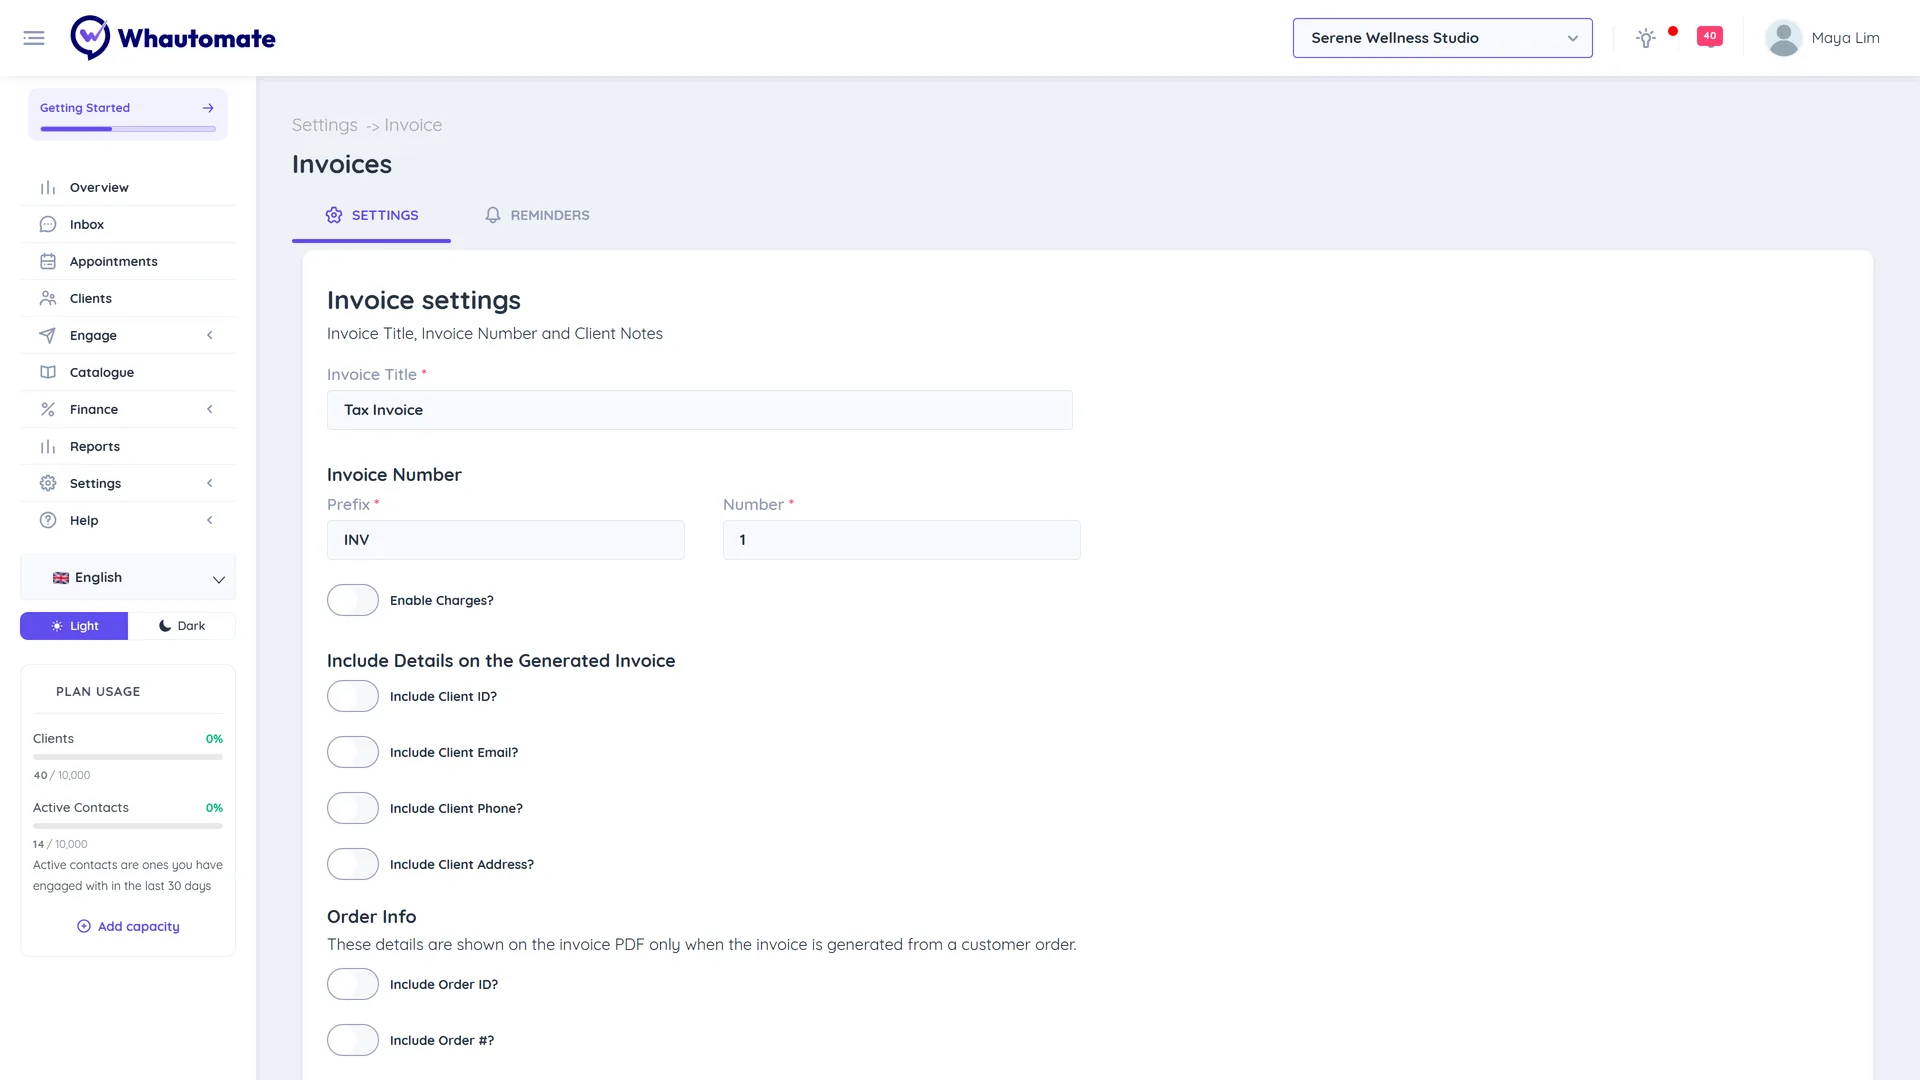
- On the Settings tab, in Invoice settings:
- Invoice Title: the heading printed on the PDF, for example "Tax Invoice".
- Invoice Number: set a Prefix (for example SWS-) and the next Number. New invoices count up from here.
- Enable Charges?: turn on to add an extra charge line to invoices, and set its default Charge Label.
- Under Include Details on the Generated Invoice, choose what prints on the PDF:
- Include Client ID?, Include Client Email?, Include Client Phone?, Include Client Address?
- Order Info: Include Order ID? and Include Order #? These show only when the invoice comes from a customer order.
- Shipping Info: Include Shipping Contact Name?, Include Shipping Contact Phone?, Include Shipping Address?
- Under Client notes, enter the default text for the notes field on all invoices (for example "Thank you for your business."), and your Invoice Terms.
- Click Save (or Update if you saved before).
Set up invoice reminders
Reminders go to clients with Sent or Pending (partly paid) invoices. They are sent once a day between 9 AM and 10 AM in your business time zone.
- Open the Reminders tab.
- Turn on Enable Invoice Reminders.
- Under Reminder Channels, pick WhatsApp, Email and/or SMS.
- For each reminder, enter the number of days in Reminder 1 - Days and choose Before Due Date or After Due Date. Click + Add Reminder to add up to three.
- Click Save.
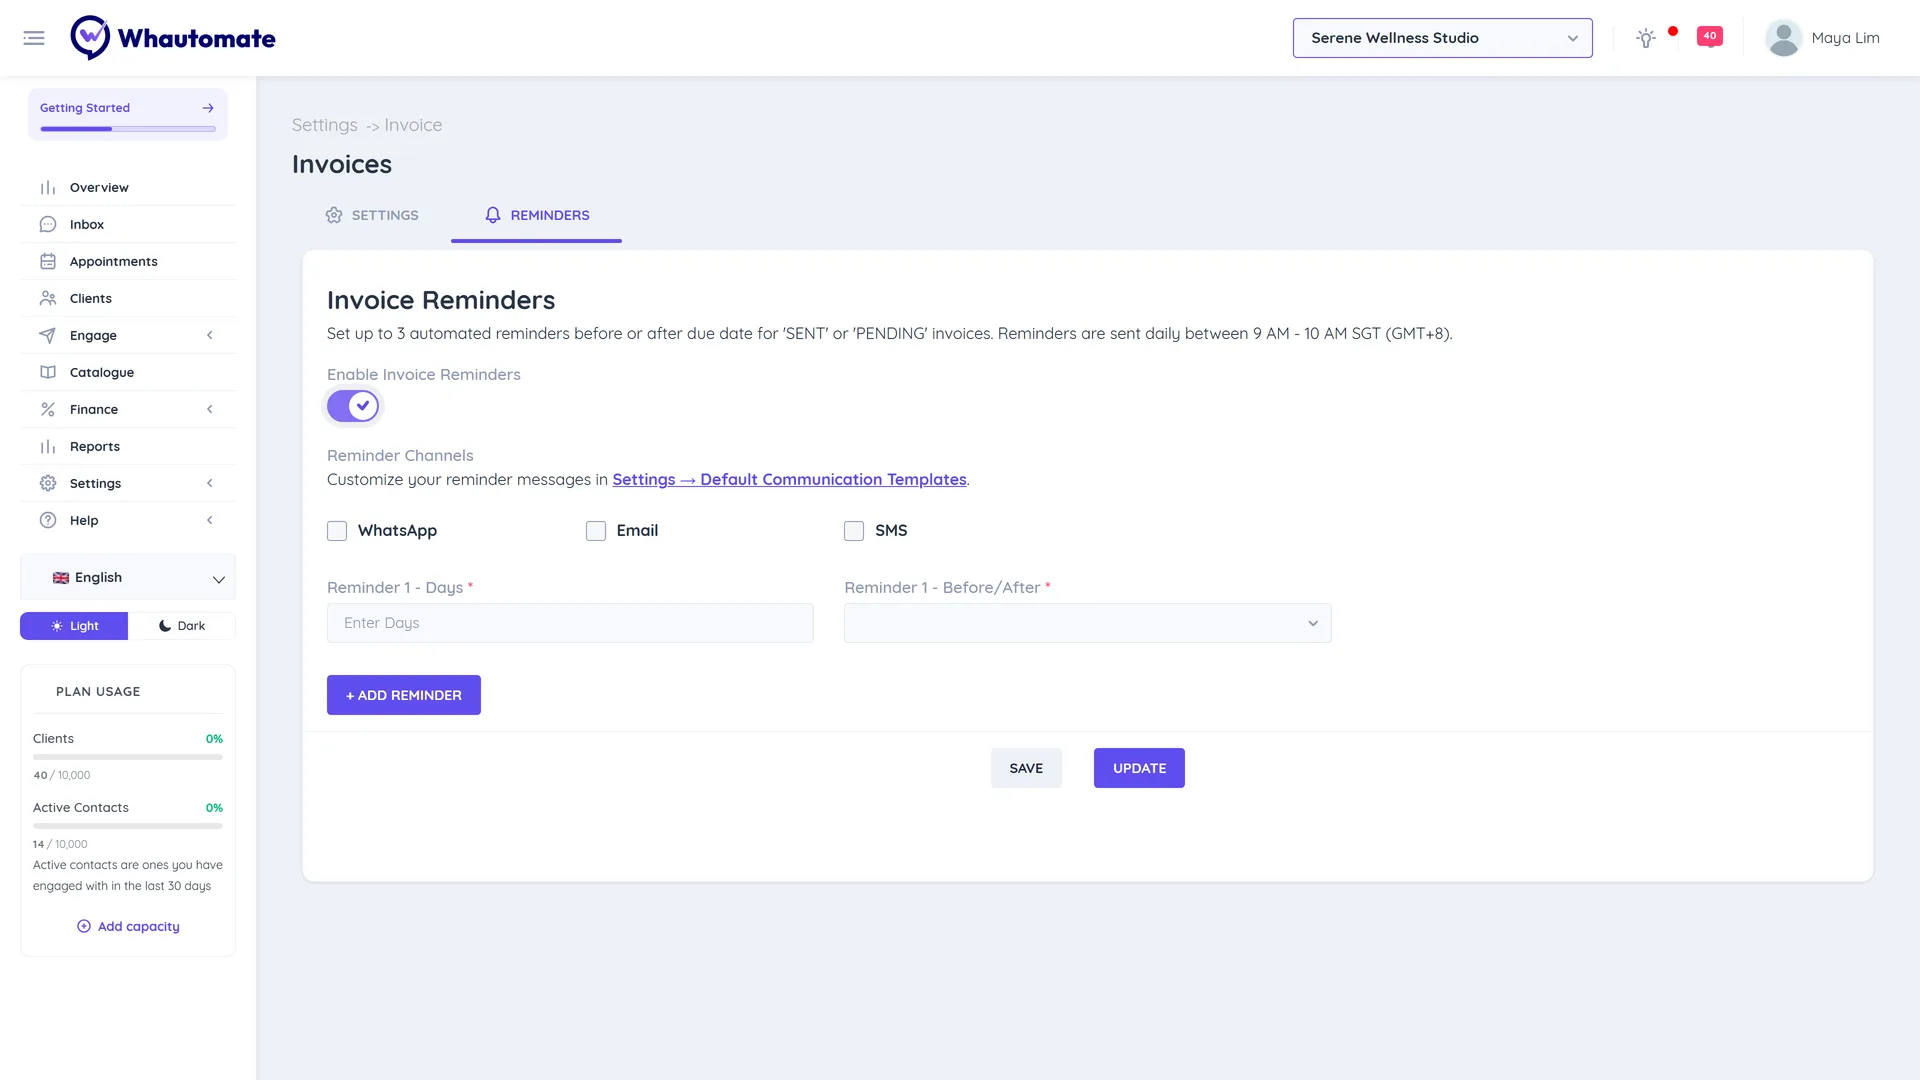
To change the reminder message, go to Settings > Default Communication Templates.