WhatsApp Flow Forms
A WhatsApp Flow form is a form your contacts fill in without leaving WhatsApp: they tap a button in the chat, answer a few screens, and submit. Use it when your customers already talk to you on WhatsApp and a web link would slow them down, for example a "Book a free consultation" request, a lead capture form, a feedback survey or a consent form. Answers are saved as responses, can create or update the client record, and can start automations.
Before you start
- Connect the WhatsApp Cloud API. You can build forms without it, but you can only publish once this workspace is connected.
- Your team member needs communication access. Without it, the WhatsApp Flows tab is hidden.
- WhatsApp Flow forms are separate from the booking flows used by the WhatsApp booking bot. Creating or editing a form here never changes your booking flows.
Create a WhatsApp Flow form
- In the main menu, open Engage > Forms & Flows and click the WhatsApp Flows tab.
- Click Create WhatsApp Flow.
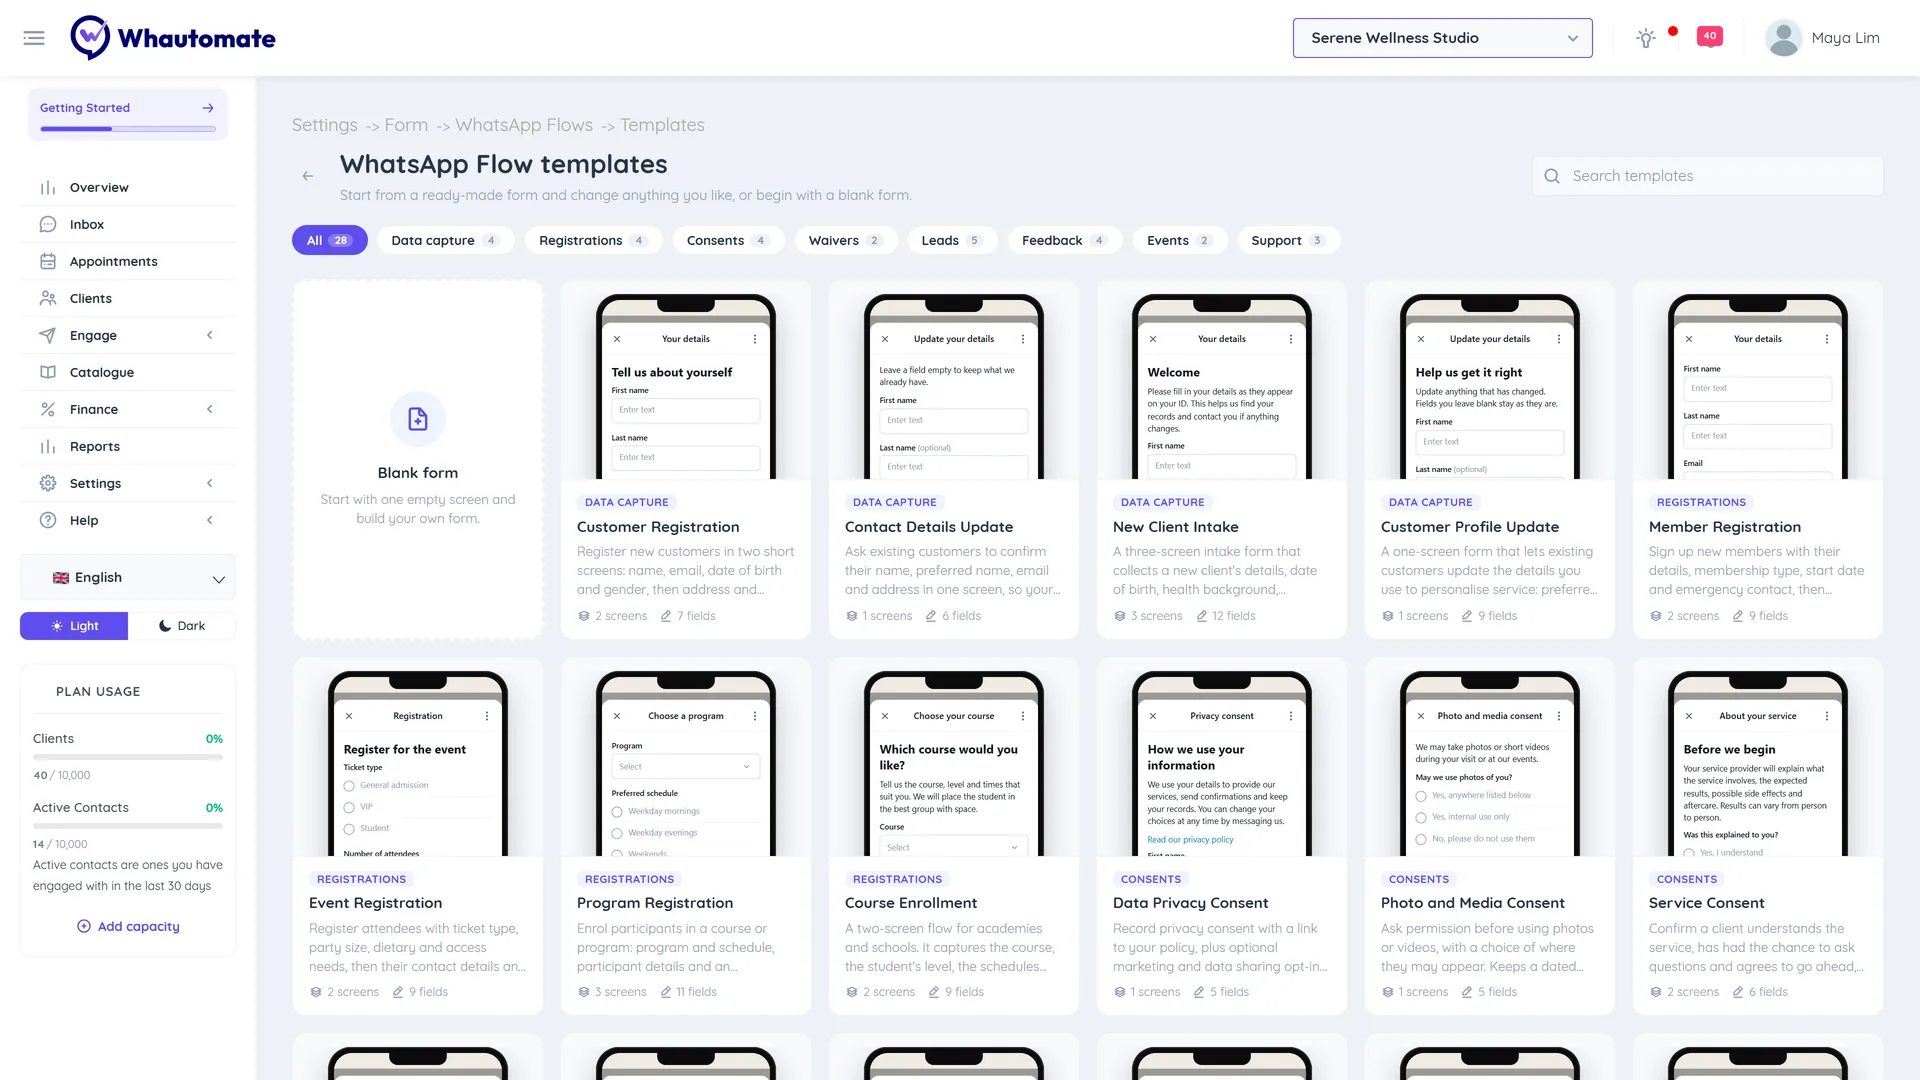
- Choose a ready-made template, filtered by category (for example Leads, Registrations, Consents or Feedback), and click Use template. Or choose Blank form.
- Enter the Form name at the top. Only your team sees it.
- Build the form (see below), then click Save draft to keep your work, or Publish to make it live.
Build the form
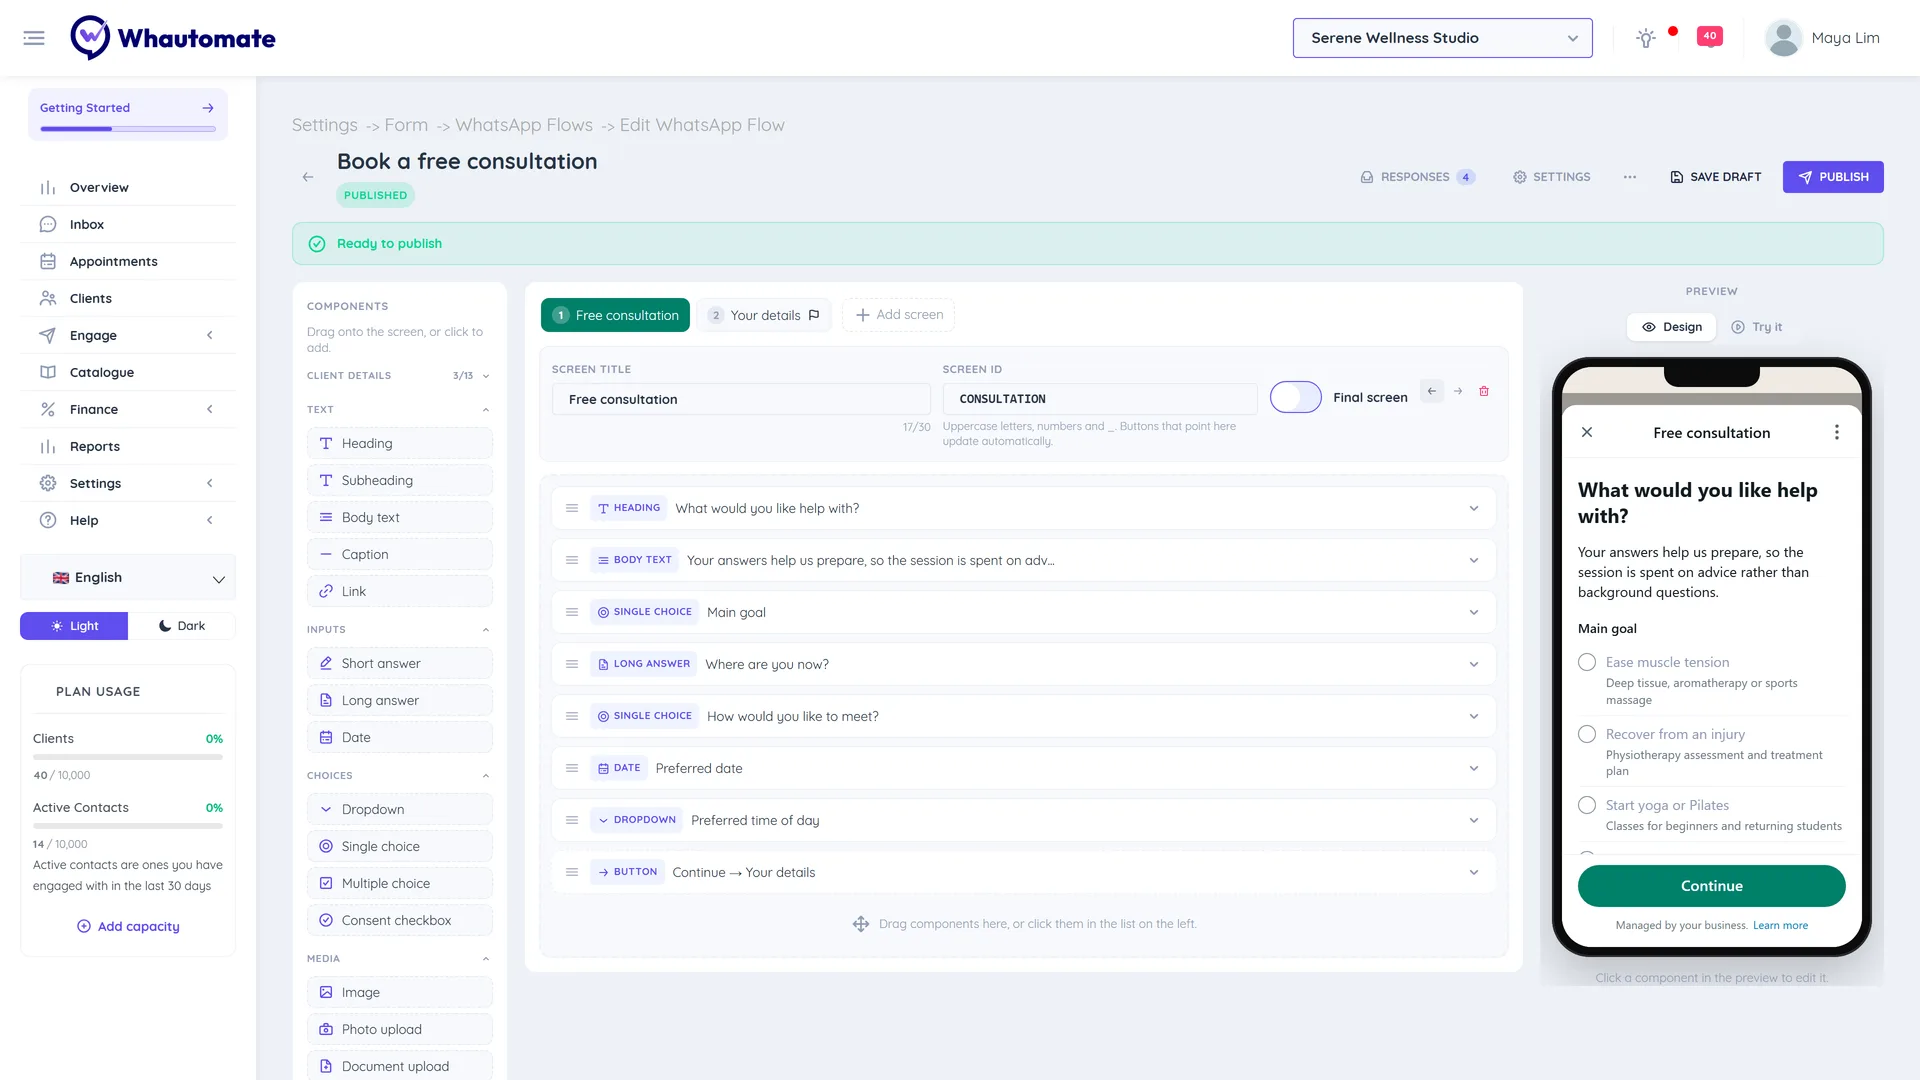
The builder has three parts: Components on the left, the screens in the middle and a live Preview of the phone on the right.
- Add components: drag an item from Components onto the screen, or click it to add it to the current screen. Groups are Text (Heading, Subheading, Body text, Caption, Link), Inputs (Short answer, Long answer, Date), Choices (Dropdown, Single choice, Multiple choice, Consent checkbox), Media (Image, Photo upload, Document upload) and Navigation (Button).
- Edit a component: click it to set its Label, Required, Helper text, Options and so on. The Field name is used in responses and exports: lowercase letters, numbers and underscores.
- Add screens: click Add screen for a multi-step form. Drag the screen tabs to reorder them. Each screen ends with a Button: set When tapped to go to the next screen, or to Complete the form on the Final screen.
- Try it: fill in the Preview like a client would. Required fields must be answered before the button works.
- Fix issues: the issues panel lists anything WhatsApp would reject. Click a fix such as Make required to apply it. When it says Ready to publish, you can publish. You can save a draft at any time.
Up to 50 components per screen. Screen titles up to 30 characters and input labels up to 20. Dropdowns hold up to 200 options; single and multiple choice up to 20. Images must be PNG or JPG up to 300 KB.
Collect client details
Add fields from the Client details group (first name, last name, email, date of birth, gender, address and others) to update the client record from the answers. Each of these fields shows Updates the client record and its field name is fixed.
- The phone number always comes from WhatsApp, so you never need to ask for it.
- A form that collects client details must include a required First name. If it is missing, the issues panel offers Add First name.
- To stop, click Stop collecting client details. Answers are then saved as responses only.
Form settings
Click Settings in the builder:
- WhatsApp category: required by WhatsApp when you publish, for example Lead generation, Appointment booking, Survey or Contact us.
- Folder: where the form appears in the list.
- Sending: the default Message header, Message text, Message footer and Button text used when you send the form in a chat.
- When someone submits: Create or update the client from client details, Add client tags and Add contact tags.
Click Done to close the settings, then save or publish.
Publish
- Click Publish in the builder, or open the row menu in the list and click Publish. To publish several drafts at once, select them and click Publish selected.
- WhatsApp checks the form. If it is accepted, the status changes to Published.
- If it fails, the status shows Publish failed. Click View publish errors, fix each problem, and publish again. Your draft is kept.
If you edit a published form, its status shows Unpublished changes until you publish again. Clients keep getting the last published version until then.
The More actions menu in the builder also offers Import Flow JSON, Download Flow JSON and Copy Flow JSON. Imports replace every screen in the form, and only static flows are supported.
Send the form
| Where | How |
|---|---|
| A chat in the team inbox | Click + in the message box and choose WhatsApp Flow. Pick the form; the message is filled in from its sending settings and you can change it for this message. Available while the 24-hour WhatsApp window is open. |
| An automation | Add the action send WhatsApp interactive message - Flow and pick the form. Works when the contact has an active session. |
| A WhatsApp template | Add a Complete Flow button to a message template and pick the form. Use this to reach contacts outside the 24-hour window, for example in a broadcast. |
Organise forms
- Use Folders on the left. Click New Folder to create one, then select forms and use Move to folder or Remove from folder.
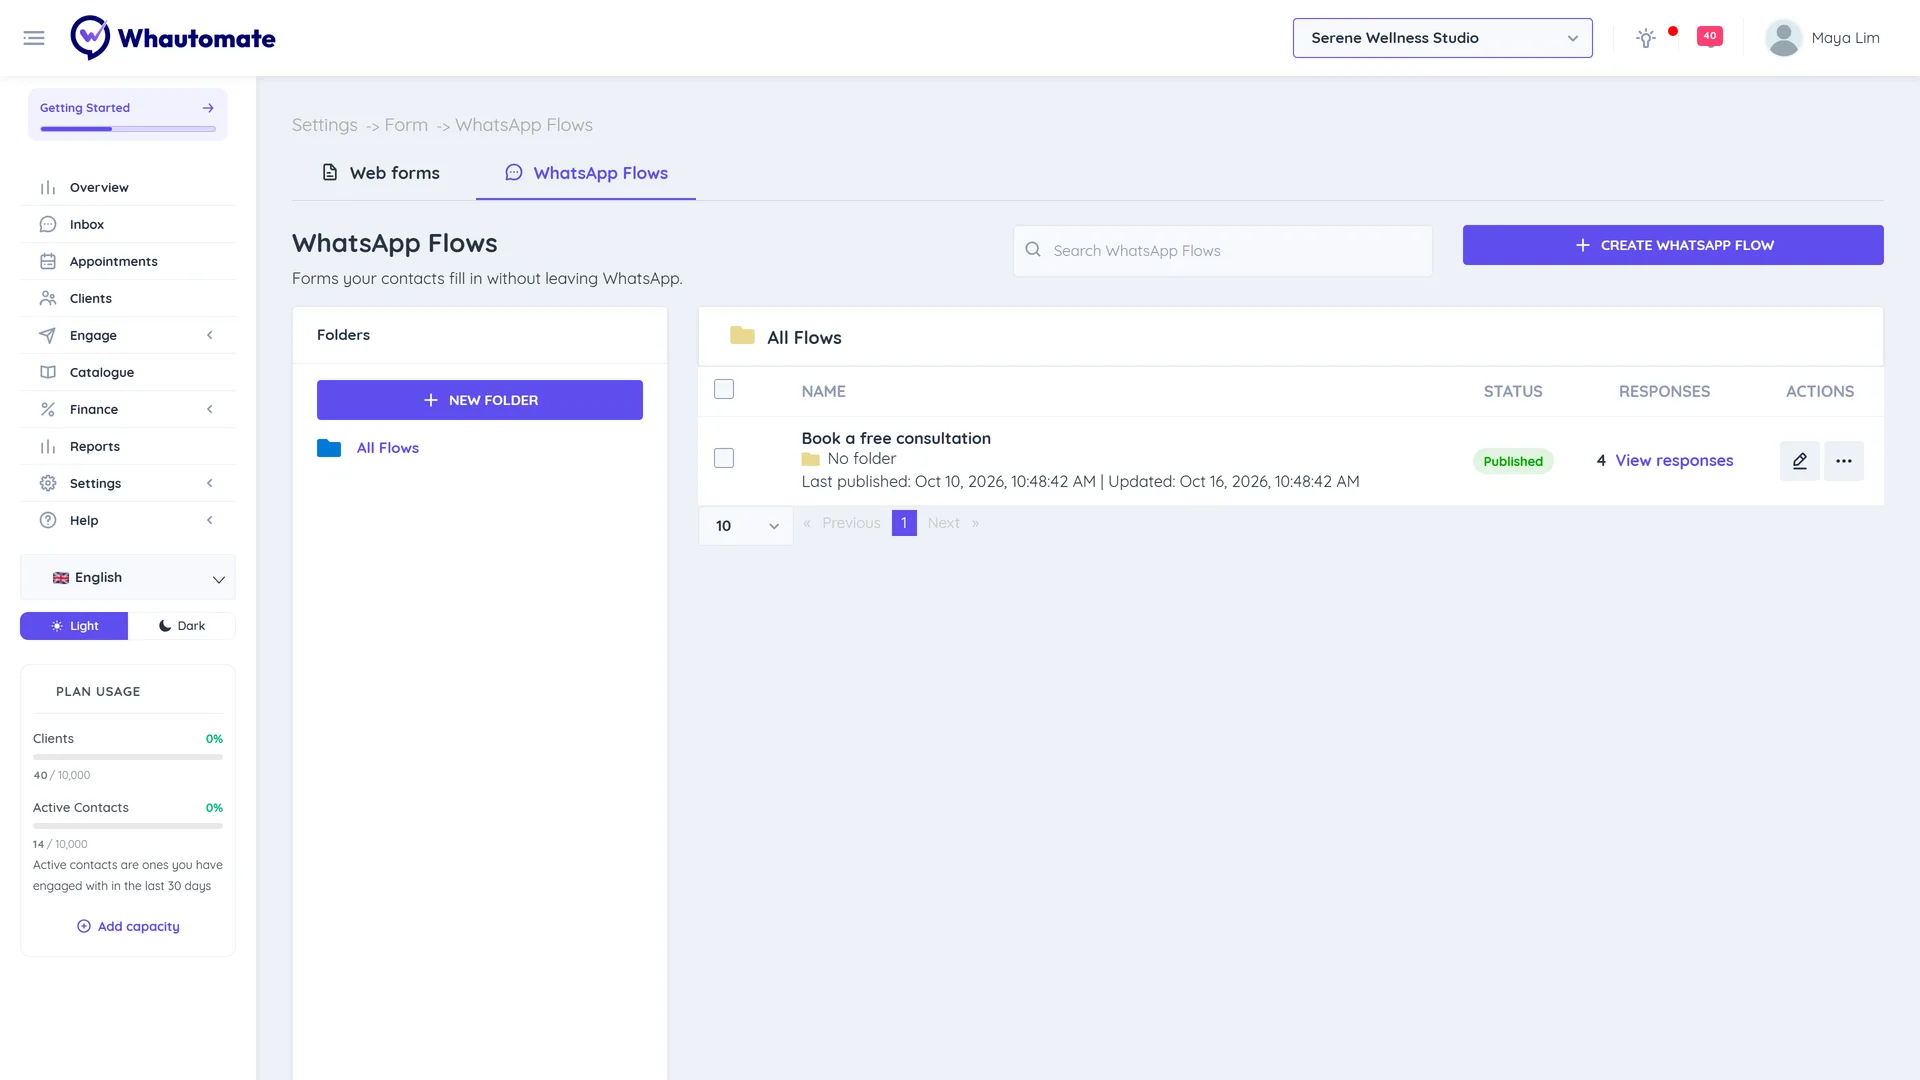
- The list shows each form's Status, version, Last published, Updated and Responses.
- Row actions: Edit, Responses, Publish, Duplicate and Delete. Deleting keeps saved responses, but automations and templates that send the form stop working.
View and export responses
- In the list, click View responses (or Responses in the builder).
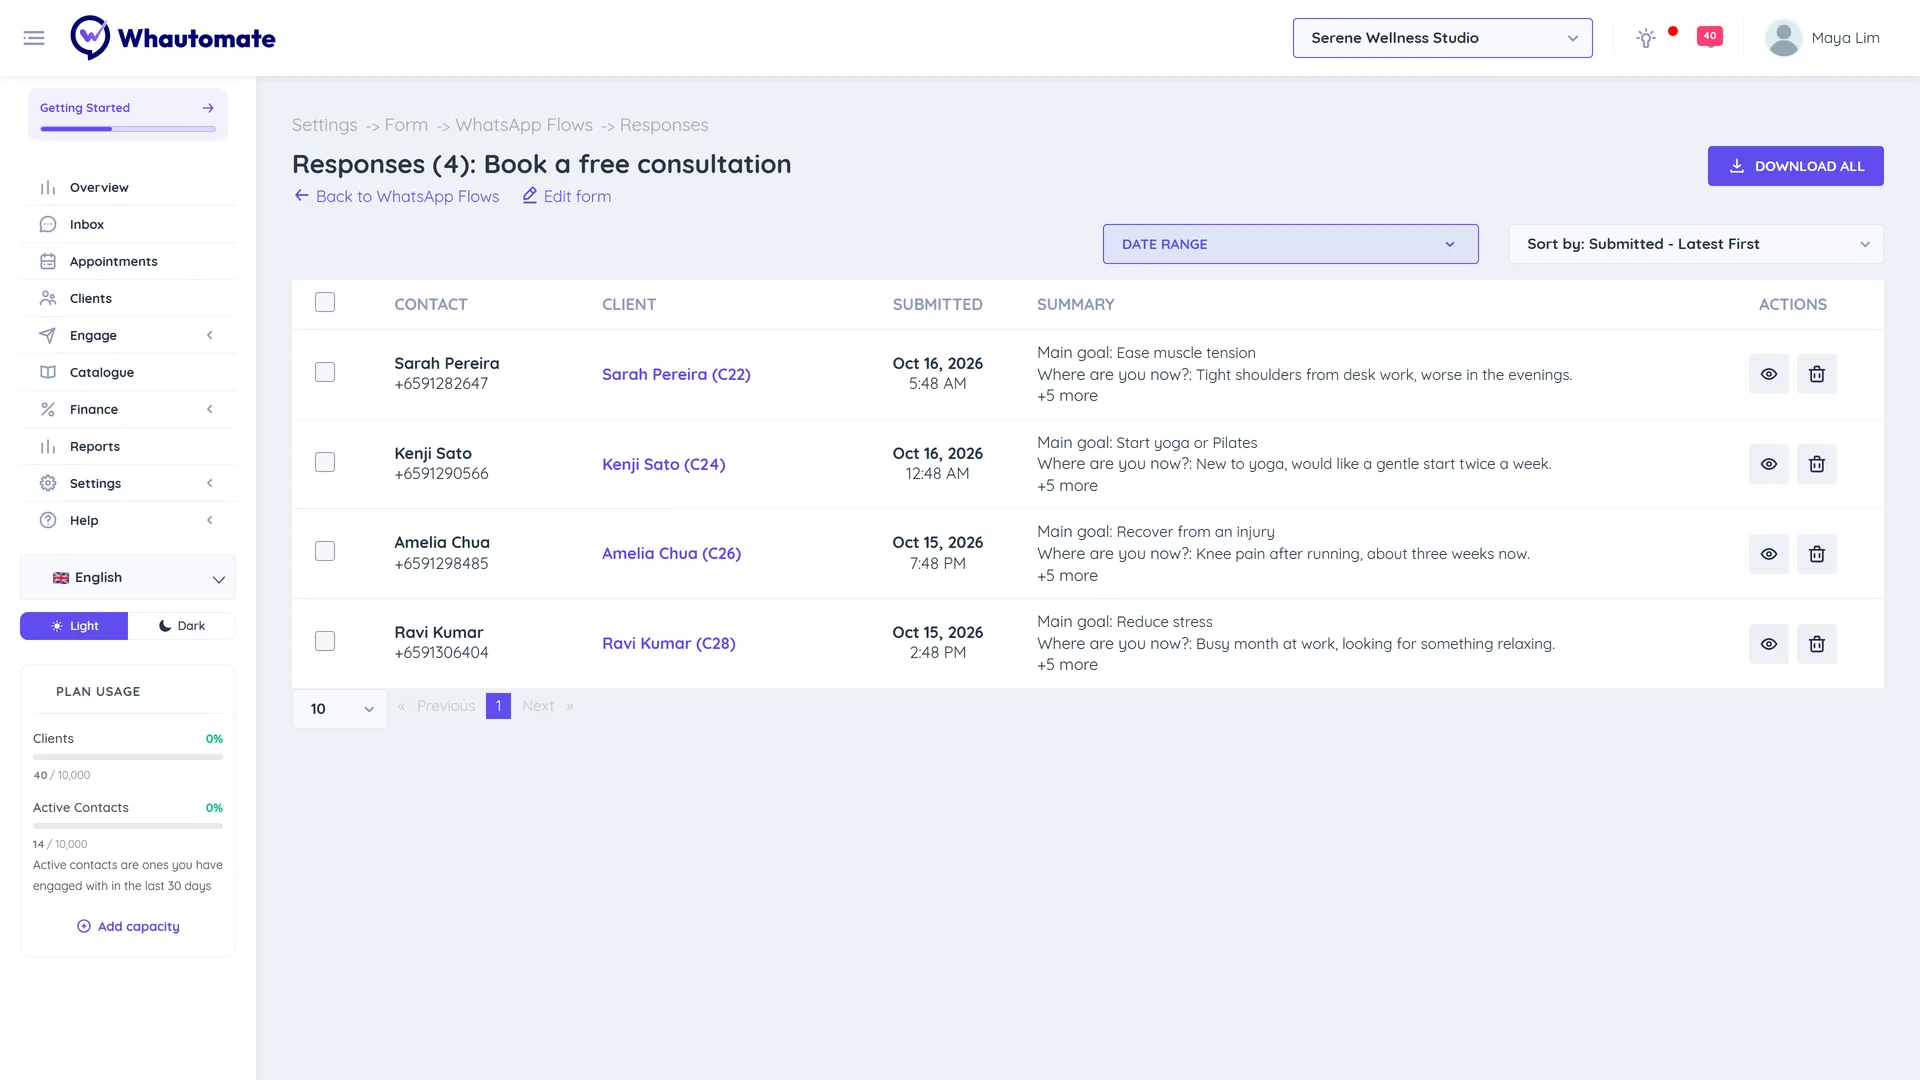
- Each row shows the Contact, the Client (with View client), when it was Submitted and a Summary of the answers. Filter with Date range and change the order with Sort by.
- Click View response to see every answer and any Uploaded files.
- To export, click Download all, or select rows and click Download selected. The file is prepared in the background; download it from Settings > Data Exports > Other Exports.
- To remove responses, select them and click Delete selected. This cannot be undone.
Responses also appear on the client's WhatsApp Flows tab.
Exported responses include links to uploaded files that work for 7 days after the export. Turn on Save to client documents on a Photo upload or Document upload component to keep files on the client's profile.
Automate on submission
Create an automation with the trigger When a WhatsApp Flow form is submitted and a WhatsApp Flow condition to act on answers: tag the client, notify your team, send a follow-up or assign a web form. See Automation.