Web Forms
Web forms are online forms your clients open from a link: intake forms, consent forms, waivers, surveys, registrations and lead capture. Use them to collect information before a first visit (like a New Client Intake Form), to get a signed consent, or to capture leads from your website. Answers can create or update the client record, add tags, save uploaded files to the client's documents and start automations, and each response is saved as a PDF.
Before you start
- Decide who fills the form in. This sets the form type:
- Private: only clients you send it to. Use for consent forms sent before an appointment.
- Public: anyone with the public link. A client record is created from the name and phone number.
- Anonymous: anyone with the public link, and no client is created. Use for anonymous surveys.
- Collecting payments in a form also needs Sales. See Payment forms.
Create a form
- In the main menu, open Engage > Forms & Flows. The Web forms tab opens.
- Click Add New Form.
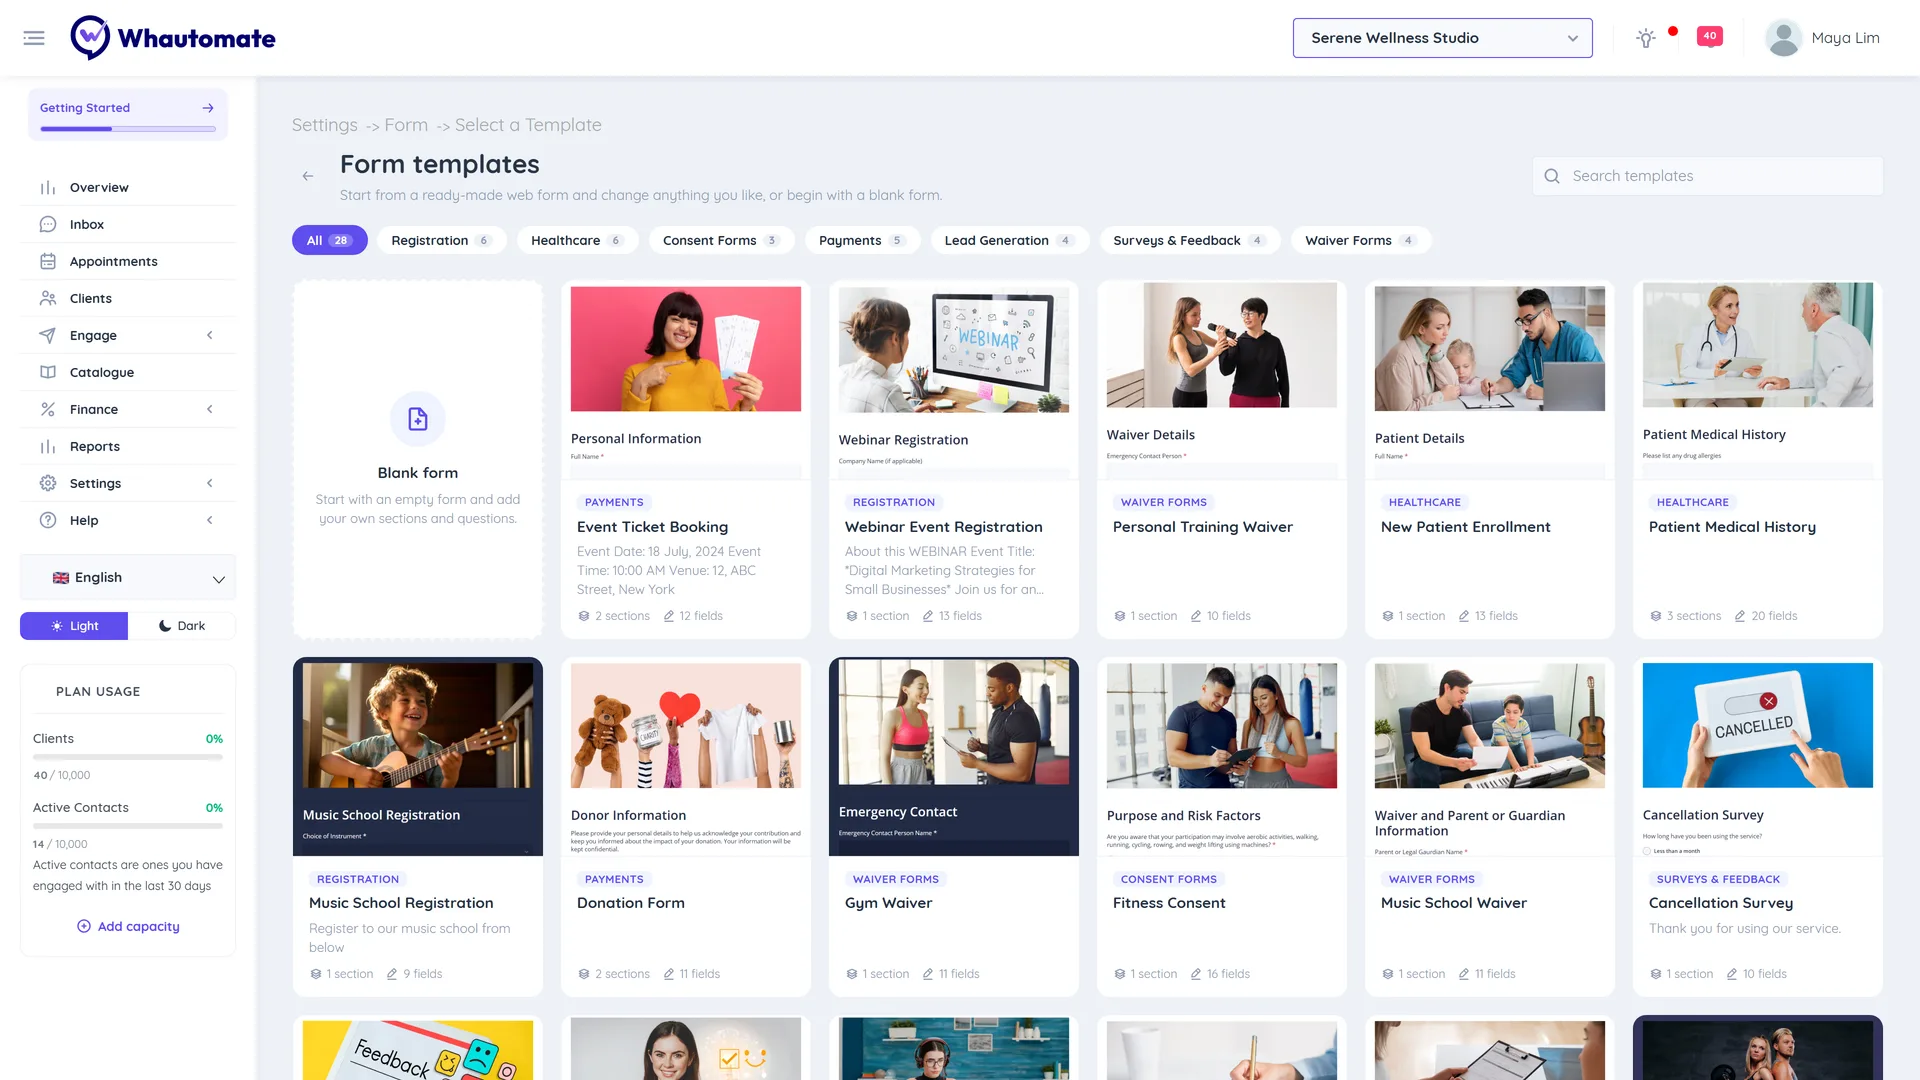
- Pick a template from Form templates (filter by category or search) and click Use template, or choose Blank form.
- Type the form name at the top, where it says Enter form name.
- Click the type under the name (Private, Public or Anonymous) to change who can fill it in.
- Build the form (see below) and click Save.
Build the form
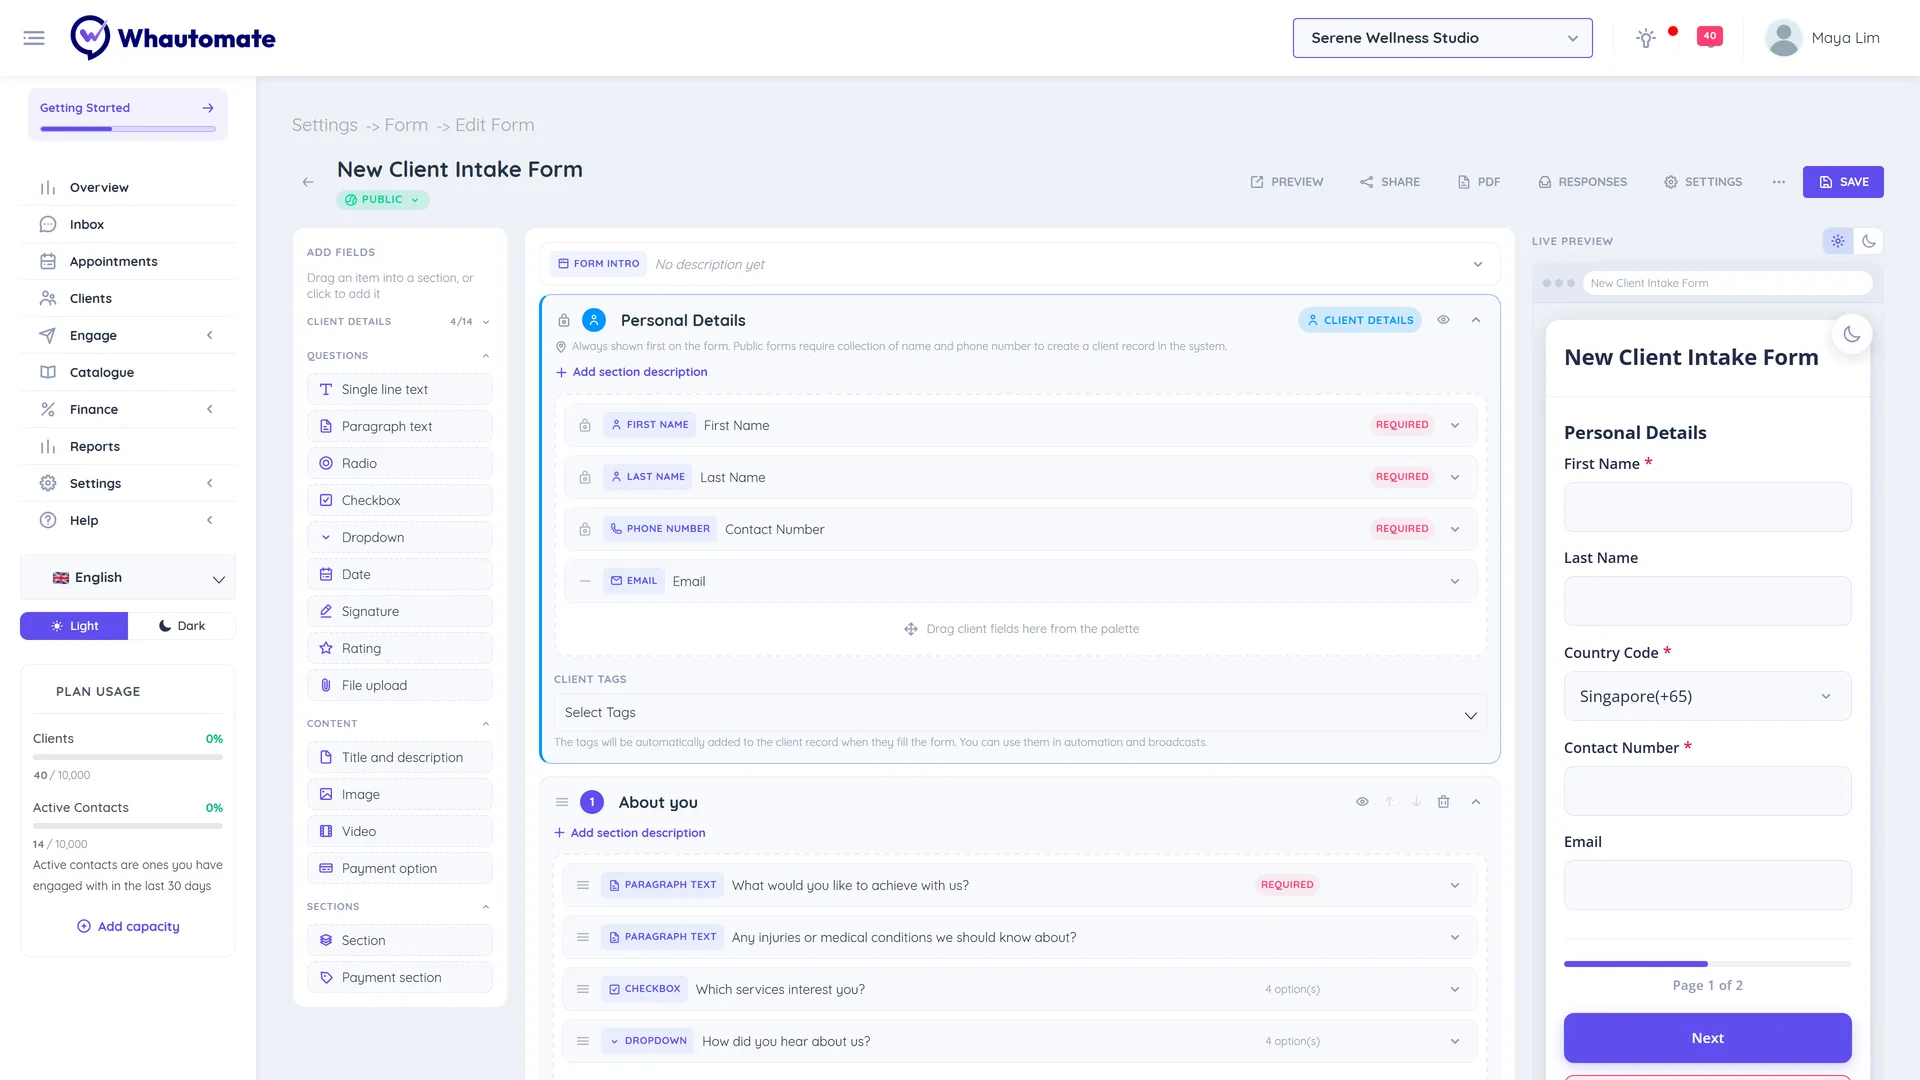
The builder has Add fields on the left, your sections in the middle and a Live preview on the right.
- Drag an item from Add fields into a section, or click it to add it. Groups are:
- Client details: first name, last name, phone number, email, date of birth, gender, address, emergency contact, referral source and more. They go in the client details section, which is always first. Each can be added once.
- Questions: Single line text, Paragraph text, Radio, Checkbox, Dropdown, Date, Rating, Signature and File upload.
- Content: Title and description, Image and Video (a YouTube link).
- Sections: Section, and Payment section for paid forms.
- Click a field to edit it: Question title, Choose type, Options and Required?. Use Duplicate, Delete, Move up and Move down, or drag to reorder.
- Each section becomes a page of the form. Add a Section title and Section description to guide the client.
- Click any field in the Live preview to jump to it. Switch the Preview theme between Light mode and Dark mode; visitors see the mode of their device.
Client details
Turn on Collect client personal details? in the settings (or click Collect client details in the palette) to let clients fill in or update their own record. Existing details are pre-filled for the client to review. Public forms always collect the name and phone number. You can rename the label of each client field, mark it required, and turn on Mask in PDF for the phone number. Add Client tags to tag everyone who submits the form.
File uploads
Add a File upload question to collect photos or documents, such as an ID or a medical certificate.
- Accepts: Photos, Documents, or Photos and documents.
- Max files: 1 to 3 per question. Max size per file (MB): up to 5 MB.
- Save to client documents: when on, uploaded files are added to the client's documents when the form is submitted. When off, they stay on the response only.
- File uploads need client details, so a form with a file upload question cannot be anonymous.
Form settings
Click Settings in the top bar. Settings that need attention show a dot.
- General: the form Type, Collect client personal details?, client tags and referral sources.
- Header and branding: Add header media (image or YouTube video), Upload your header logo, Footer text.
- Theme settings: Primary color, Font, Layout direction (Left to right or Right to left).
- Response settings: Accept responses, Accept responses until a date, Message when not accepting responses, Limit number of responses.
- Submission settings: Display thank you note (with a title and description) or Redirect to URL.
- Button text settings: the text on the Submit, Clear form, Next and Previous buttons.
Click Done, then Save.
Share a public form
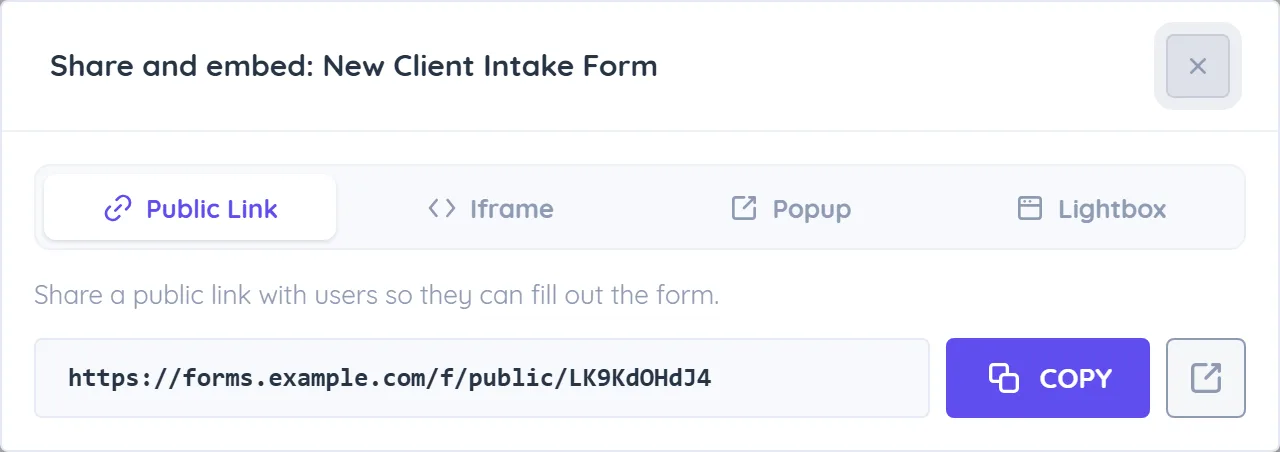
Public and anonymous forms have a Share button in the builder, and Share and embed in the list's More Actions menu.
- Public Link: click Copy public link and share it anywhere, or Open in new tab.
- Iframe: embed the form in a page of your website.
- Popup: add a button to your website that opens the form in a browser popup.
- Lightbox: add a button to your website that opens the form in a lightbox.
Copy the code with Copy iframe code, Copy popup code or Copy lightbox code and paste it into your website. To send a private form to a client, use the client's Forms tab or an automation.
Manage forms
- Each row in the list shows the folder, type, number of sections and questions, and # of Responses.
- Organise forms in Folders: click New Folder, then select forms and click Move Selected Forms.
- More Actions on a row: Open public link, Copy public link, Share and embed (public and anonymous forms), Clone, Preview, View responses and Move to folder.
View and export responses
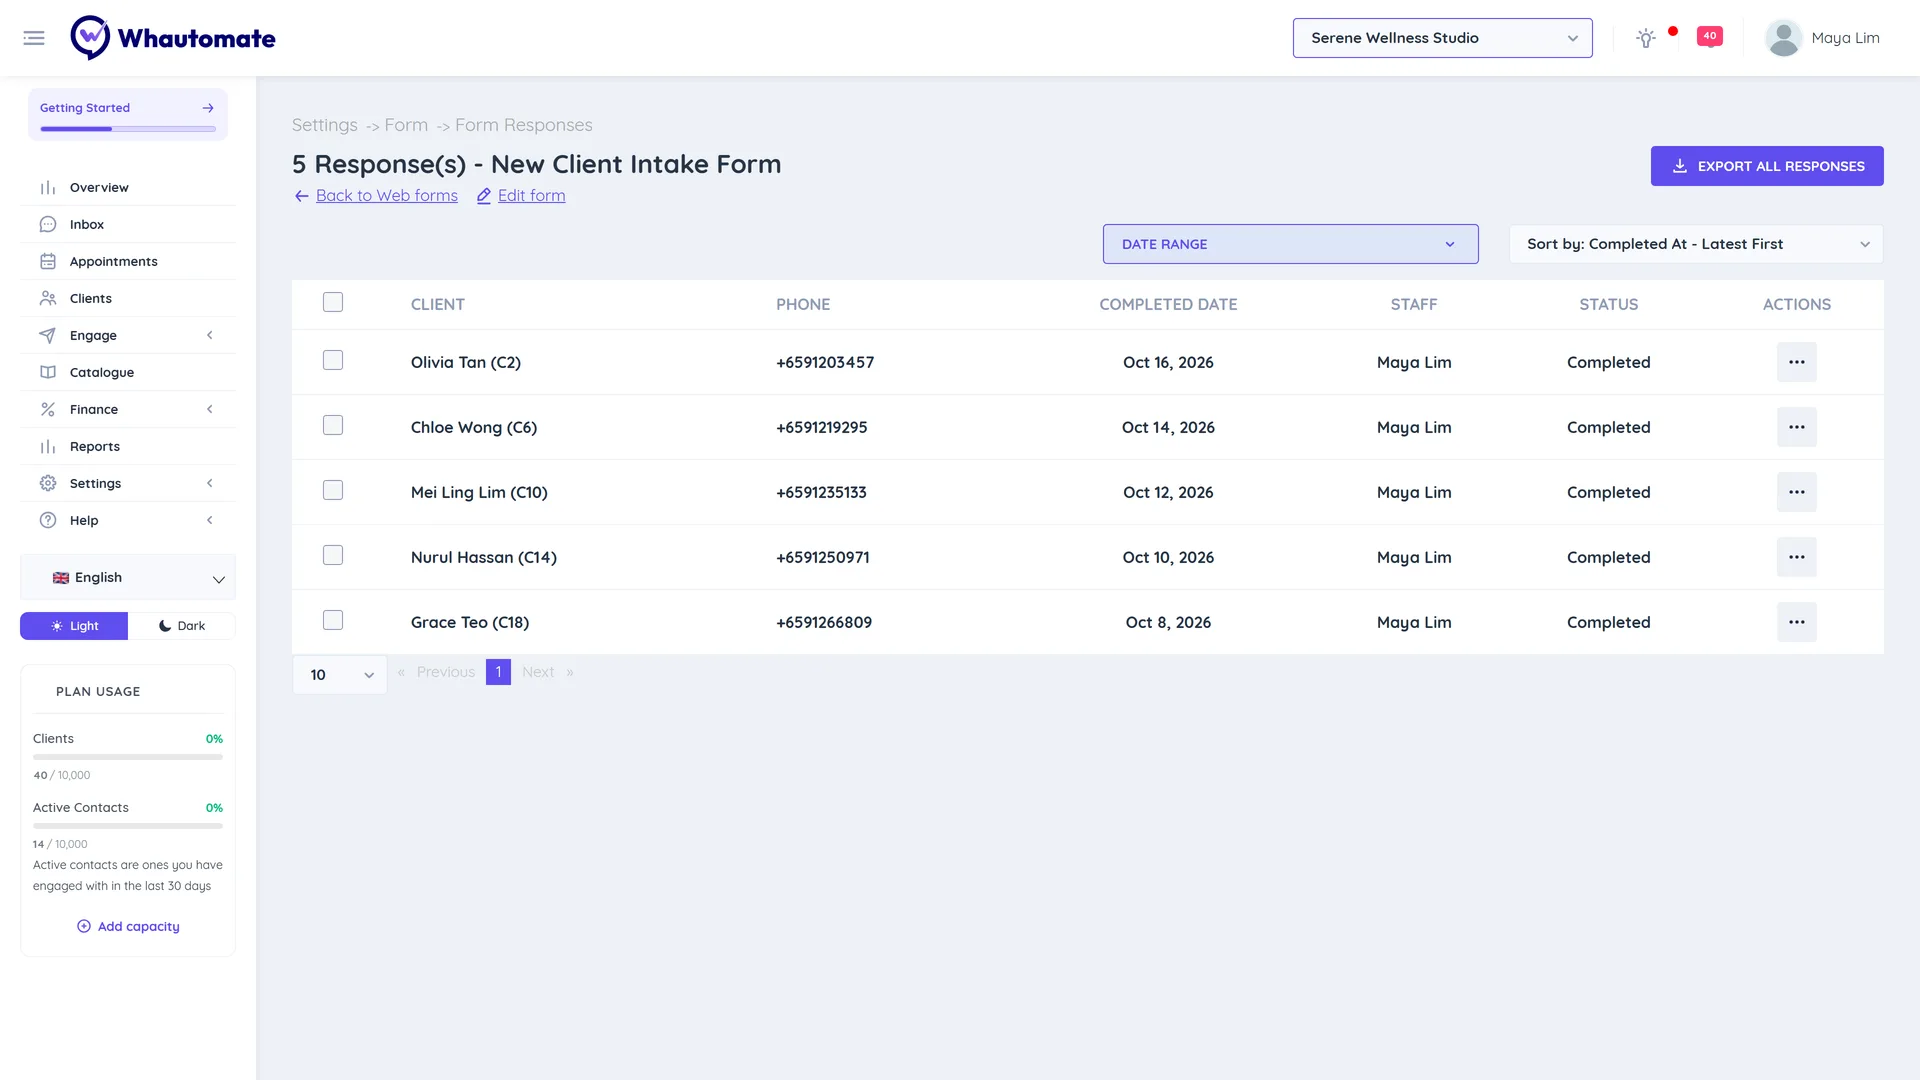
- In the list, click View Responses under # of Responses, or click Responses in the builder.
- Each row shows the Client, Phone, Completed Date, Staff, Amount (payment forms) and Status. Filter with Date Range and change the order with Sort by.
- Open a response to view the answers, print the PDF or see uploaded files.
- To export, click Export All Responses, or select rows and click Export selected. The file is prepared in the background; download it from Settings > Data Exports > Other Exports.
- To remove responses, select them and click Delete selected.
Exported responses include links to uploaded files that work for 7 days after the export. To change how the response PDF looks, click PDF in the builder; see Personalize form response PDFs.