Email Sending Domains
Before you can send email campaigns, Whautomate needs permission to send email on behalf of your domain, for example serenewellness.com. You give that permission by adding a few DNS records at the company that manages your domain (your DNS provider, often the place you bought the domain). After the domain is verified, you add the sender addresses your campaigns come from, such as hello@serenewellness.com.
Before you start
- You need to be an account Owner or Administrator.
- You need access to your domain's DNS settings, or someone who can add records for you.
- Only add domains you own.
Add and verify a domain
- Go to Settings > All Settings, and under Messaging & Inbox click Email sending domains.
- Click Add domain, enter the domain only (for example
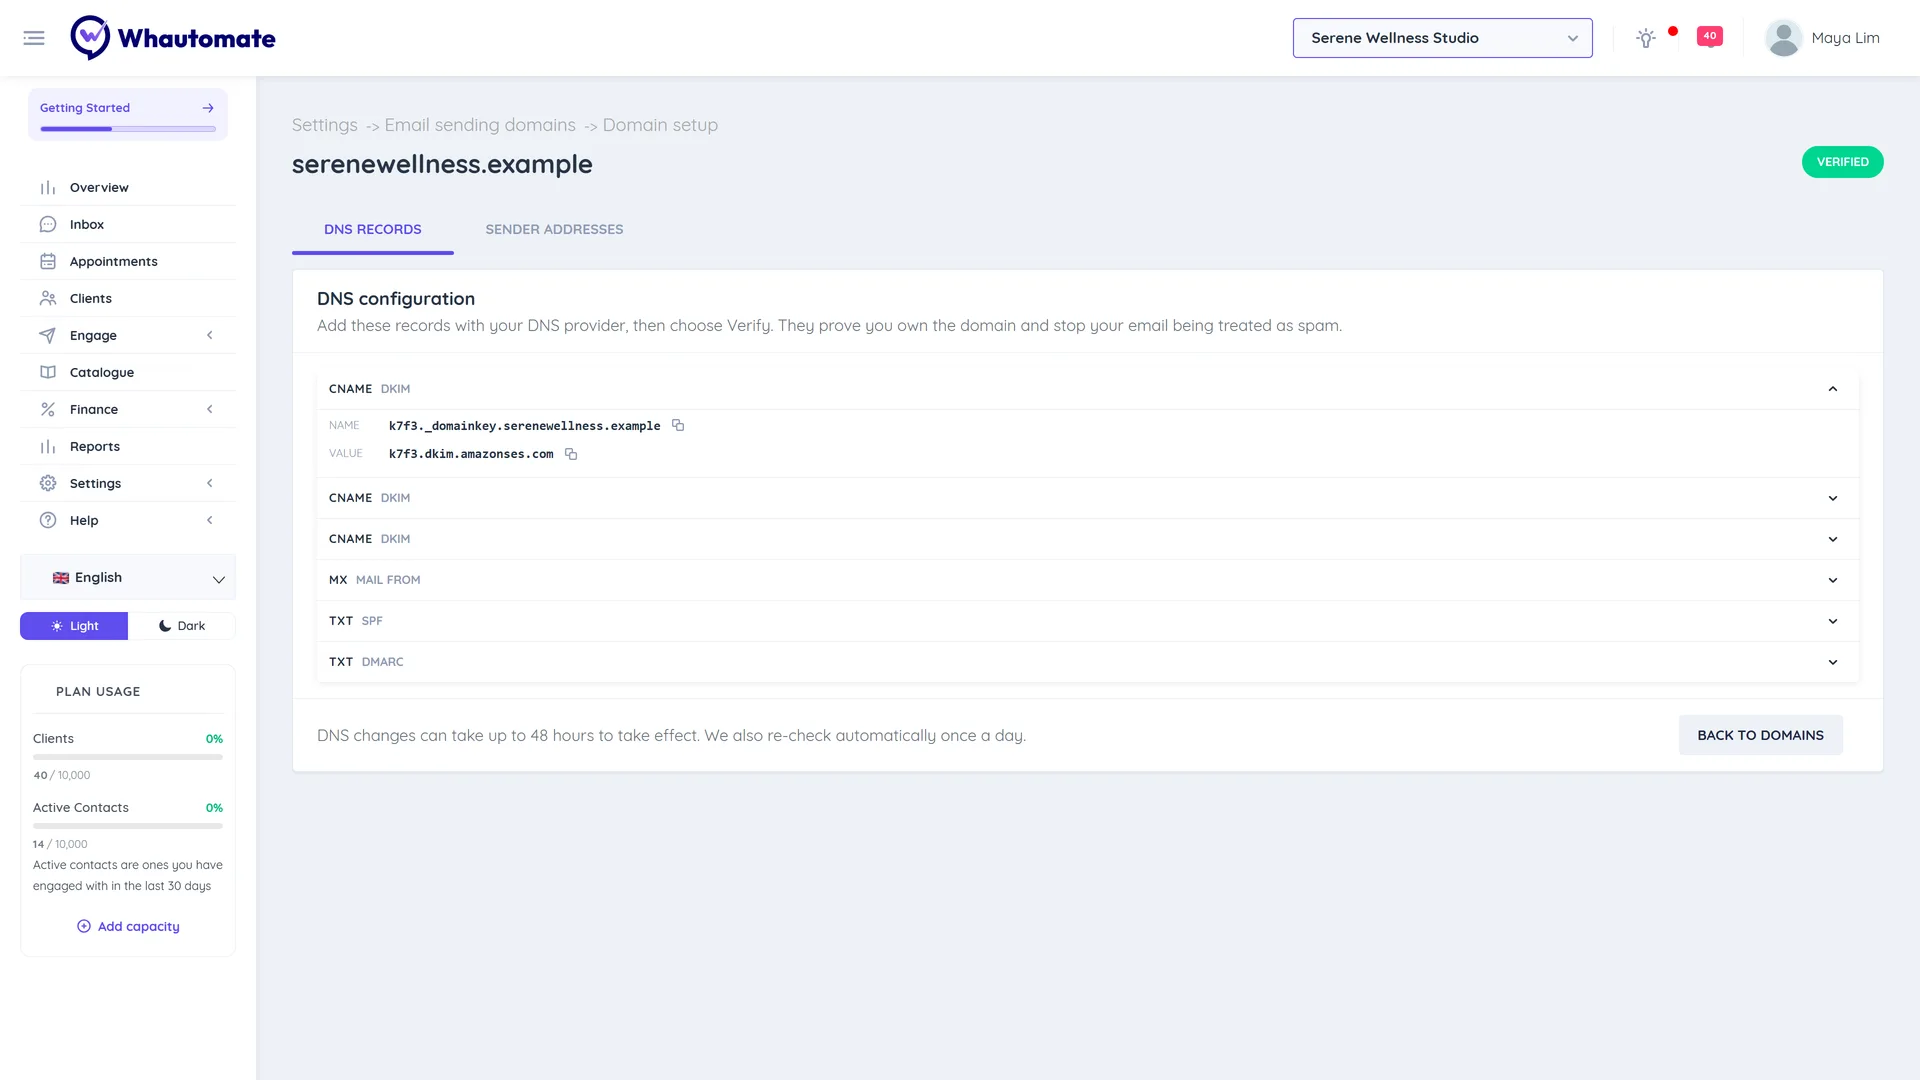
serenewellness.com, withouthttp://or a path) and save. You see Domain added. Add the DNS records shown, then verify. - The domain opens on the DNS records tab. Under DNS configuration, each record shows its type, a Name and a Value, with copy buttons.
- In your DNS provider, add each record exactly as shown: several CNAME records for signing (DKIM), an MX and a TXT record for the return path (SPF), and a TXT record for DMARC.
- Back in Whautomate, click Verify. When the records are found, you see Domain verified. You can now add a sender address.
DNS changes can take up to 48 hours. If verification fails at first, wait and click Verify again. Whautomate also re-checks once a day.
Domain status
| Status | Meaning |
|---|---|
| Pending verification | Waiting for the DNS records to be found |
| Verified | Ready to use |
| Verification failed | The records were not found or do not match. Check them and verify again |
| Disabled | Sending from this domain has been switched off |
Add a sender address
- Open the domain and go to the Sender addresses tab. (Add sender stays disabled until the domain is verified.)
- Click Add sender.
- Enter the From name (for example "Serene Wellness Studio") and the Email address on your domain.
- Optionally add a Reply-to address where replies should go.
- Under Applies to, choose whether every workspace can use this sender or only one.
- Tick Use as the default sender if campaigns should use it by default, and save.
When the page shows Your account is ready to send email campaigns., you can create an email broadcast. A workspace's own default sender is used before the account-wide default.
Keep your sending healthy
The Email sending domains page warns you when your bounce rate or spam complaint rate is getting high (for example Your email sending needs attention). If they pass the limit, campaign sending is paused (Campaign sending is paused) to protect your domain. Receipts and reminders keep working. Click Review the do-not-send list and see Email Activity.
To keep rates low, send only to people who agreed to hear from you, and remove old or mistyped addresses.
Remove a domain
Click Remove domain next to it and confirm. Its sender addresses are removed too. You cannot remove a domain while a scheduled or running campaign uses it.
Tips
- If your domain already sends email (for example with Google Workspace or Microsoft 365), the new records sit alongside your existing ones. Add them; do not replace your existing MX records for the root domain.