Email Broadcasts and Campaigns
An email broadcast (email campaign) sends a designed email to your clients, for example a monthly newsletter, a seasonal promotion or a new service announcement. You build it with a drag and drop editor or a simple text editor, send it from your own domain, and see who opened it, clicked a link, bounced or unsubscribed.
Before you start
- Set up email sending: add and verify your domain and add a sender address. See Email sending domains. Until this is done, the form shows Email sending is not set up.
- Create a client segment for the people you want to reach. Email campaigns go to clients (or class participants with Bookings), not to WhatsApp contacts.
- Make sure you have enough email credits. Each recipient uses one credit. You can buy more under Settings > Email/SMS/AI Credit Purchases.
Create an email broadcast
Go to Engage > Broadcasts and click + Add Broadcast. Click Save & Next after each step.
- Campaign: enter a Broadcast Name and choose Email as the Channel.
- Recipients: choose Client and pick one or more client segments, or choose Class or Retarget. Click Recipients Count to check the size.
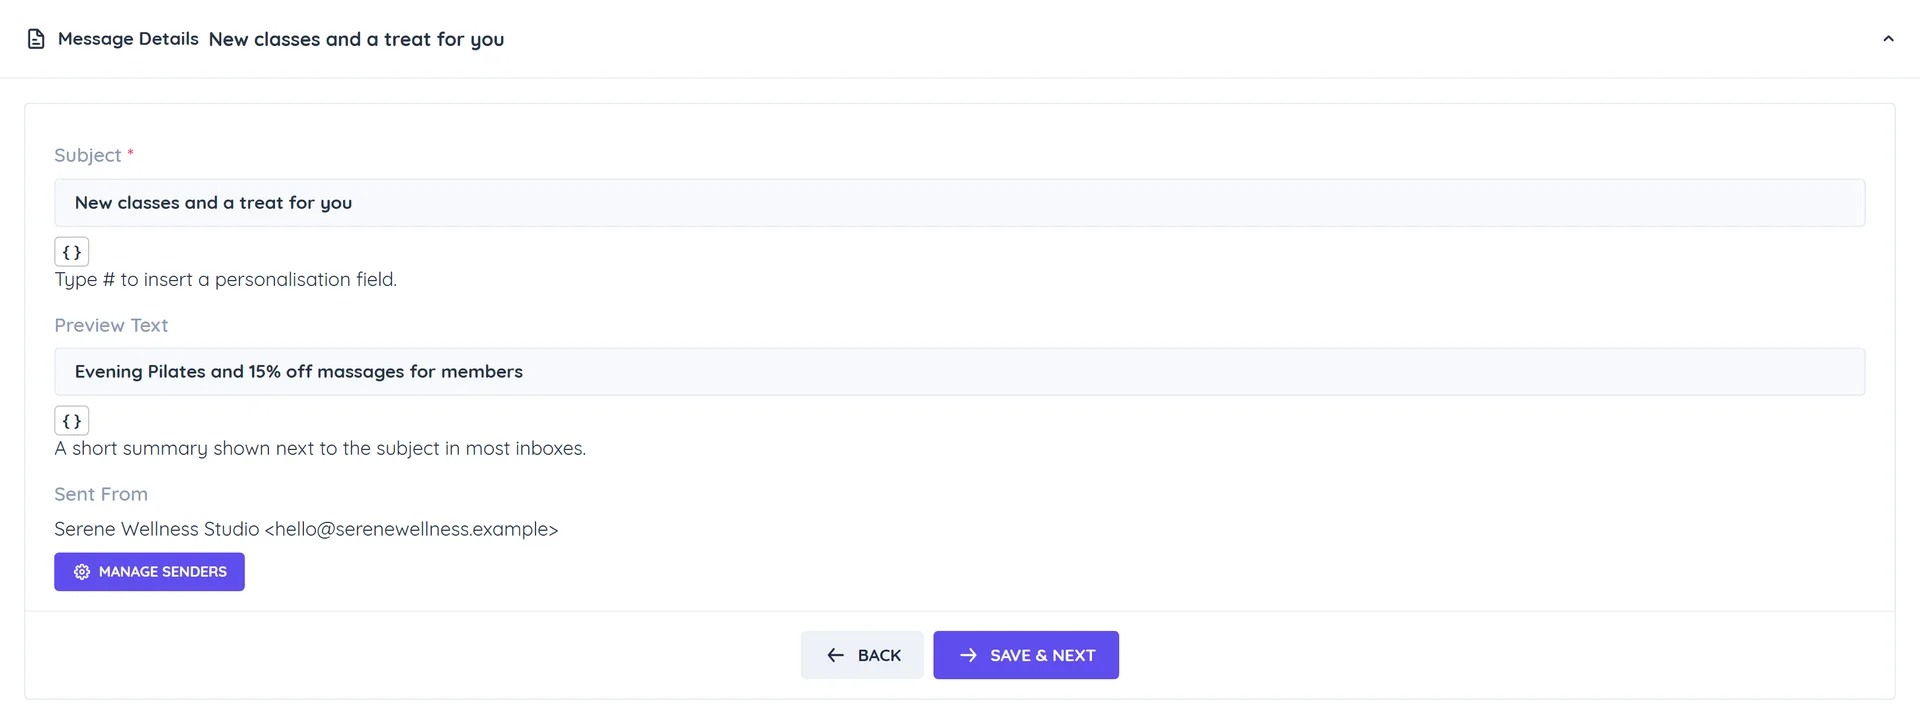
- Message Details:
- Subject: type # to insert a personalisation field such as the client's name.
- Preview Text: a short summary shown next to the subject in most inboxes.
- Sent From: the default sender for this workspace. Click Manage senders to change it.
- Email Content: choose the Drag & Drop Editor for a designed email or the Simple Editor for plain rich text, then click Create Content. See Design your email. When you return, the Email Snapshot shows a preview. Click Send Test to send it to yourself.
- Schedule & Send: choose a Broadcast Schedule, or leave it empty to send immediately. Check the Campaign Summary and click Save & Schedule, then confirm.
Click Save Draft at any time to finish later.
Design your email
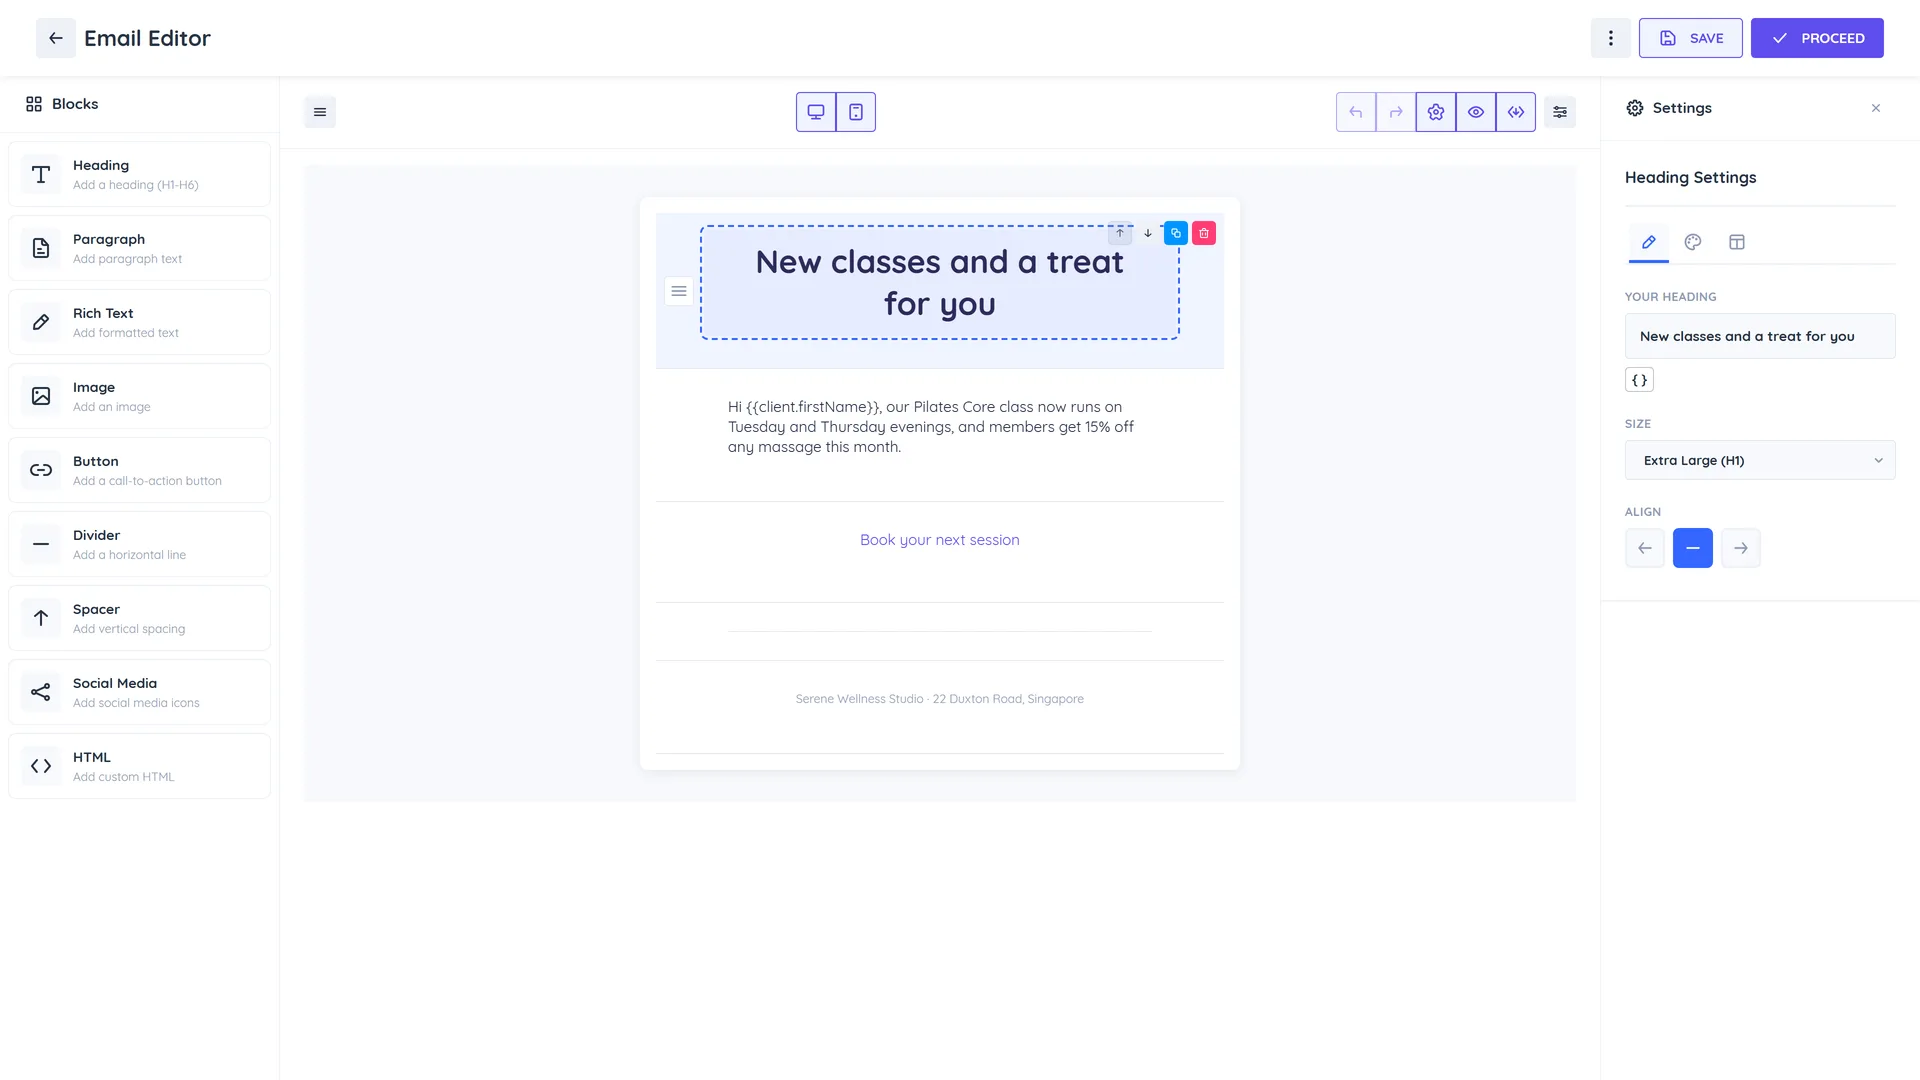
The Drag & Drop Editor opens full screen:
- Drag blocks from Blocks onto the email: Heading, Paragraph, Rich Text, Image, Button, Divider, Spacer, Social Media and HTML.
- Click a block to edit it in Settings on the right. Use the block controls to move it up or down, duplicate it or delete it.
- Click the background of the email to open Email Template Settings for background colours and width.
- Switch between desktop and mobile views to check the layout. Use Preview & Test Email to preview it in light and dark mode and send a test.
- To start from a design, open the menu and choose View Templates. To reuse your design later, choose Save as Template.
- Click Proceed to save and return to the broadcast.
You can use personalisation variables such as {{client.name}} and {{business.name}} in the text.
About test emails
Test emails are sent from your real sender address with [Test] in front of the subject. Personalisation variables are not filled in, links are not tracked and no credits are used.
Unsubscribe link
Every campaign email automatically gets a footer with your business name and an Unsubscribe link. People who unsubscribe are added to your do-not-send list and do not receive future campaigns. You do not need to add your own unsubscribe link.
Track results
Open a sent campaign from the Broadcasts page (View Analytics). The detail page shows Emails Sent, Delivered, Opened, Clicked, Bounced, Unsubscribed, Spam Reports and Failed. Open, click, unsubscribe and spam rates are a share of delivered emails. Some email apps do not report opens, so the real open rate can be higher.
Use Filter By to list, for example, everyone who opened or clicked, and Export Data for a full report. To follow up, click Retarget Recipients and choose Opened the email, Clicked a link or Bounced.
For a log of every email your account has sent, including receipts and reminders, see Email Activity.
Limits
- Credits: if you run out of credits, the campaign sends to as many recipients as your credits allow and the detail page explains why it stopped.
- Daily sending limit: new accounts have a lower daily limit for their first days of sending, which then rises. Emails over the daily limit are not sent.
- Free trial: campaigns reach up to 100 recipients.
- Reputation protection: if too many emails bounce or are reported as spam, campaign sending is paused to protect your domain. Receipts and reminders keep working. See Email sending domains.
- Do-not-send list: addresses that bounced, reported spam, unsubscribed or were added by you are skipped and show as SKIPPED.
- Once a campaign has started, it can no longer be edited.