Manage Data Lists
Manage Data Lists is where you keep the lists your team picks from: client tags such as VIP, Member or Yoga, the referral sources clients choose ("How did you hear about us?"), contact tags and groups for the inbox, and categories for services and products. Tidy lists make filters, segments and reports more reliable, so set them up before you import clients or build forms.
The page itself is on every plan. Each tab appears only when your plan includes the feature it serves:
| Tab | Used for | Needs |
|---|---|---|
| Client Tags | Tagging clients, client list filters, client segments, automations | CRM Suite |
| Referral Source | The referral source on client profiles and web forms | CRM Suite |
| Contact Tags | Tagging inbox contacts | Every plan |
| Contact Groups | Grouping inbox contacts | Every plan |
| CSAT Surveys | Customer satisfaction surveys sent after conversations | Every plan |
| Service Category | Grouping services | Bookings or Sales |
| Product Category | Grouping products | Sales |
Add a client tag
- Go to Settings > Manage Data Lists (under Data & Fields).
- Open the Client Tags tab.
- Click Add Client Tag.
- Enter the tag Name and click Save.
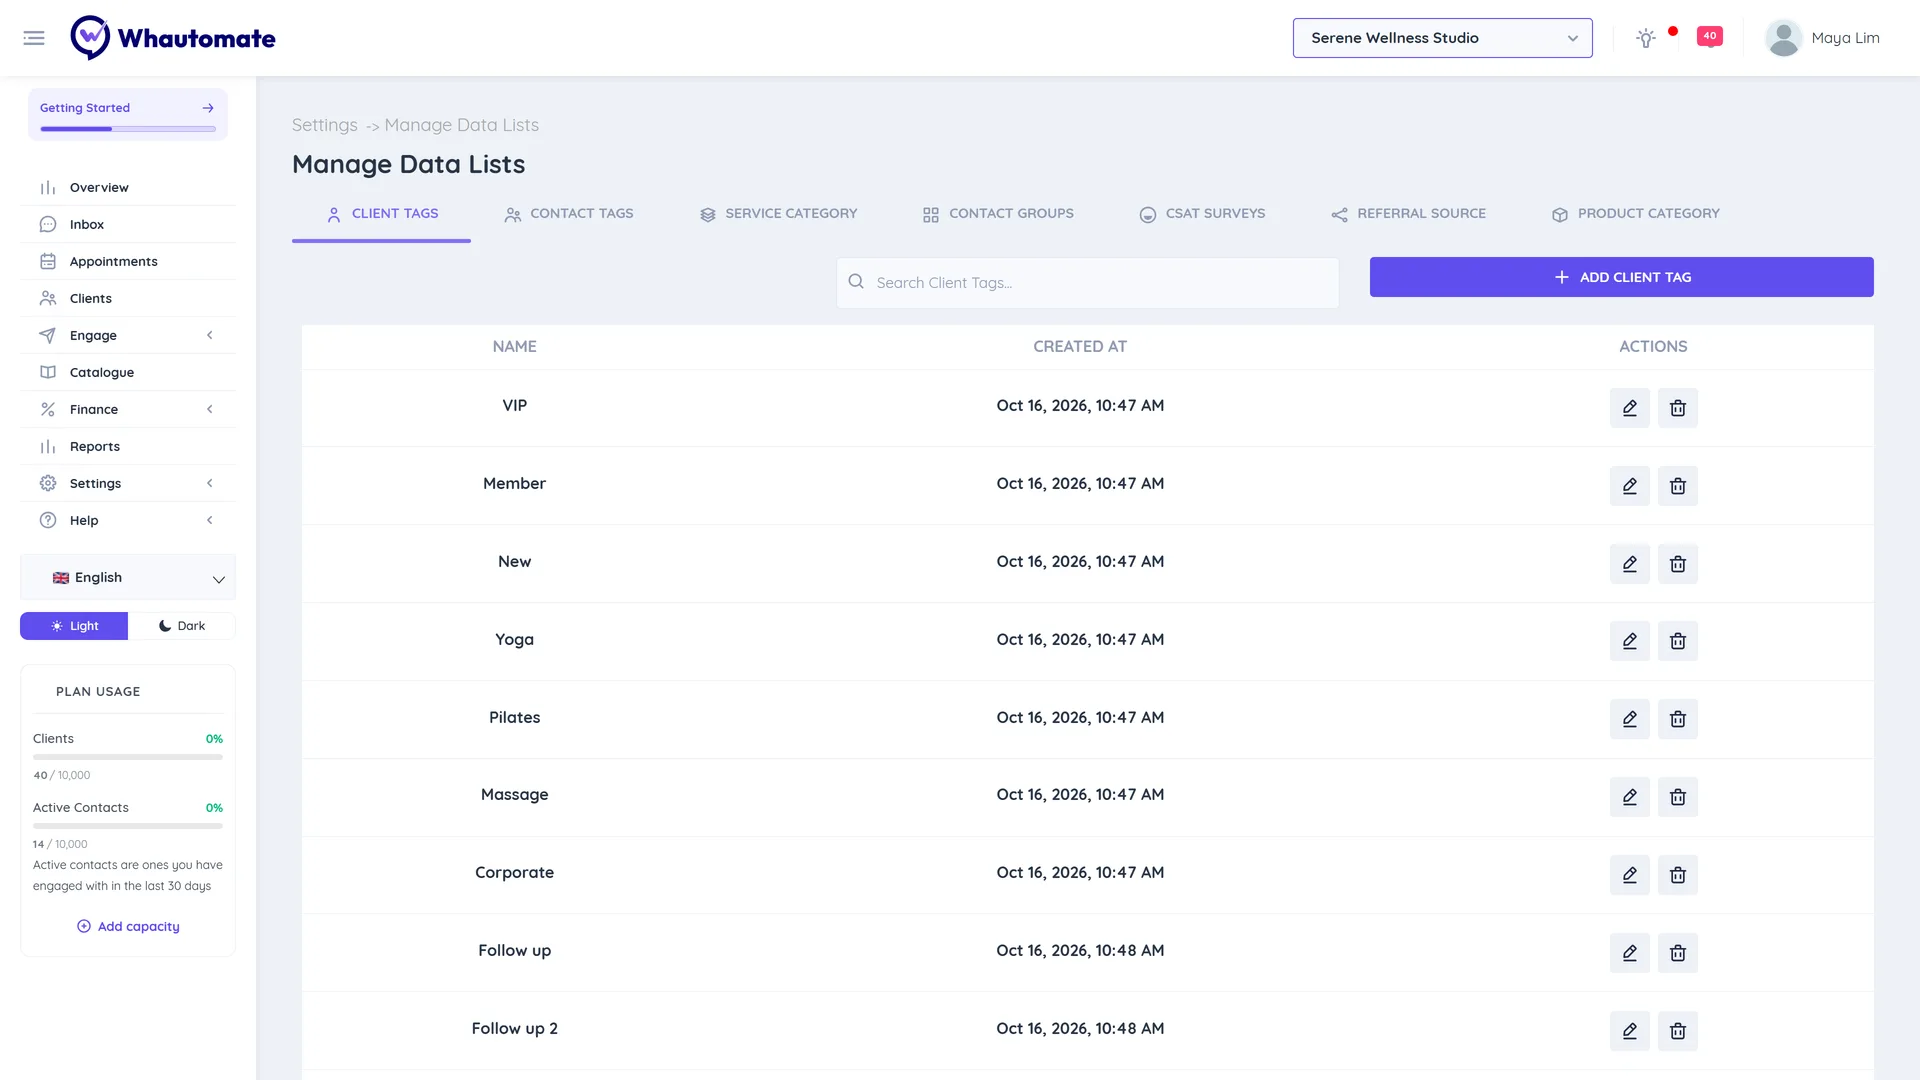
To rename or remove a tag, use Edit Client Tag or Delete Client Tag on its row. Every other tab works the same way: Add Referral Source, Add Contact Tag, Add Contact Group and so on.
Tags are saved on each client by name. Renaming or deleting a tag here does not change the tags already on clients. To change a tag on many clients, filter the client list by the tag and use Add Tags to Client(s) and Remove Tags from Client(s).
You can also create a client tag on the fly: type a new name in any tag picker (client profile, bulk tagging, web form settings) and add it. Lists are shared by all workspaces in your account.