Create an Automation Rule
Build your own rule when no template fits. A rule has one Trigger, optional Conditions and one or more Actions. This page walks through each part.
Before you start
- Connect the channel the rule will message on, for example WhatsApp.
- For messages sent later than 24 hours after the contact's last message (reminders, follow-ups, birthday wishes), create an approved WhatsApp template first.
Create the rule
- Go to Engage > Automations and click Add Rule.
- On Create Automation Rule, click Create rule from scratch.
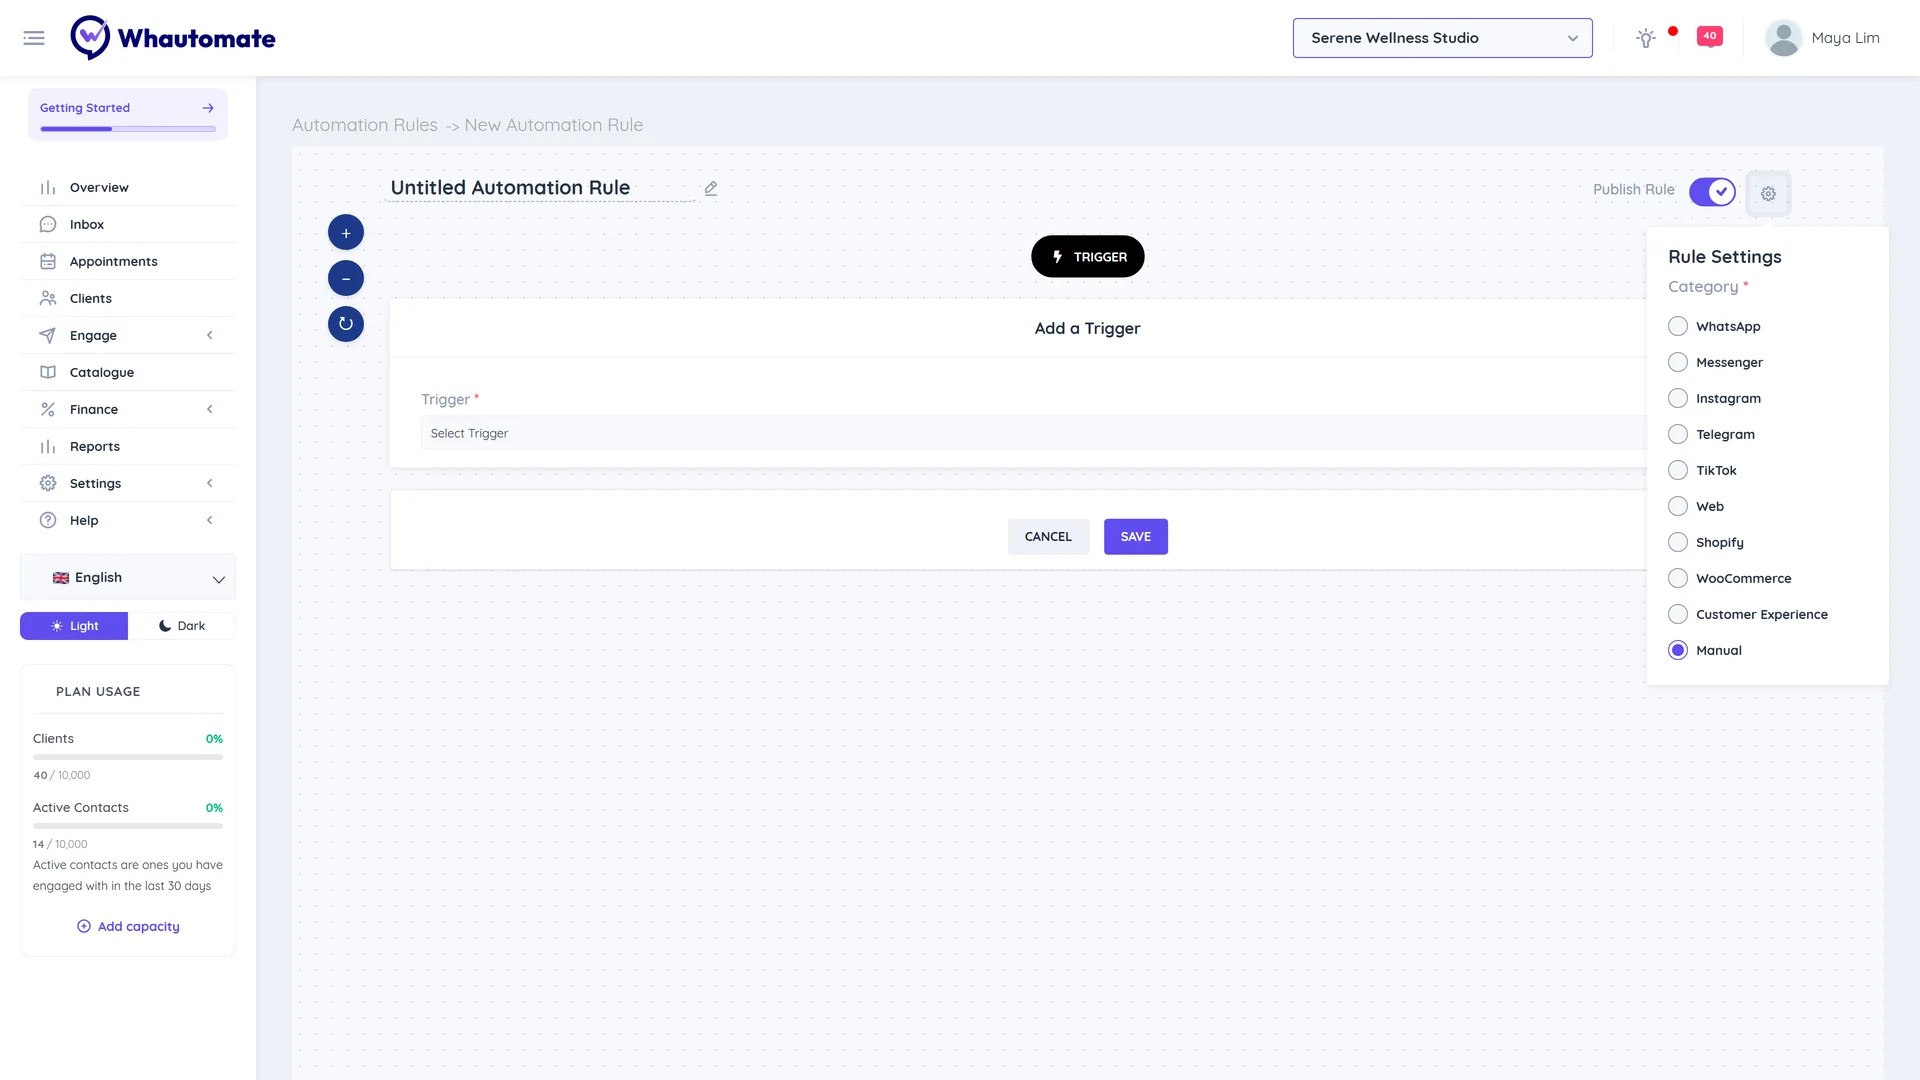
- Click the name at the top (it starts as Untitled Automation Rule) and type a name you will recognise, for example "Opening hours reply".
- Click the settings icon next to Publish Rule to open Rule Settings and choose a Category: WhatsApp, Messenger, Instagram, Telegram, TikTok, Web, Shopify, WooCommerce, Customer Experience or Manual. The category only decides which tab the rule is listed on.
1. Choose the trigger
Click Trigger (or Add a Trigger) and pick an event from the Trigger list. A short description of the trigger appears below it. See Triggers for every option.
Changing the trigger later clears the rule's conditions and actions, because each trigger has its own.
On message triggers you also see Override Human Agent:
- Off (default): while a team member has the conversation Open, the rule does not run, so the bot does not talk over a person.
- On: the rule runs whatever the conversation status. Use it for rules that must always work, such as an opt-out keyword.
2. Add conditions (optional)
Without conditions, the rule runs every time the trigger fires. To narrow it down:
- Click Conditions, then Add Condition.
- Pick a Field, an Operator and a value. The value box changes with the field: keywords, a regex pattern, a list of tags, a time, a number or a status.
- Add more conditions if needed, and choose the Condition Type:
- All (AND): "This rule is executed only when all of the following conditions are met."
- Any (OR): "This rule is executed even when any one of the following conditions is met."
- Remove a condition with the bin next to it.
Useful operators:
| Operator | Use it for |
|---|---|
| includes any | Keywords. Matches if the text contains any of them, ignoring upper and lower case. |
| equals / not equals | An exact value, such as a status or an exact reply. |
| matches regex pattern | Precise text matching. Click View examples for patterns such as /^stop$/i. |
| is part of any / is part of all / is not part of all | Lists, such as tags, groups or message types. |
| is between / is before / is after | A time of day in your location's time zone, for example 19:00 to 09:00. |
| is on | One or more weekdays. |
| is less than X period ago (past) / is more than X period ago (past) | How long ago something happened, for example the last contact activity. |
3. Add actions
- Click Add Action and pick one from Select Action. The list depends on the trigger.
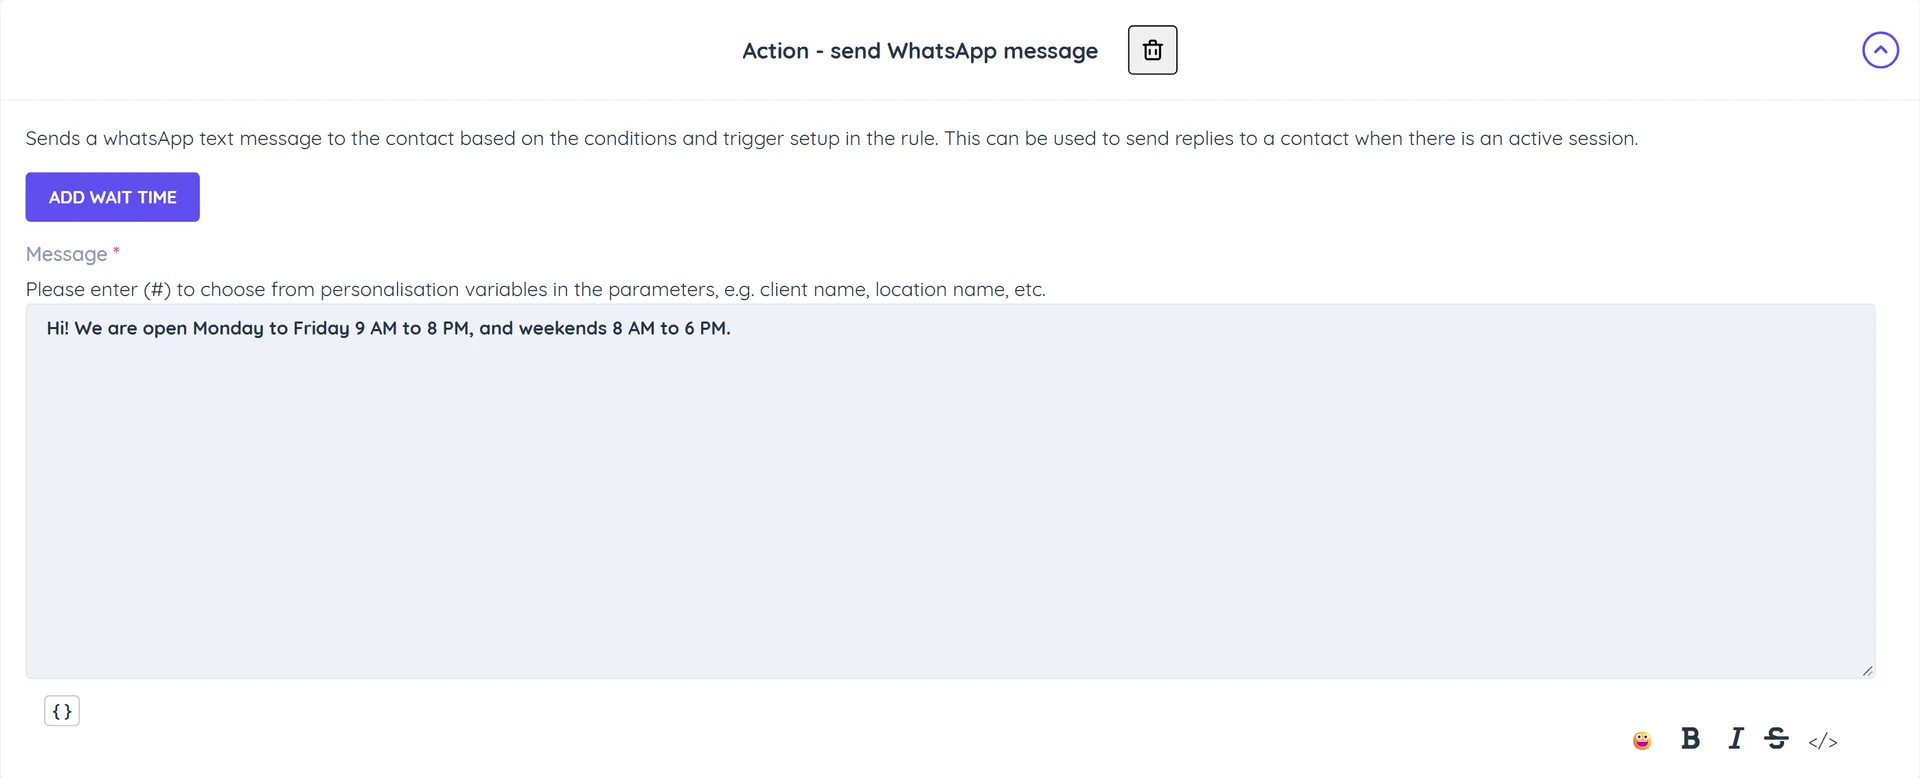
- Fill in the action, for example the Message to send. Type # in a message or parameter to insert a personalisation variable such as the contact's name.
- Add more actions as needed. They run from top to bottom; use the arrows on an action to move it up or down, and the bin to remove it.
Wait and schedule times
By default an action runs straight away. To delay it:
- Click Add wait time, enter a number and Choose duration (minute(s), hour(s), day(s), week(s) or month(s)).
- On template messages and emails, click Add wait & Schedule time to also set a Schedule Time (Optional): the action runs at that time of day on the day the wait ends. If that time has already passed, it runs the next day.
- On appointment, class and credit triggers you can also wait relative to the event, for example day(s) before appointment or hour(s) after class.
Things to know about waits:
- Wait times count from the trigger event, not from the previous action. For a sequence of 1 day, 3 days and 7 days, enter 1, 3 and 7.
- Messages that need an open WhatsApp session (text, media, buttons, lists) can wait at most 1 day: "This action supports only a maximum wait time of 1 day as per WhatsApp session policy". Use send a WhatsApp template message for anything later.
- A "before" wait that is already in the past when the rule runs is skipped.
Emails
Send Email asks for an Email type:
- Transactional: reminders, confirmations and receipts. No unsubscribe link, and it reaches clients who opted out of marketing.
- Marketing: offers and drip sequences. An unsubscribe link is added, a verified sending domain is required, and clients who opted out are skipped. Marketing emails need CRM Suite.
4. Publish and save
- Make sure Publish Rule is on if the rule should start running now.
- Click Save. You see Automation Rule saved successfully!
If Publish Rule is off when you save, you are asked "The automation rule is inactive. Would you like to publish the rule?". Choose Publish or Keep Inactive.
Use the +, − and reset buttons in the corner to zoom the editor in and out on long rules.
Test your rule
- For message rules, send the trigger message from a phone that is not connected to your business account, and watch the reply arrive in the Team Inbox.
- Make sure the conversation is not Open with a team member, or turn on Override Human Agent.
- If nothing happens, check that the rule is on and the conditions match. If you get two replies, another rule with the same trigger also matched: every matching rule runs, so make their conditions exclusive.
Plan modules
Triggers and actions that need a module your plan does not include are listed with Needs the ... add-on and cannot be picked. For example Add Client Tags needs CRM Suite and Appointment Updates needs Bookings. See what each module adds.