Setup the Booking Portal for Appointments
Your booking portal is a branded web page where clients book appointments and classes, see their bookings and, if you sell online, shop. You set it up once in Online Booking & Store: switch on bookings, add your logo and colours, choose the portal address and copy a link or embed code for your website.
- Services with Allow Online Appointment turned on. See Setup Services.
- If you want clients to log in with a one-time code on WhatsApp, a connected WhatsApp number. See WhatsApp Cloud API.
Open the settings
- Go to Settings > All Settings.
- Under Website & Booking Portal, click Online Booking & Store.
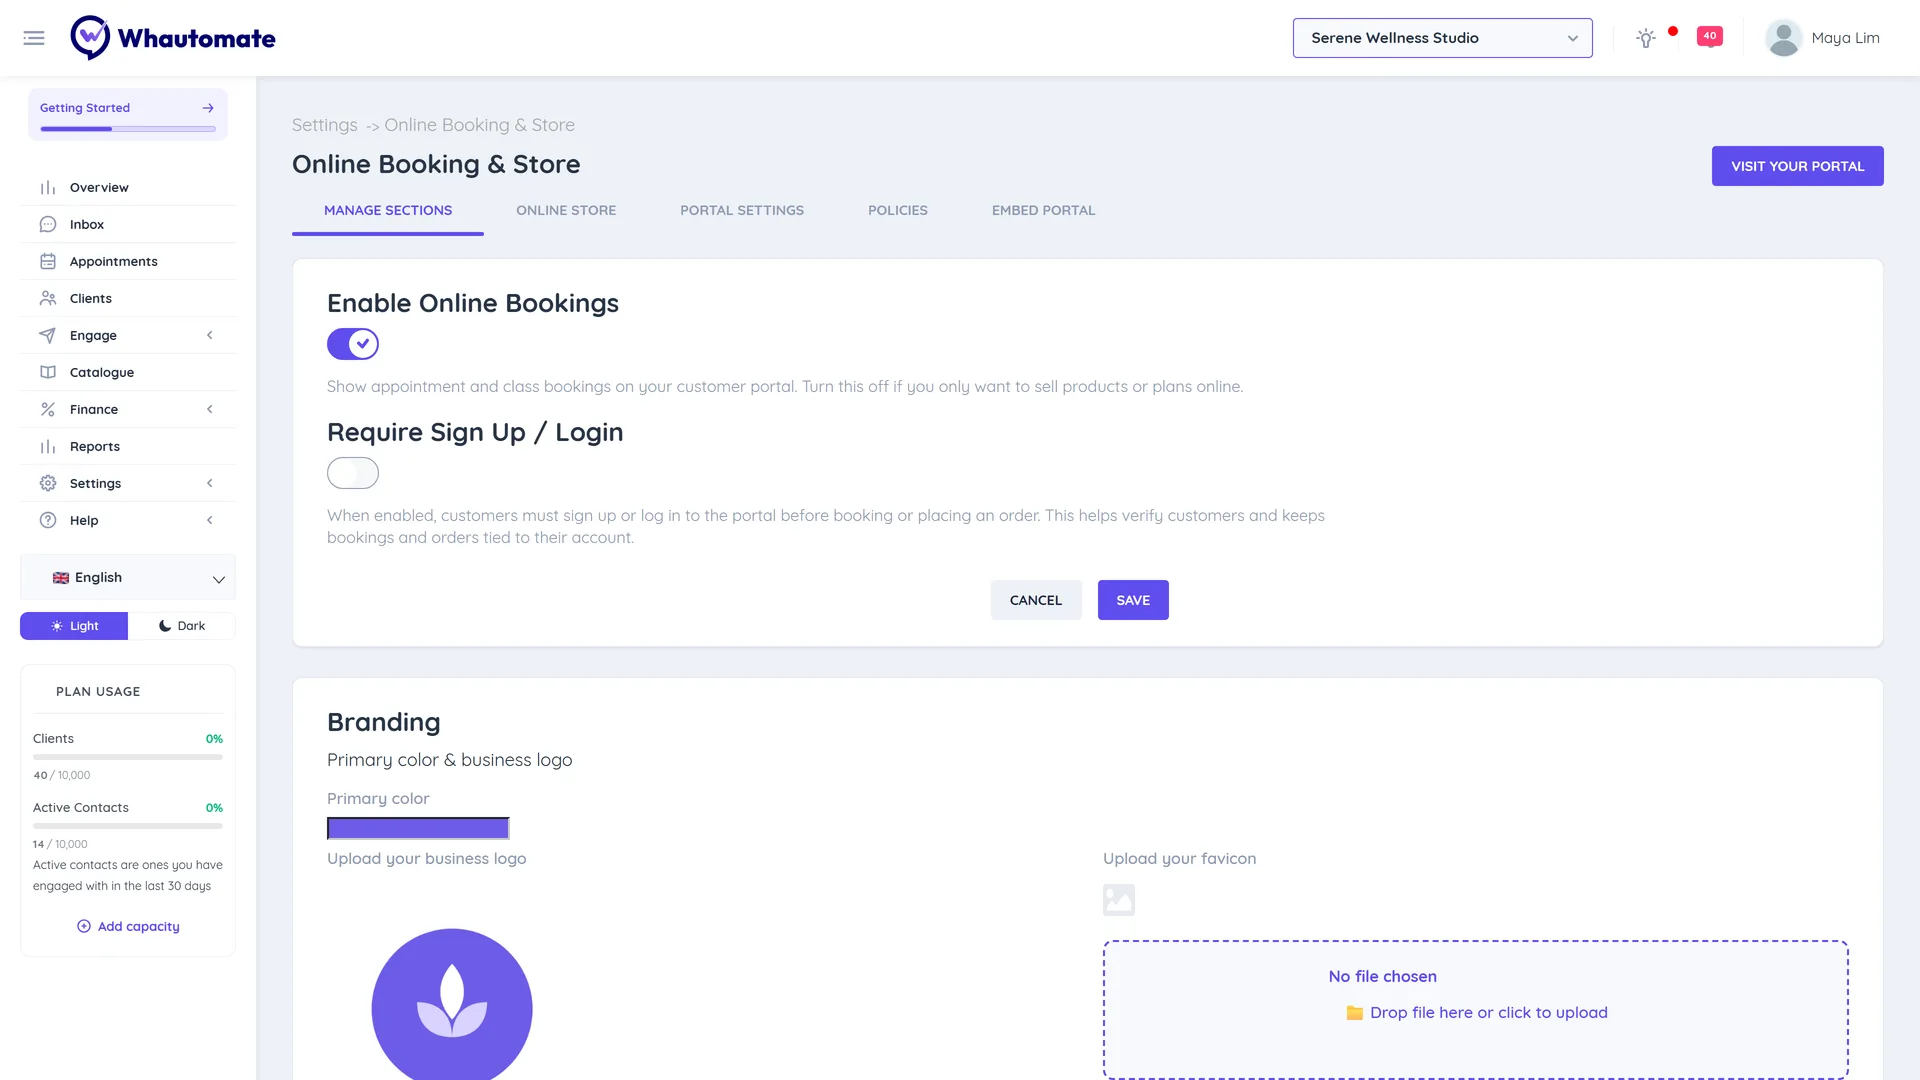
Manage Sections tab
- Turn on Enable Online Bookings to show appointment and class booking on your portal.
- Optional: turn on Require Sign Up / Login so clients sign up or log in before booking or ordering. Choose the WhatsApp Account for OTP that sends the login code if you have several WhatsApp numbers.
- In Branding, set the Primary color, Upload your business logo (150 x 50 px, white or transparent background) and Upload your favicon (32 x 32 px).
- In Page Settings, under SEO Metadata, fill in Title, Description and Social share image for search results and link previews.
- Optional, under Analytics & tracking: paste your Google Tag Manager container ID (for example
GTM-XXXXXXX). Your container then loads on every booking page and records each page clients visit. Leave it blank to run no tracking code at all. - In Progressive Web App settings, set Your app name and the app icons (144 x 144 px for Android, 192 x 192 px for iOS) used when clients add the portal to their home screen.
- Click Save.
If you turn on Require Sign Up / Login, connect WhatsApp first. Clients cannot finish signing up without the verification code.
Portal Settings tab
- Turn on Enable Portal.
- Choose your Portal URL, the first part of your portal's web address.
- Click Save.
These settings are shared with your client portal and online store.
Policies tab
Add your Terms & Conditions (incl. Refunds & Cancellation) and Privacy Policy. Click Insert default content to start from a template. Leave them empty to use the default text.
Embed Portal tab
Copy the option that suits your website:
- Public Link: a direct link to share in messages, social profiles or QR codes.
- Iframe: shows the portal inside a page of your website.
- Popup: a button that opens the portal in a pop-up.
- Lightbox: a button that opens the portal over your page.
To link straight to one service category or one team member, use Get Booking Link in Catalogue or on Team Members.
Check your portal
Click Visit Your Portal at the top of the page and make a test booking. See Customer Booking Portal for what clients see.
Tips
- The booking portal and your online store are the same portal with the same branding and address. Use the Online Store tab to sell products and plans on it; see Sell Online with Your Online Store. The tab needs the Sales module. See Plan Modules.
- Booking rules such as how late clients can book or cancel are in Appointment Settings.