Manage the Appointments Calendar
The Appointments page is where your team sees and runs the day: every appointment and class from every booking channel, laid out by team member and time. Use the calendar to see who is free and move bookings around, and the list view to filter, search and update statuses in bulk.
Team members with working hours and at least one service. See Setup Team Member Profile.
Calendar view
- Click Appointments in the menu. The Availability tab opens.
- Switch between This Week and Day, use the arrows to move, and click Today to come back.
- Type a name in the staff filter to see one team member's calendar.
- Turn on Show 24 hrs to see the whole day instead of business hours.
- Click Show Availability to open the Staff Availability panel: pick a date to see each team member's free times. A Limited services badge means they only offer some services that day.
- Refresh reloads bookings, and Full screen gives the calendar the whole screen.
Each team member's appointments use the calendar colours set on their profile. Click an appointment to open its details, or click an empty time to add an appointment, a class or block time.
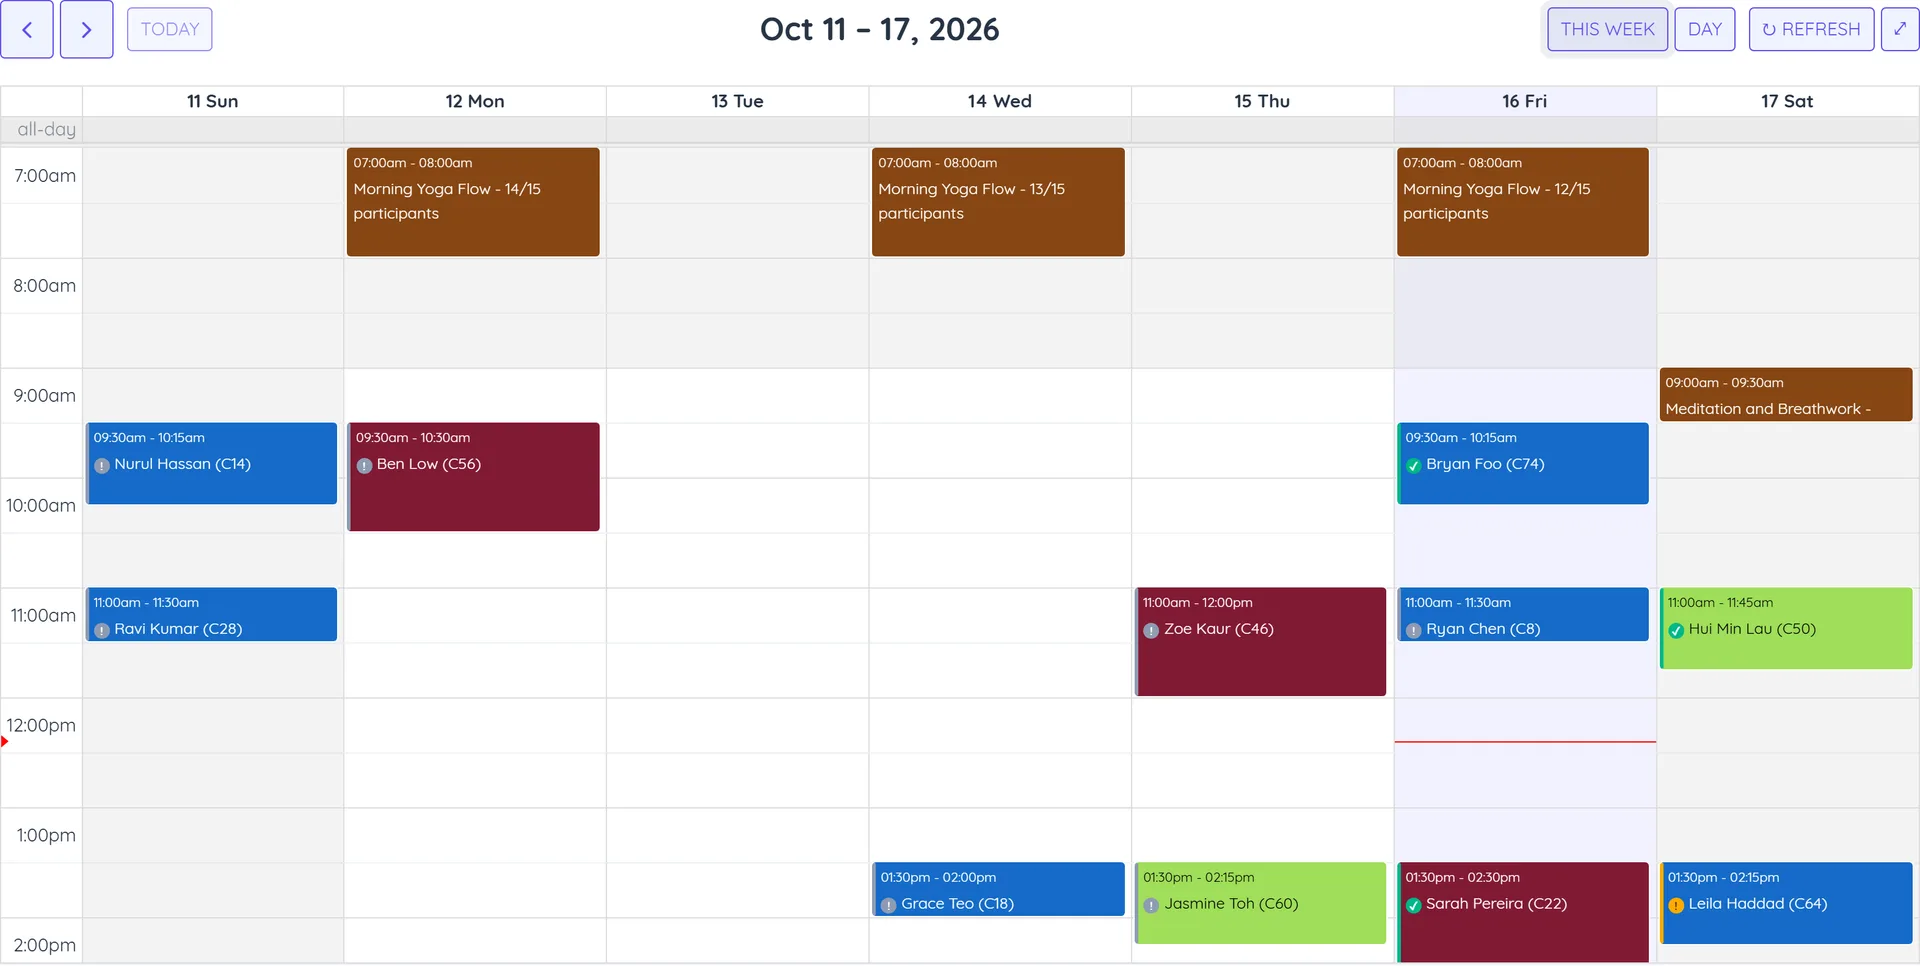
Reschedule by dragging
Drag an appointment or class to a new time and confirm Reschedule Appointment. Its length stays the same, and the client can be notified through your reschedule automation.
List view (Date Range)
- Open the Date Range tab.
- Click the date button and choose Today, This Week, This Month or a Start Date and End Date, then Apply.
- Narrow down with the status filter (All Statuses), the confirmation filter (Any Confirmation, when double confirmation is on), Service, Staff and Search Client....
The list shows Date, Client, Service, Staff, Status, Payment (Paid Online, Invoiced or Redeemed credits) and Actions. Past appointments are shown in red.
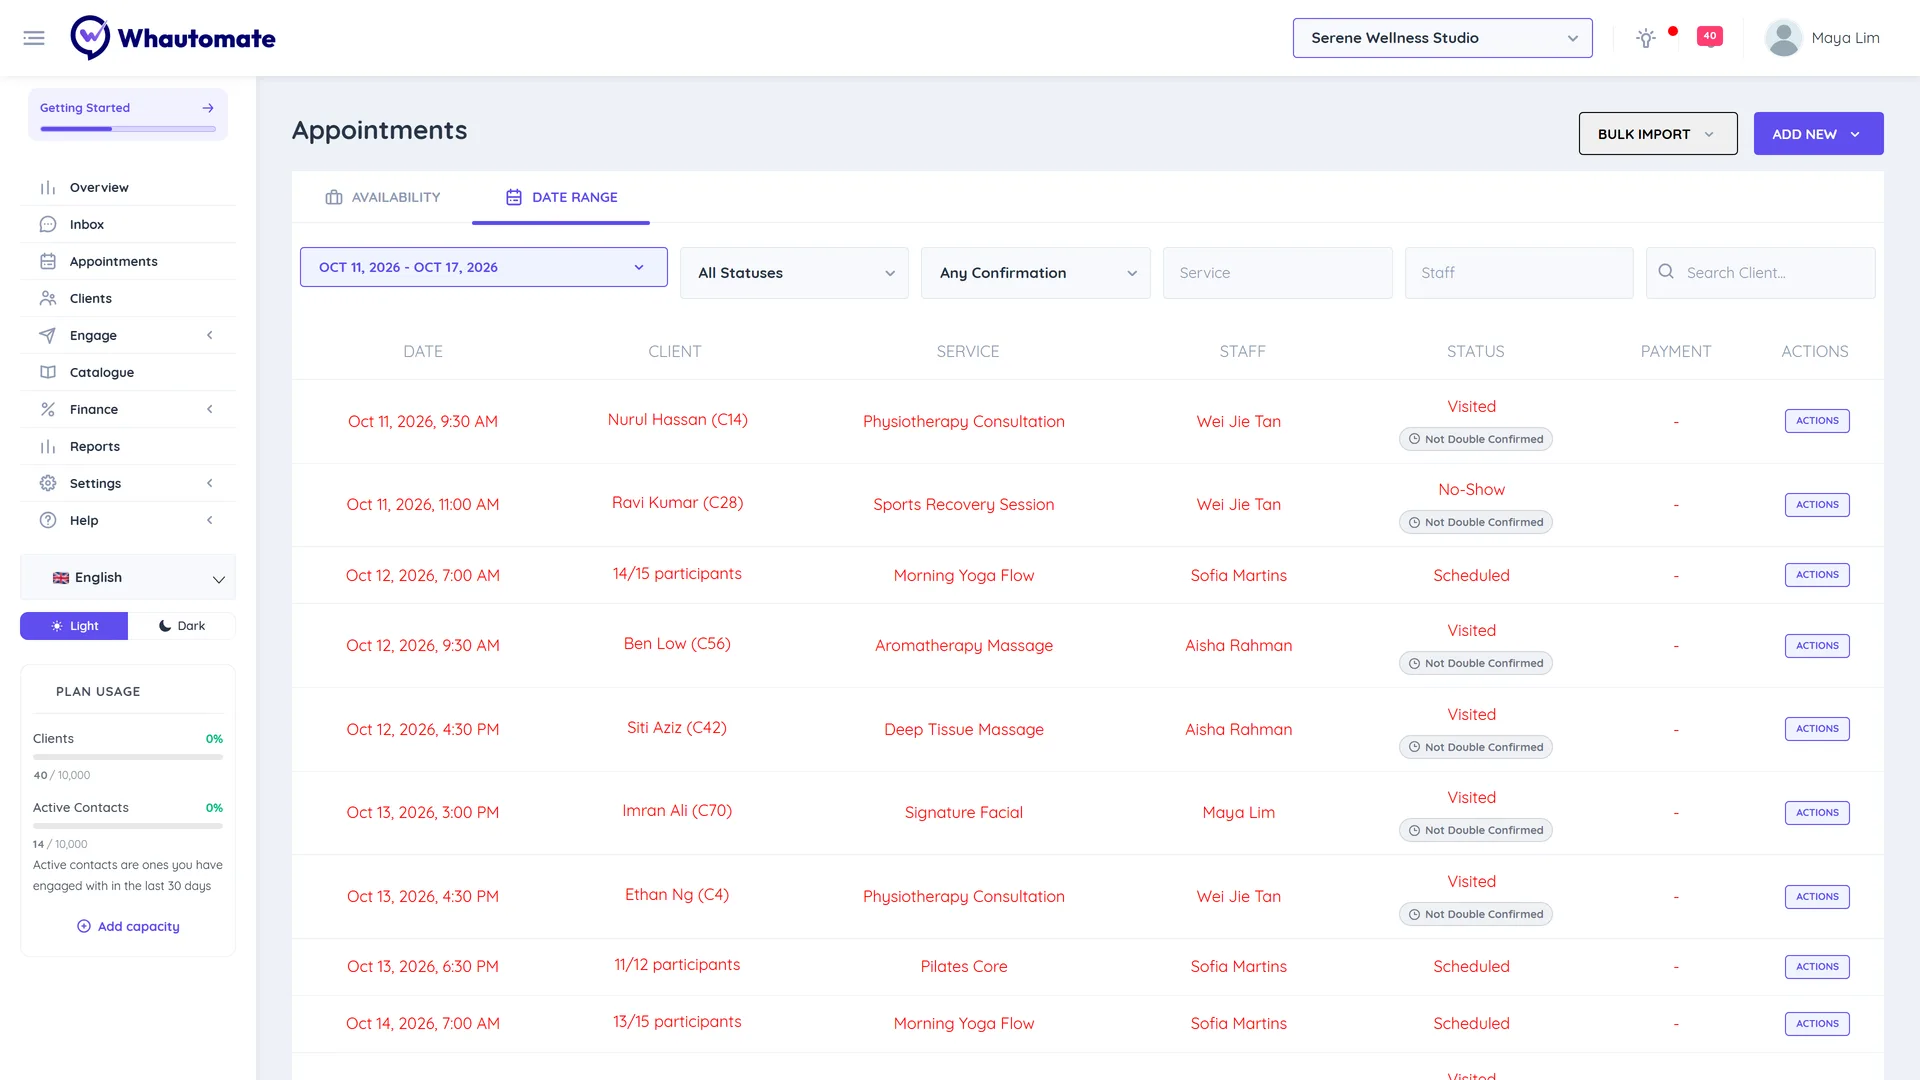
Statuses
| Status | Meaning |
|---|---|
| Pending | Not confirmed yet, for example booked or imported as Pending. Use Booked to confirm it. |
| Booked | Confirmed and upcoming. |
| Rescheduled | Moved to a new date, time, team member or service. Still upcoming. |
| Visited | The client came. |
| No-Show | The client did not come. |
| Cancelled | Cancelled by your team or the client. |
Class participants can also be Waitlisted; see Manage Class Participants.
Double Confirmed is not a status. It is a separate marker that shows the client confirmed they are coming; see Appointment Double Confirmation.
Appointment actions
Click an appointment on the calendar (or Actions > View Appointment Detail in the list) to open Appointment Details. It shows date and time, service, add-ons, staff, location, Booked From (Admin Portal, Online Portal, WhatsApp or Bulk Import), Payment Status, client details and notes. The Actions menu offers:
- Edit: change the booking. See Book Appointments - Admin.
- Join meeting: for virtual appointments.
- Go to Client detail.
- Create Invoice: bill the appointment (needs the Sales module; hidden once paid).
- Booked, Visited, No-show, Cancel: change the status.
- Mark as Double Confirmed and Remove Double Confirmation.
- Start Chat next to the client's phone opens a conversation in the inbox.
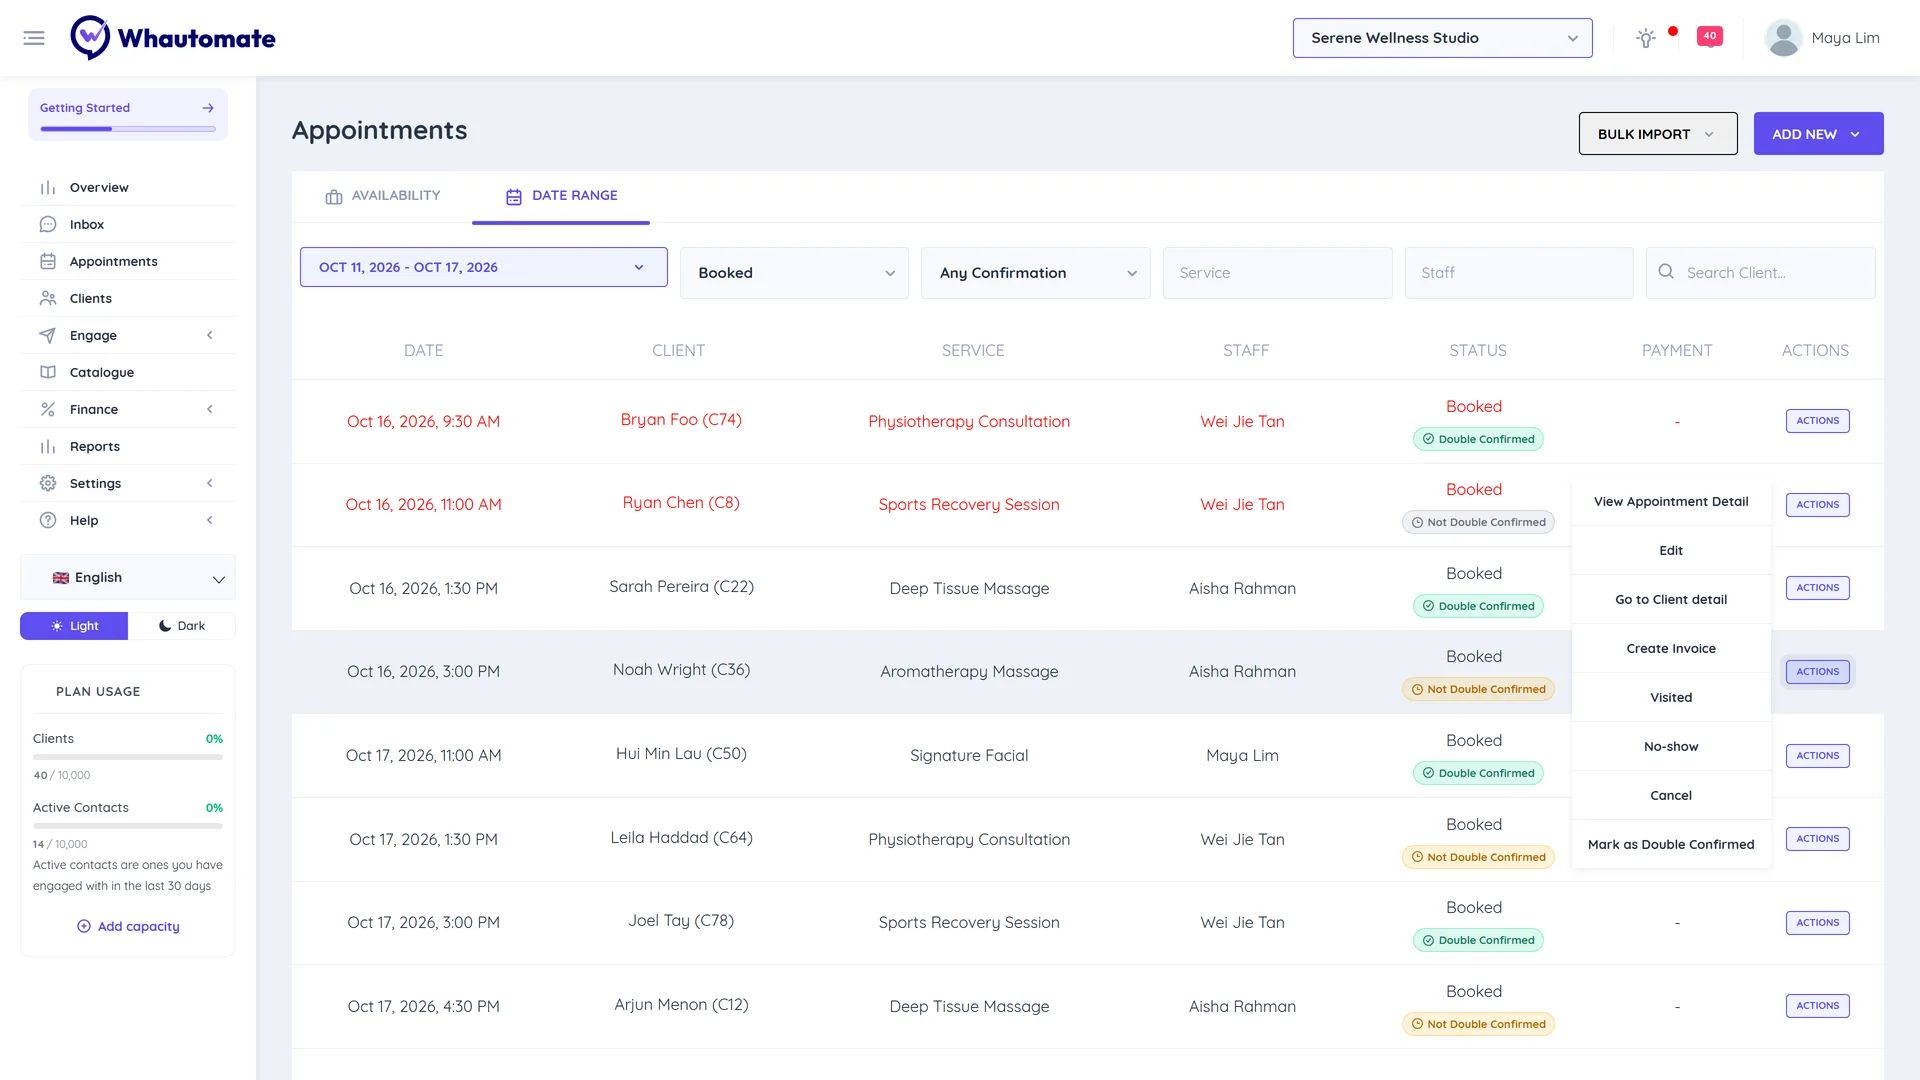
Visited, No-show and Cancel cannot be undone. After you confirm, the appointment is no longer editable and the automations for that status run, for example a review request after Visited.
Block time
Block time stops clients from booking a team member, for example for a meeting or training.
- Click Add New > Block time.
- Choose the Staff, the Start Date and End Date, and an optional Note.
- Under Select the time the staff is unavailable, set Start and End. Click + for more periods.
- Click Save Block Time.
To remove it, open the block on the calendar and click Delete Blocked Time.