Bulk Import Appointments
Moving from another booking system? Import your upcoming appointments from a CSV file so your calendar is complete from day one. Each row creates a new appointment; clients are matched or created from the name and phone number in the file.
Prerequisites
- Your appointment services and team members exist in Whautomate. The file refers to them by ID.
Steps
- Click Appointments in the menu.
- Click Bulk Import > Import Appointments.
- Click Download Sample file. It lists the Staff IDs and Service IDs for your location.
- Fill in one row per appointment and save the file as CSV.
- Under Upload CSV File, choose the file and check the Preview.
- Click Import and confirm both prompts. The import runs in the background and you get a notification when it is done. Progress also shows in Settings > Data Import Logs.
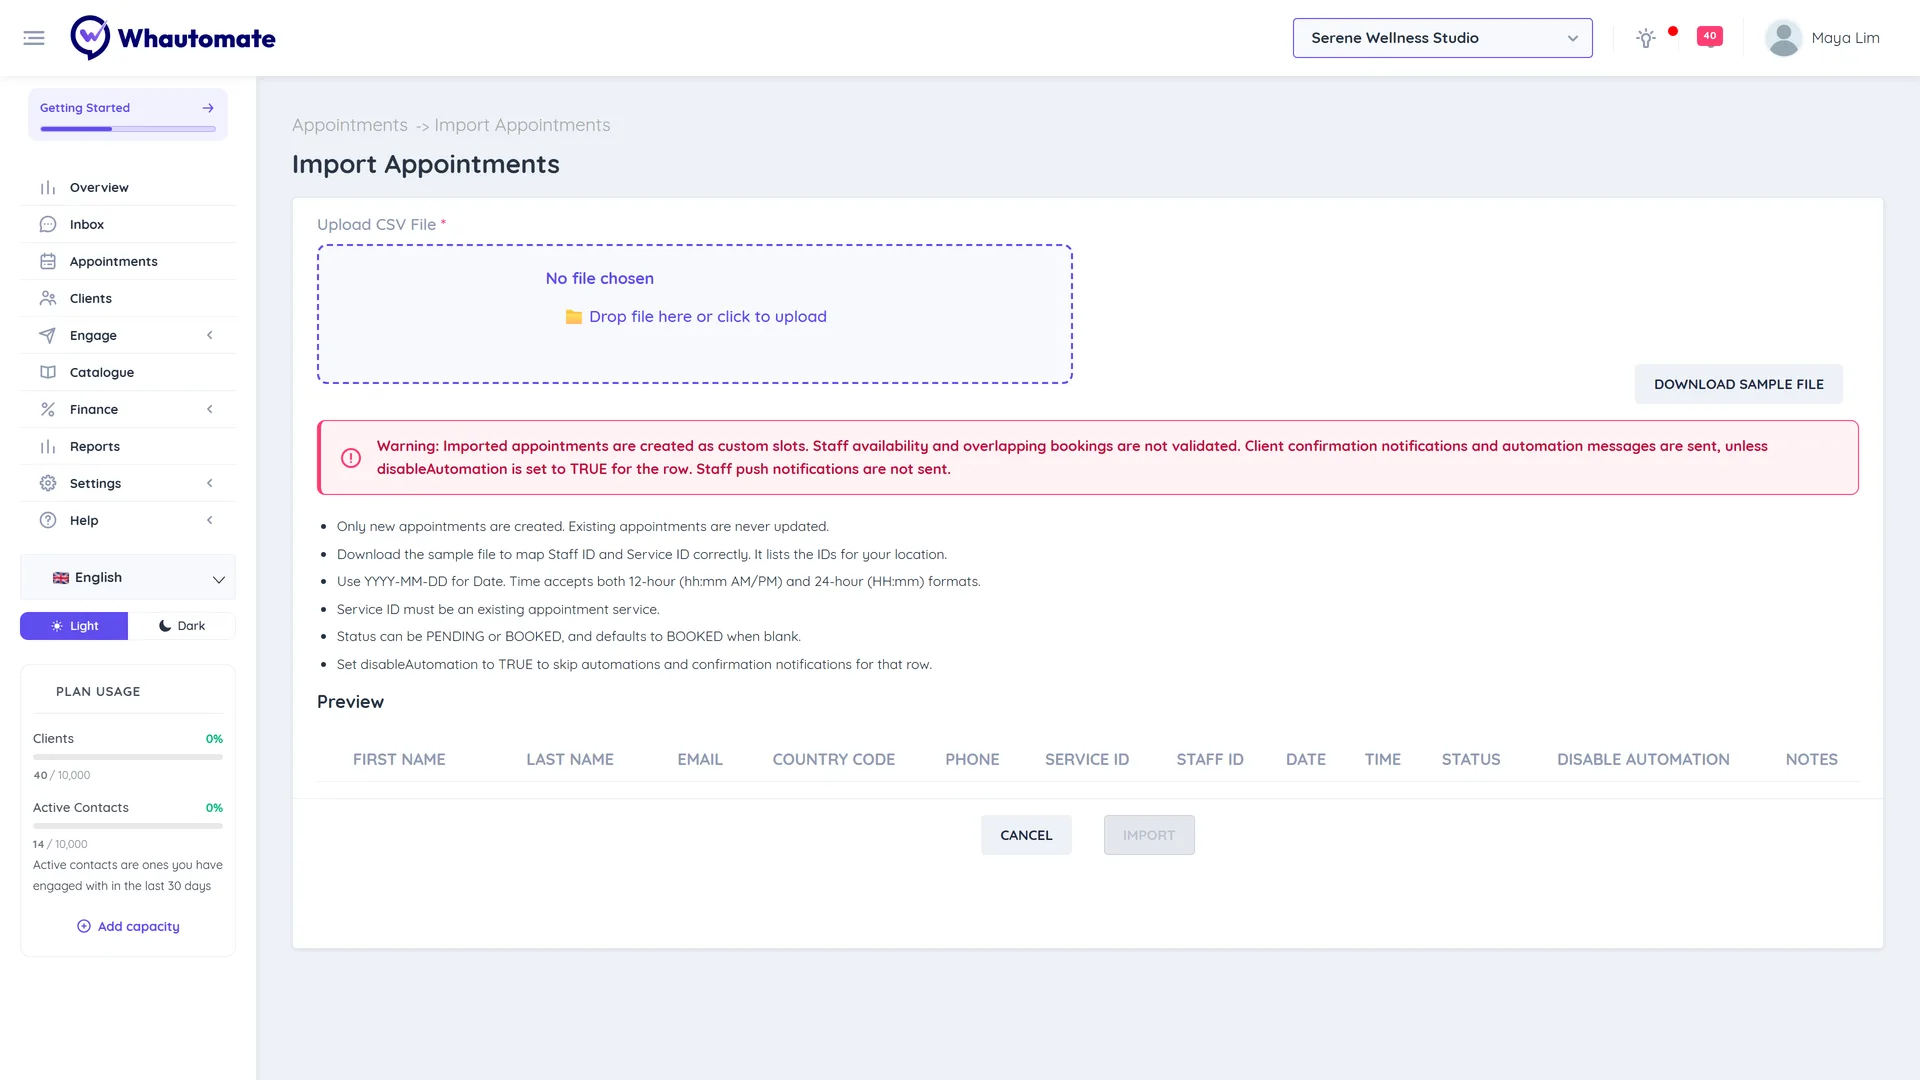
Columns
| Column | What to enter |
|---|---|
firstName, lastName, email | Client details |
countryCode, phone | Client mobile number |
serviceId | ID of an existing appointment service |
staffId | ID of the team member |
date | YYYY-MM-DD |
time | 12-hour (09:00 AM) or 24-hour (18:30) |
status | PENDING or BOOKED; blank means BOOKED |
disableAutomation | TRUE to send no confirmation or automation for that row |
notes | Optional notes |
Before you import
warning
- Imported appointments are created as custom slots: working hours and overlapping bookings are not checked.
- Only new appointments are created. Existing appointments are never updated, and the import cannot be undone.
- Client confirmation notifications and automations run for each row unless
disableAutomationisTRUE. Set it toTRUEwhen importing past or already-confirmed appointments. - Team members do not get push notifications for imported appointments.